120
13.LightlyattachtheMotorAssemblytotheFrame.Besuretoonlynger
tighten the hardware.
14. Loop the Drive Belt onto the Motor Pulley. With the Drive Belt looped
onto the Motor, carefully roll the Drive Belt onto the Drive Pulley.
15. Wrap the new Drive Belt around the Motor Pulley. Start the Drive Belt
on the Drive Pulley and roll it in a clockwise motion. Be sure the Belt does
not come off of the Motor Pulley.
Keep ngers out of any pinch opportunities when turning
the Pulleys.
16. Roll the Drive Pulley clockwise until the Drive Belt is fully installed.
ContinuetorolltheBeltforwardwhileaddingsidepressurewithngersto
align as necessary.
17. With the Motor Assembly loosely attached to the Frame, turn the Belt
Tensioner Screw to the previous level. This will tighten the Drive Belt to
the previous tension level.
18.Usinga6mmhexwrench,fullytightenthescrewsthatattachtheMo-
tor Assembly to the Frame.
19. Connect the Motor Connectors to the Motor Control Board following
the previous route.
Note: Be sure to attach the cables to the proper locations on the Motor
Control Board. Do not crimp any cables.
20. Secure the Motor Cables using the replacement Zip-Ties.
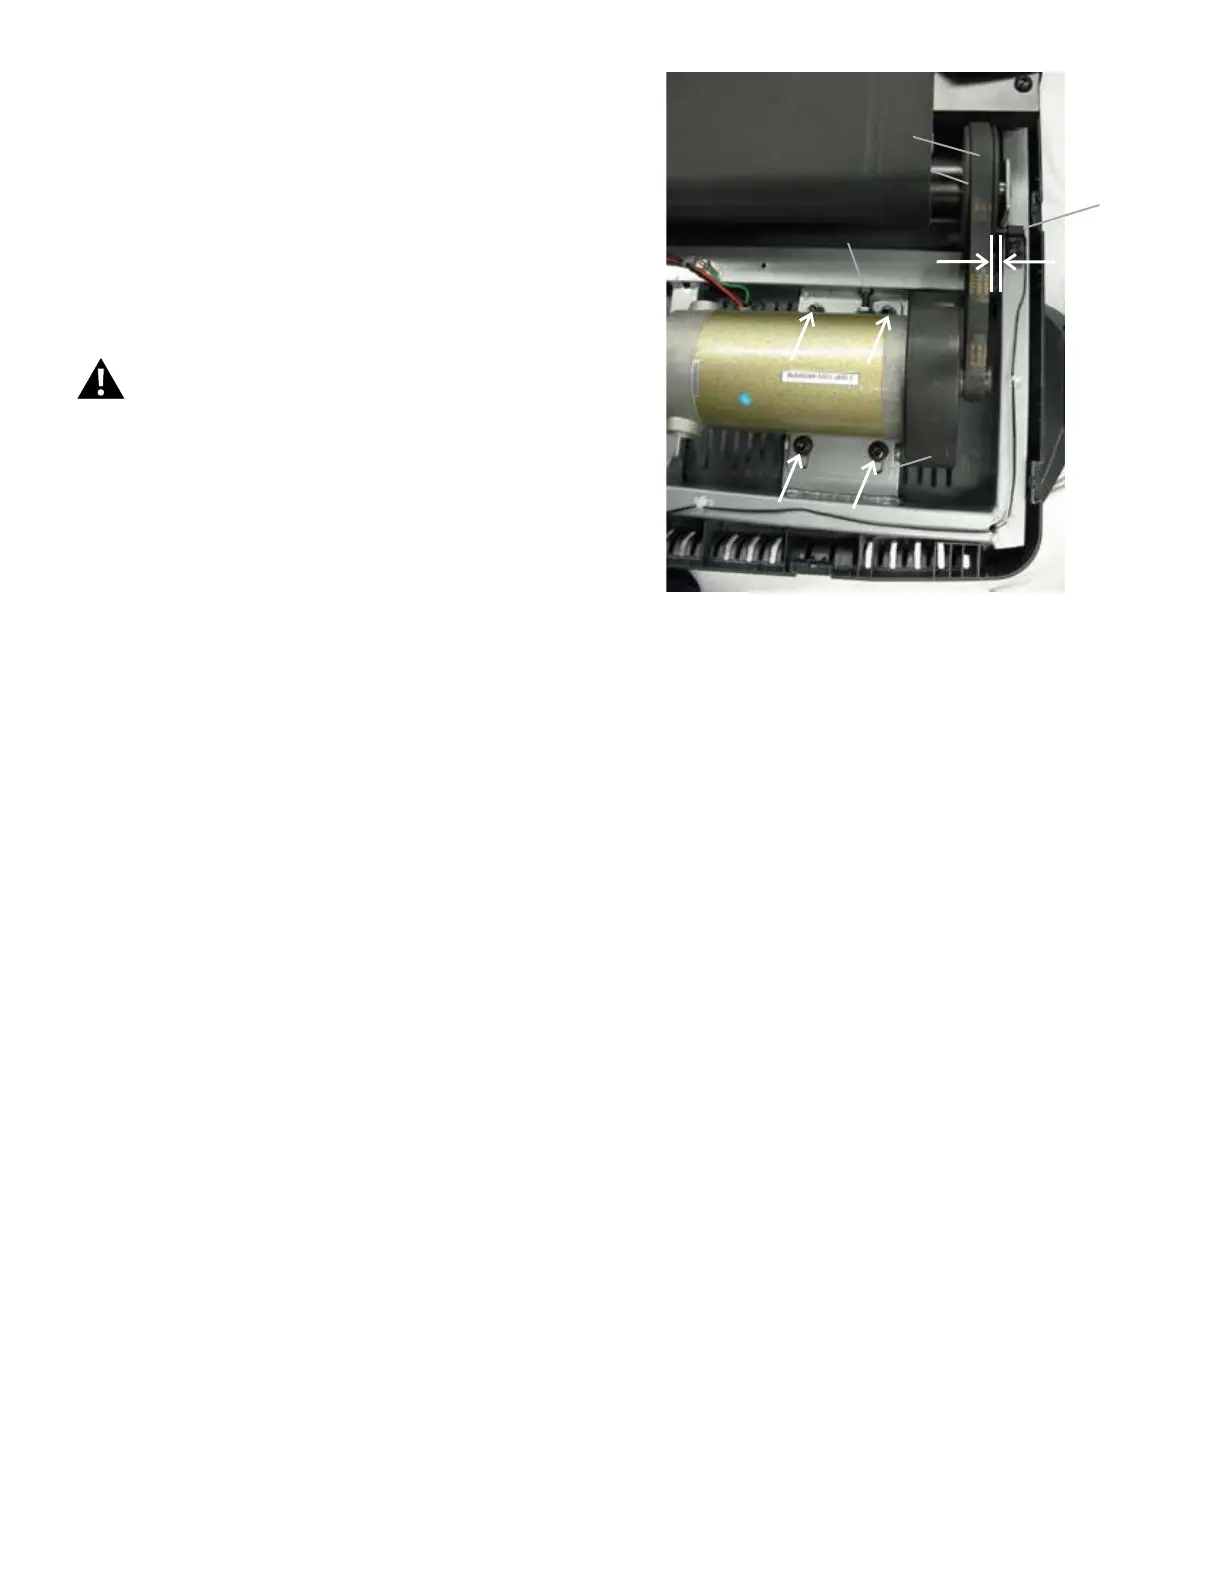
21. Inspect the distance between the Speed Sensor and the Drive Pulley.
If necessary, adjust it to be the same distance as before the procedure.
22. Re-install all remaining parts that were removed in reverse order.
23.AttachthepowercordandturnontheTreadmillbyippingthepower
switch to ON.
24. From the Power Up (or Welcome) screen, push and hold down the
PAUSE/STOP button and Right arrow button for about 5 seconds to go
into the Console Setup Mode. The Console display will show the Date
prompt with the current setting.
25. Push the OK button 4 times until the Console displays the TOTAL
RUN HOURS screen.
Belt Tensioner Screw
Drive Belt
Motor
Mount
Speed
Sensor
Drive Pulley
 Loading...