2 3
PLACING YOUR FINGER ON THE SENSOR PROPERLY
Users with smaller ngerprints, especially women and children, may need
to press the nger harder to achieve sucient coverage (applying pressure
spreads your nger).
1 YOUR FINGERPRINT MUST COVER AT LEAST 70% OF THE SENSOR
SURFACE.
For most users, this is approximately in the middle of the nger pad, where
the ngerprint curves form the centre. Have a look at your ngerprints and
their features.
2 PLACE YOUR FINGER IN THE CENTRE OF THE SENSOR AT THE
AREA WHERE THE FINGERPRINT IS MOST PRONOUNCED.
3 DRY SKIN IS THE MOST COMMON CAUSE OF POOR READING.
If the nger needs to be pressed harder than usual to be read, the most
likely cause is dry skin on your nger. This is particularly common during
winter months. Make sure your skin is not unusually dry and use hand cre-
ams or moisturizing wipes or touch a damp surface lightly for this purpose,
but make sure your nger is not wet.
4 DO NOT MOVE YOUR FINGER WHILE READING IS IN PROGRESS.
Wait for the device to beep to conrm a successful entry before moving
your nger.
6 ENTER EACH USER FINGERPRINT MULTIPLE TIMES! ENTER
SEVERAL FINGERS OF BOTH HANDS TO AVOID POSSIBLE PROBLEMS
DUE TO INJURED FINGERS.
This ensures a good reading can be taken regardless of the position of your
nger on the sensor and backup is provided in case of a nger injury.
5 TO SUCCESSFULLY ENTER YOUR FINGERPRINT, PLACE YOUR
FINGER ON THE SENSOR 3 TIMES.
Only then will your ngerprint be saved. This ensures quality input and
good reading.
TABLE OF CONTENTS
PLACING YOUR FINGER ON THE SENSOR PROPERLY 3
TECHNICAL DATA 4
MAINTENANCE 4
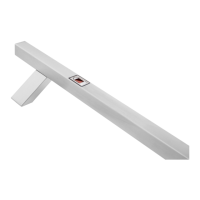
READER COMPONENTS AND FUNCTIONS 5
DOOR PROFILE BUILT-IN CONTROL UNIT 5
READER CONTROL MODES 6
TEST FUNCTION 6
FINGERPRINT READER SECURITY LOCKDOWN 7
BLUE LIGHT ON/OFF 7
RELAY 2 7
READER CONTROL MODES (door prole built-in control unit) 8
ANALOGUE READER CONTROL WITH DOOR PROFILE BUILT-IN CONTROL UNIT 9
ADMINISTRATOR FINGERPRINTS 9
ANALOGUE CONTROL BY PLACING YOUR FINGER ON THE SENSOR 13
ADMINISTRATOR FINGERPRINTS 13
FACTORY RESET 15
HYBRID CONTROL 16
APP CONTROL 18
! NAVIGATE TO THE INSTRUCTIONS BY CLICKING ON FIELDS MARKED WITH
 Loading...