6 7
No matter which control unit you have, when using the reader for the rst time, you can choose between three
dierent control modes: analogue, app or hybrid control. Description and instructions for each control mode can
be found below.
ANALOGUE CONTROL using buttons located on the control unit, by remote control or by placing your
nger on the sensor
APP CONTROL on your smartphone
HYBRID CONTROL - analogue reader control, using the app only to unlock doors and control LED lighting
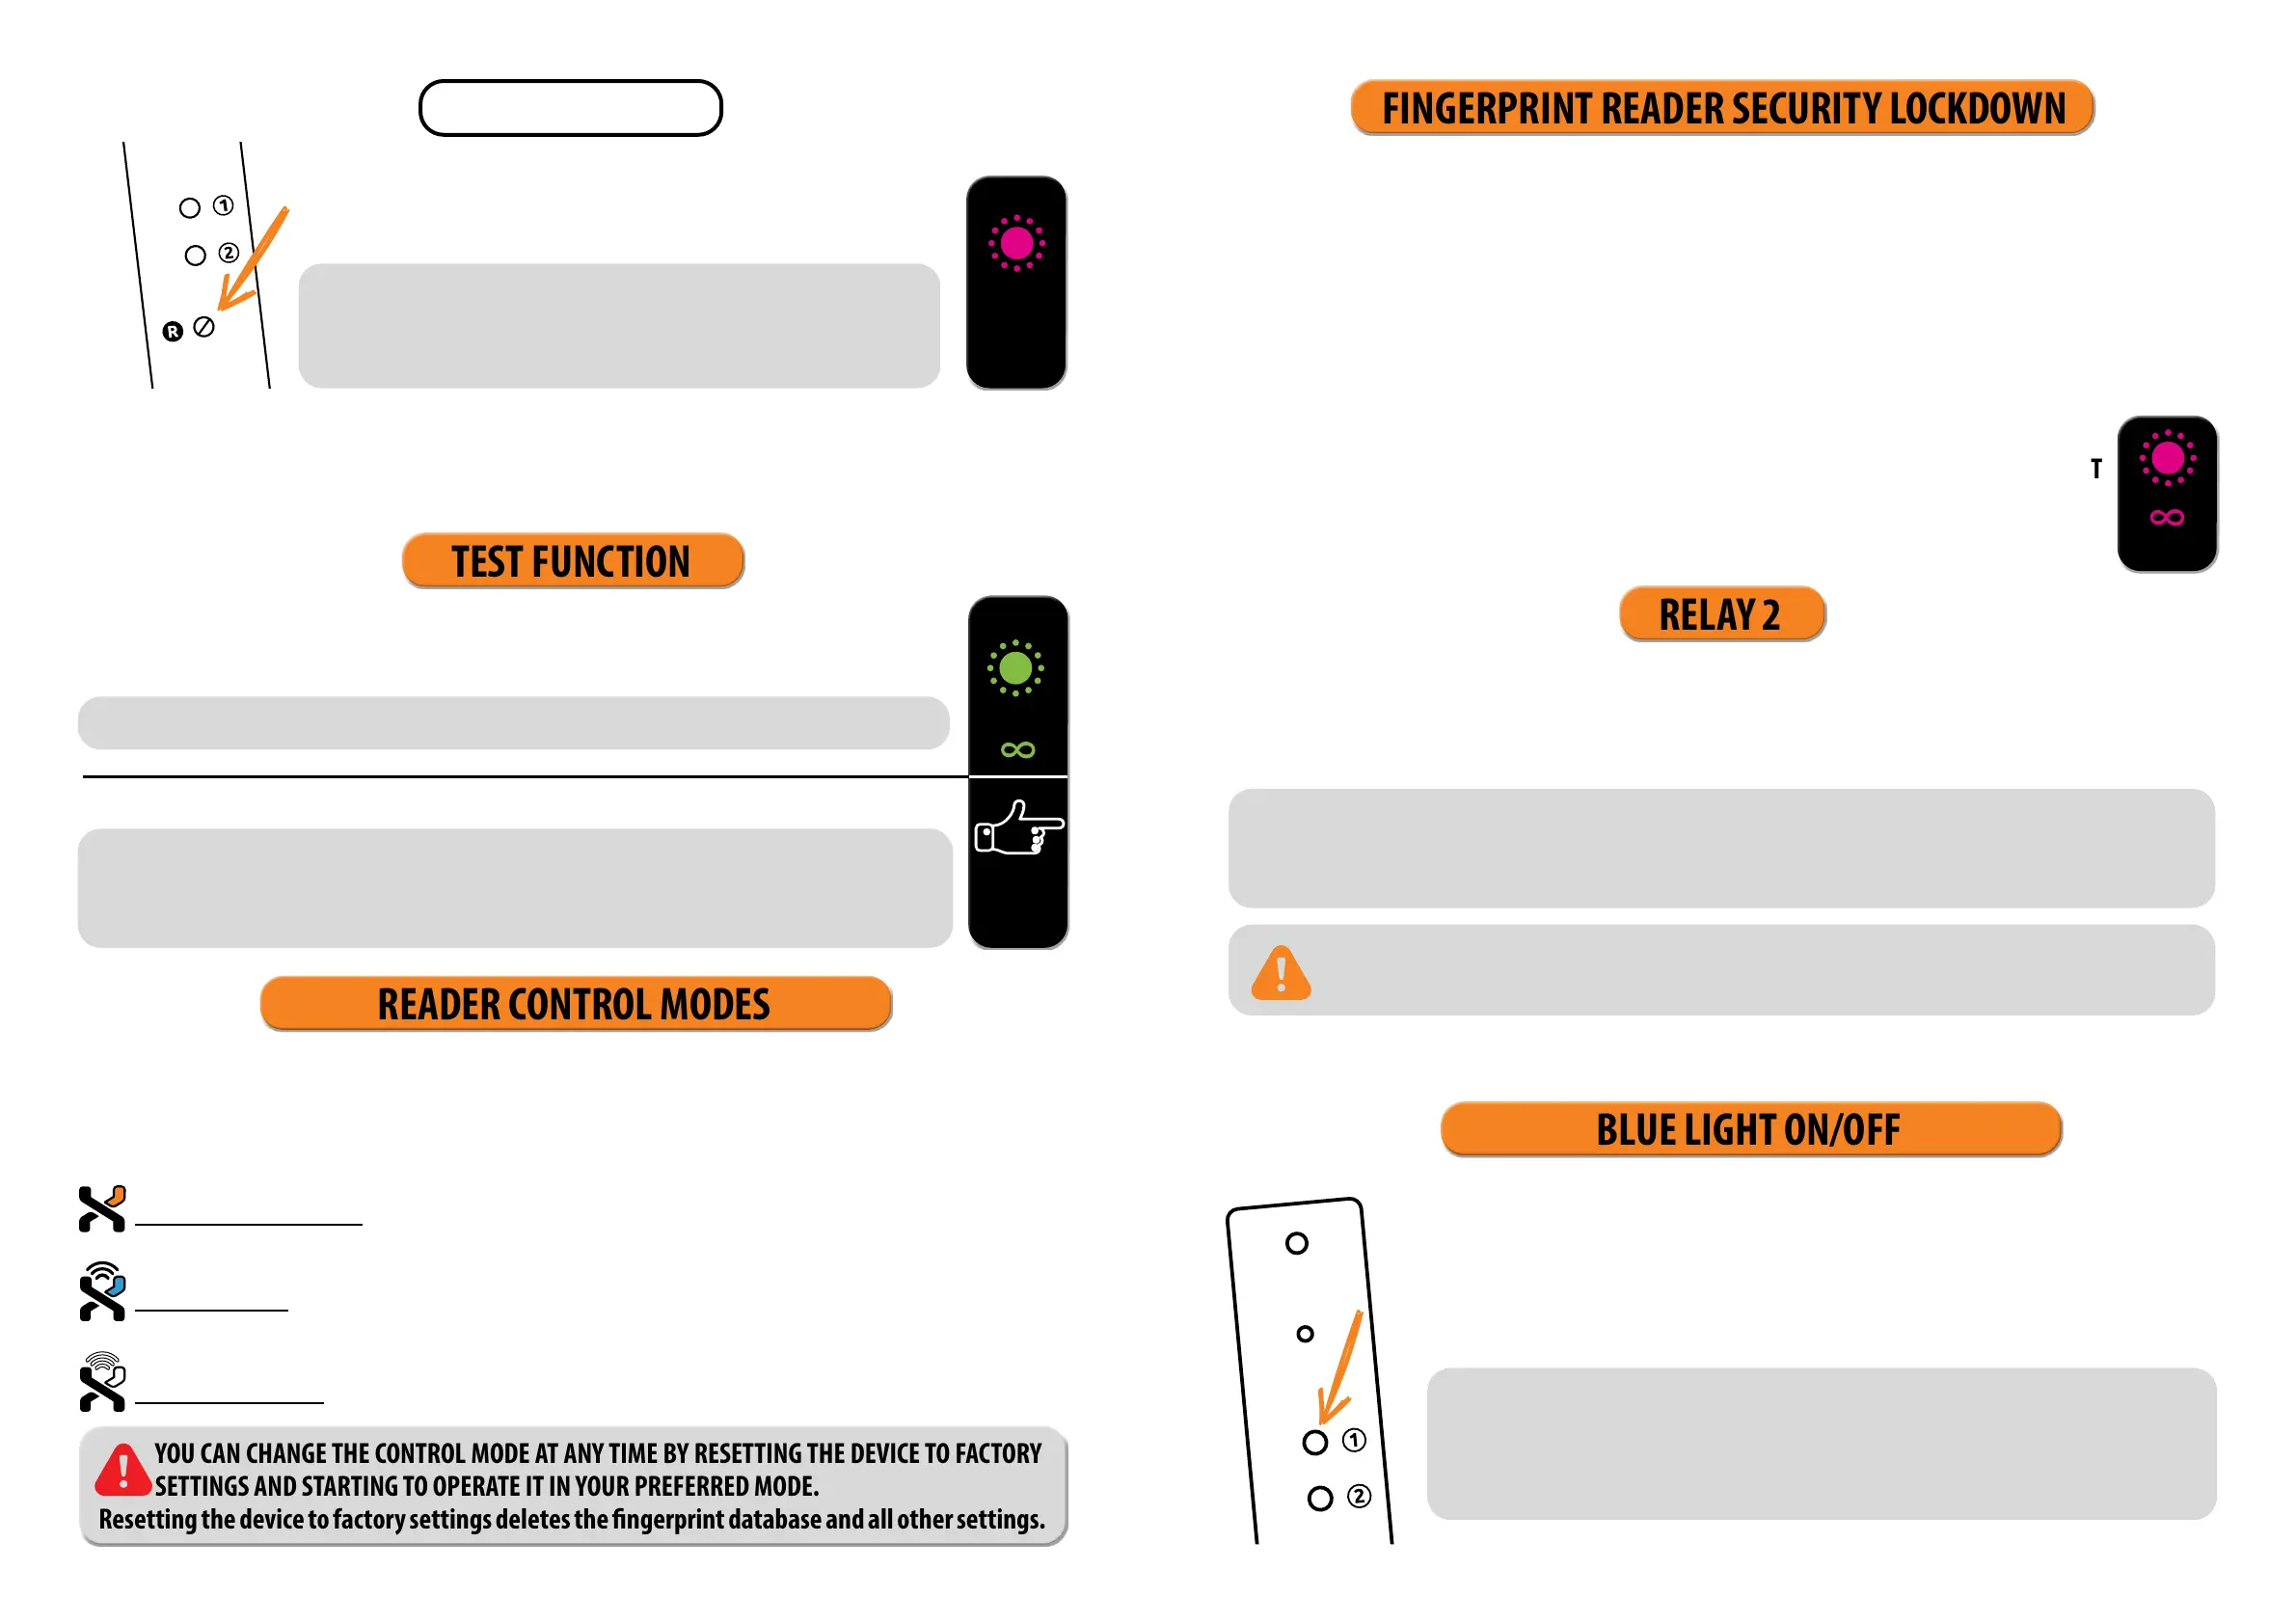
READER CONTROL MODES
YOU CAN CHANGE THE CONTROL MODE AT ANY TIME BY RESETTING THE DEVICE TO FACTORY
SETTINGS AND STARTING TO OPERATE IT IN YOUR PREFERRED MODE.
Resetting the device to factory settings deletes the ngerprint database and all other settings.
In the event that a nger is placed on the sensor of the ngerprint reader seven times in a row, the reader will
not recognize it and will lock for 30 seconds.
After thirty seconds, the reader will be ready to be used again. The reader will lock again if a ngerprint which
cannot be recognized by the reader is placed on the sensor again seven times in a row. This time it will lock for
60 seconds.
After each unsuccessful attempt, up to seven attempts, the reader will be locked and the time will increase by 30
seconds, up to a maximum of 5 minutes. Each time the reader successfully recognizes a ngerprint, the count is
interrupted and resets to the beginning.
FINGERPRINT READER SECURITY LOCKDOWN
The test function is interrupted by a power outage or the addition of ngerprints.
Once the test function has elapsed, the device remains at factory settings and ready
for rst use.
TEST FUNCTION
X
GREEN
R
AFTER EACH FACTORY RESET, THE DEVICE REMAINS IN TEST FUNCTION FOR 1
MINUTE.
During this time, the sensor-LED ashes green.
DURING THIS TIME, ANY FINGERPRINT CAN UNLOCK THE DOOR.
WHILE THE READER IS LOCKED, THE PURPLE LED WILL FLASH AND THE READER WILL NOT
RESPOND TO FINGERPRINTS.
PURPLE
PRESS AND HOLD THE R BUTTON FOR 10 SECONDS. THE
PURPLE LED BLINKS 5 TIMES ACCOMPANIED BY FIVE BEEPS.
All ngerprints, including the administrator’s, are erased from the
memory and the device is restored to factory settings. Any paired re
-
mote controls and smartphones are disconnected as well.
In combination with the control unit built in the door prole, our ngerprint readers allow you to unlock additi-
onal (side or garage) doors, as well as the door the reader is installed in. Individual ngerprints can be assigned
to either open the additional door only or the main and additional door together.
To activate relay 2 with the selected ngerprint, complete the Optional step for activating relay 2 when
entering the ngerprint (both administrator and user), which is described in the Input procedures for admi-
nistrators and users section.
SKIP THIS STEP, IF YOU WANT THE FINGERPRINT TO OPEN THE FRONT DOOR ONLY.
The blue LED starts ashing immediately. Wait for three beeps before you release
the button. With this operation, only the blue LED that is lit in standby mode is turned
o. All other light signals remain active. Repeat the procedure to reactivate the blue
LED.
1
HOLD DOWN BUTTON 1 ON THE CONTROL UNIT FOR 10 SECONDS AND
WAIT FOR THE DEVICE TO BEEP 3 TIMES. THE BLUE LED TURNS OFF.
BLUE LIGHT ON/OFF
RELAY 2
FACTORY RESET
PURPLE
5 ×
If you are bothered by the blue LED that is constantly lit in standby mode, you can turn it
o.
AFTER EACH FACTORY RESET, THE DEVICE REMAINS IN TEST FUNCTION FOR 1 MINUTE.
 Loading...