Right after the installation, the state of charge displayed may not be correct,
but thanks to the device’s self-learning algorithm, after the first use of the
batteries the accurate indication will be available, both for charging and
discharging.
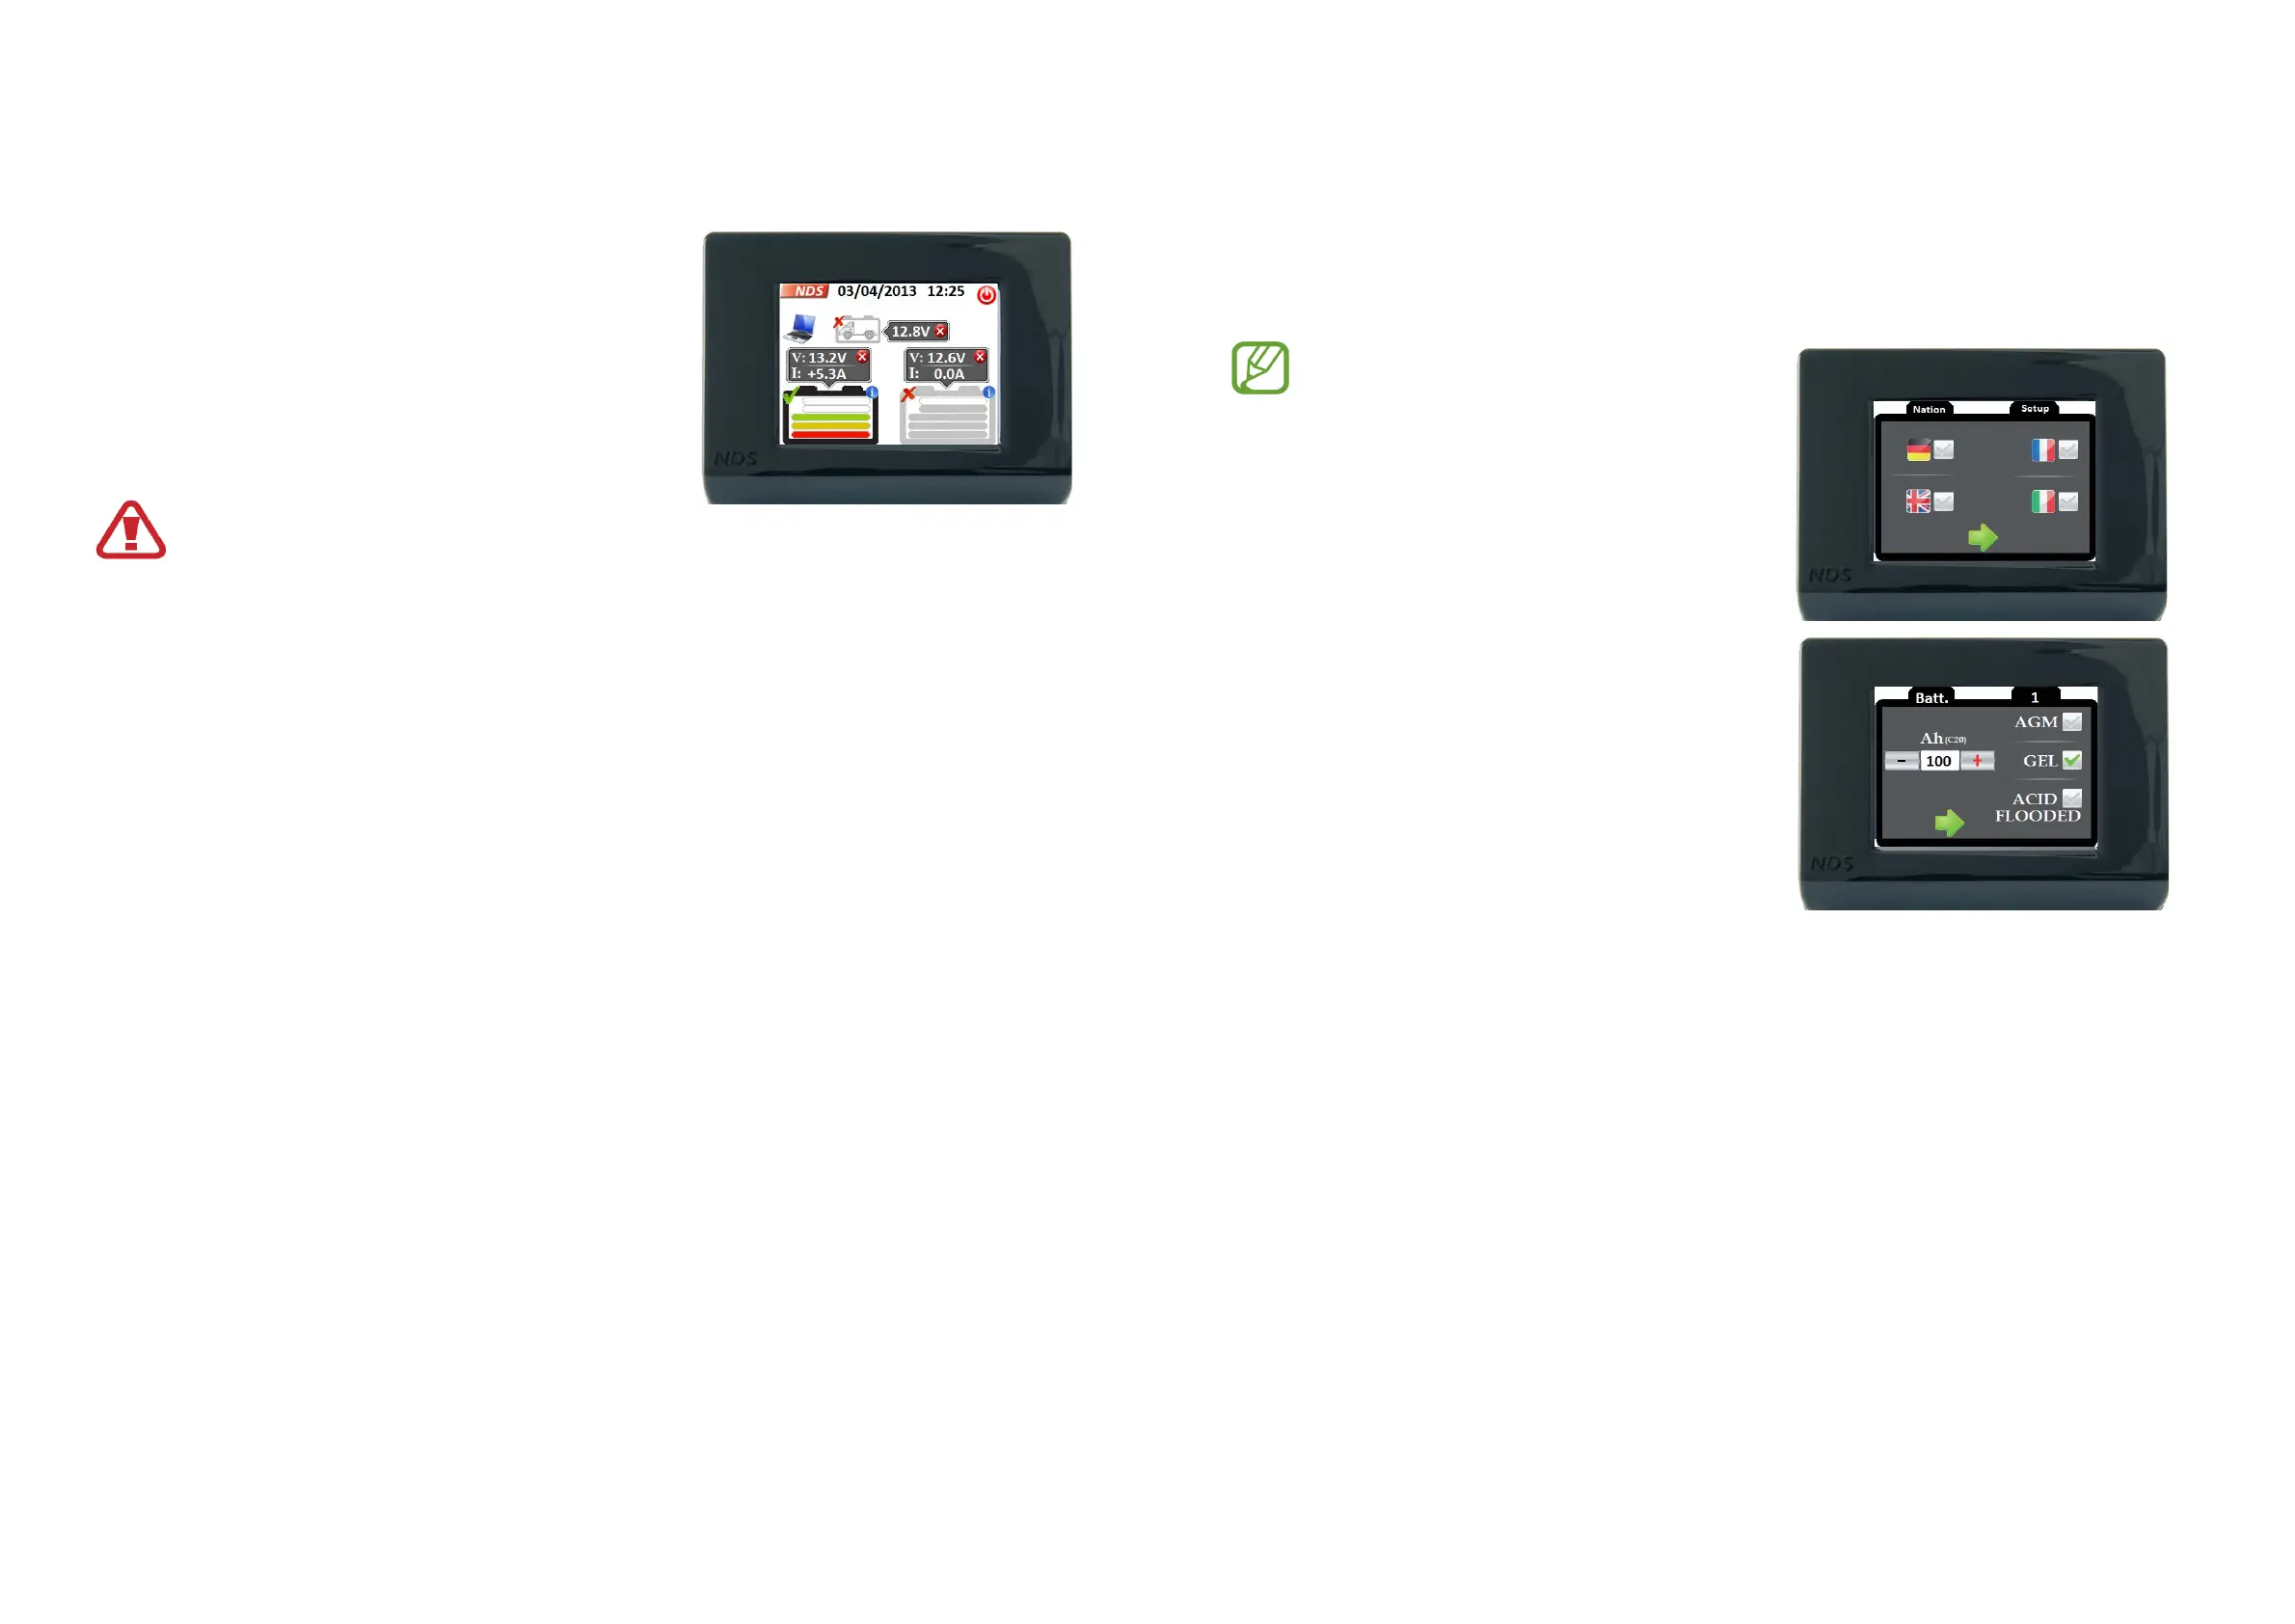
5.4 Displaying Data
By quickly clicking on the area of one of the leisure
batteries’ icon, you can display the voltage (V) and
current (A) information regarding the relevant battery.
Whereas, by clicking on the engine battery (if
connected) it is possible to display the voltage only.
The window may be closed by just clicking on their
area.
If the Display show a NOT Zero current
when all loads and chargers are switched off, DO a Currente Reset
Operation!
6. MANAGING BATTERIES
6.1 Automatic Mode
This is the iManager’s default operation mode after installation.
By automatically managing leisure batteries, the system can optimize the
performance and preserve their efficiency over time thanks to the many safety
functions.
This function is based on an algorithm designed to allow the batteries to be selected
1920
4.2 INITIAL SETTINGS
Switching on the device
When the communication cable is connected, the display turns on and the initial
screen appears, with the "iManager" writing which will keep displaying until the device
has not received the first data from the BlackBox.
Initial Settings
Once the data have been received, the display will show the connected batteries’
data setup screen.
To ensure the system for proper functioning,
set the values requested in all the screens.
Language setup:
The selection shall be made with a single touch on
the relevant small box or the item indicating the
language.
By clicking on the rightward arrow, you can move
on to the settings, whereas by clicking on the
leftward arrow, you can go back and change the
input data.
From this screen you can set the following:
Manufacturing technology of batteries (agm,
gel, lead-acid);
11