Follow these steps:
1. Make sure that the vehicle's engine and/or the battery chargers onboard are off
2. Prepare three cables (or two if you have only one leisure battery) with a
diameter equal to or higher than 10mm
2
, protecting each cable with a 120A
fuse, the cables’ length shall be suitable to make the following connections.
3. Connect a cable terminal for M6 screws on each cable.
4. Unscrew the three M6 nuts from the device’s front screws and make the
following connections with the cables prepared earlier:
Screw no. 3 => Positive pole of Leisure battery no. 1
Screw no.4 => Common positive pole of the vehicle’s system
Screw no. 5 => Positive pole of Leisure battery no. 2
Tighten the three cable terminals to the screws firmly using the nuts supplied.
5. Connect a cable with 1.5mm
2
to 2.5mm
2
of section, properly peeled, from
connector no. 2 to the engine battery’s positive pole. Then, fasten the screw
over the connector properly.
6. Connect a cable with 1.5mm
2
to 2.5mm
2
of section, properly peeled, from
connector no. 1 to the negative pole of one of the leisure batteries. Then,
fasten the screw over the connector properly.
DO NOT USE LOADS GREATER THEN 100A.
The negative cable (Earth) connection shall be performed only at the
end of the installation, as last step.
6
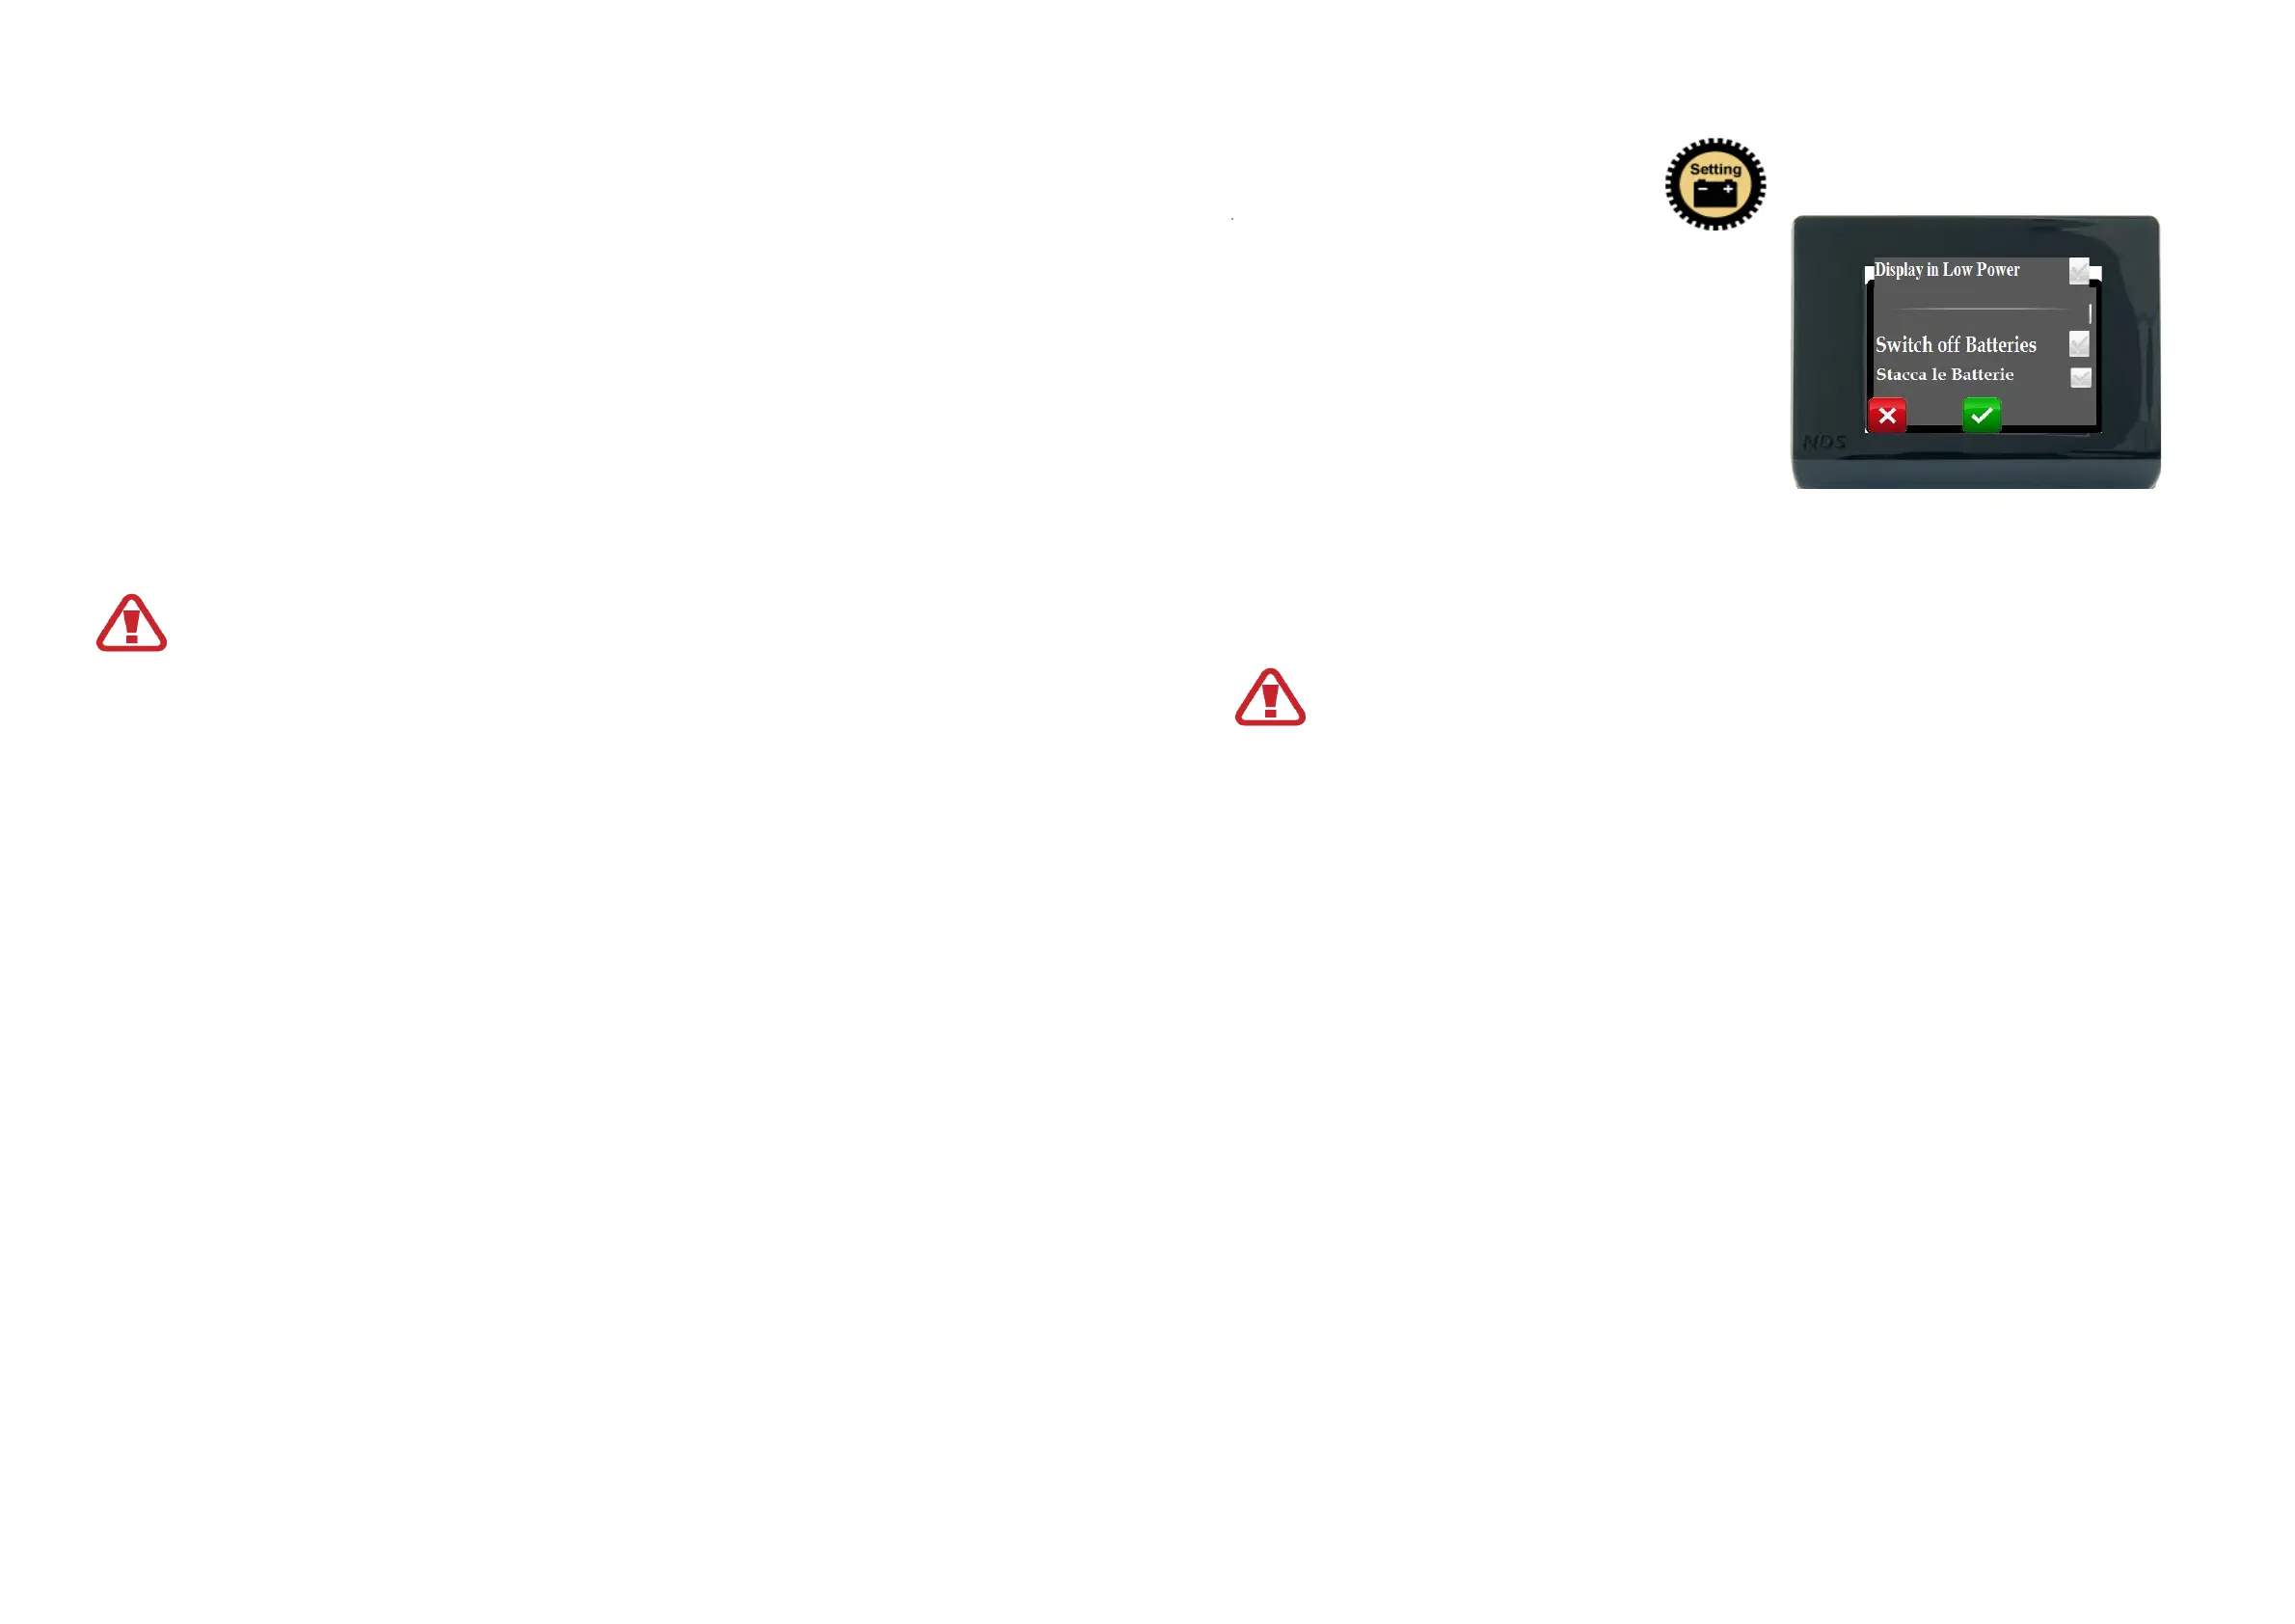
7. Setting Menu (Setting Key)
The icon below lets you access two different menus, based on the kind of touch:
Tap quickly
Press and hold
7.1 Setting Key (Tap Quickly)
By tapping the Settings icon on the main screen,
you access the additional settings:
Display in Low Power
Switch off Batteries
Display in Low Power:
The power saving mode lets you reduce the display’s brightness automatically after 3
minutes from the last touch on the touchscreen and, after 10 minutes with no touch,
the display turns off completely.
To activate this function, you have to tick the box of the relevant item and click on the
confirmation symbol.
By clicking on the cancel-command red key ("X"), no function is performed
and you go back to the main screen.
Switch off Batteries:
Through this command you manually isolate the batteries from the loads. This
command shall only be performed after clicking on the confirmation key.
Once the batteries have been disconnected from the loads, to reconnect them you
24