- When the temperature measured on one or both batteries exceeds the limit
threshold of 60°C.
In case only one battery falls under one of these three cases and the automatic mode
is on, the iManager will select the battery which is most suitable for use.
Also During the Automatic Battery Switch off the Display will be deactivated!
If the temperature exceeds the critical threshold of 60°C, it cannot be reused until
it drops to under 55°C; such condition will be notified by an icon inside the battery.
When the Leisures Batteries are Isolated, is possible reactive the connection,
activating a Battery Charger, or Turning ON the Engine or pushing for 5
seconds the ON-OFF Push Button placed on the TOP cover of the BlackBox.
6.4 Charging the Engine Battery
This function is crucial for storage periods. In fact, even after long stops it prevents
from having the engine battery depleted, which would allow the engine to start.
The iManager allows to charge the engine battery automatically only when strictly
necessary, when the following conditions occur:
Engine battery under 12.5V
The leisure battery/batteries has/have to be completely discharged
A charging source must be available: AC battery charger, solar panel or
generator.
The maximum current delivered to the engine battery is 4A.
The charging stops when also the engine battery is completely charged and, anyway,
as soon as the charging source is disconnected or the vehicle is started.
You can activate the Engine Battery Charge manually, pusching for 3 seconds
the icon when is active a charger different form the alternator and the
Engine Battery is below 12,7V.
232
As soon as the earth cable has been connected to the BlackBox, the system
immediately becomes active.
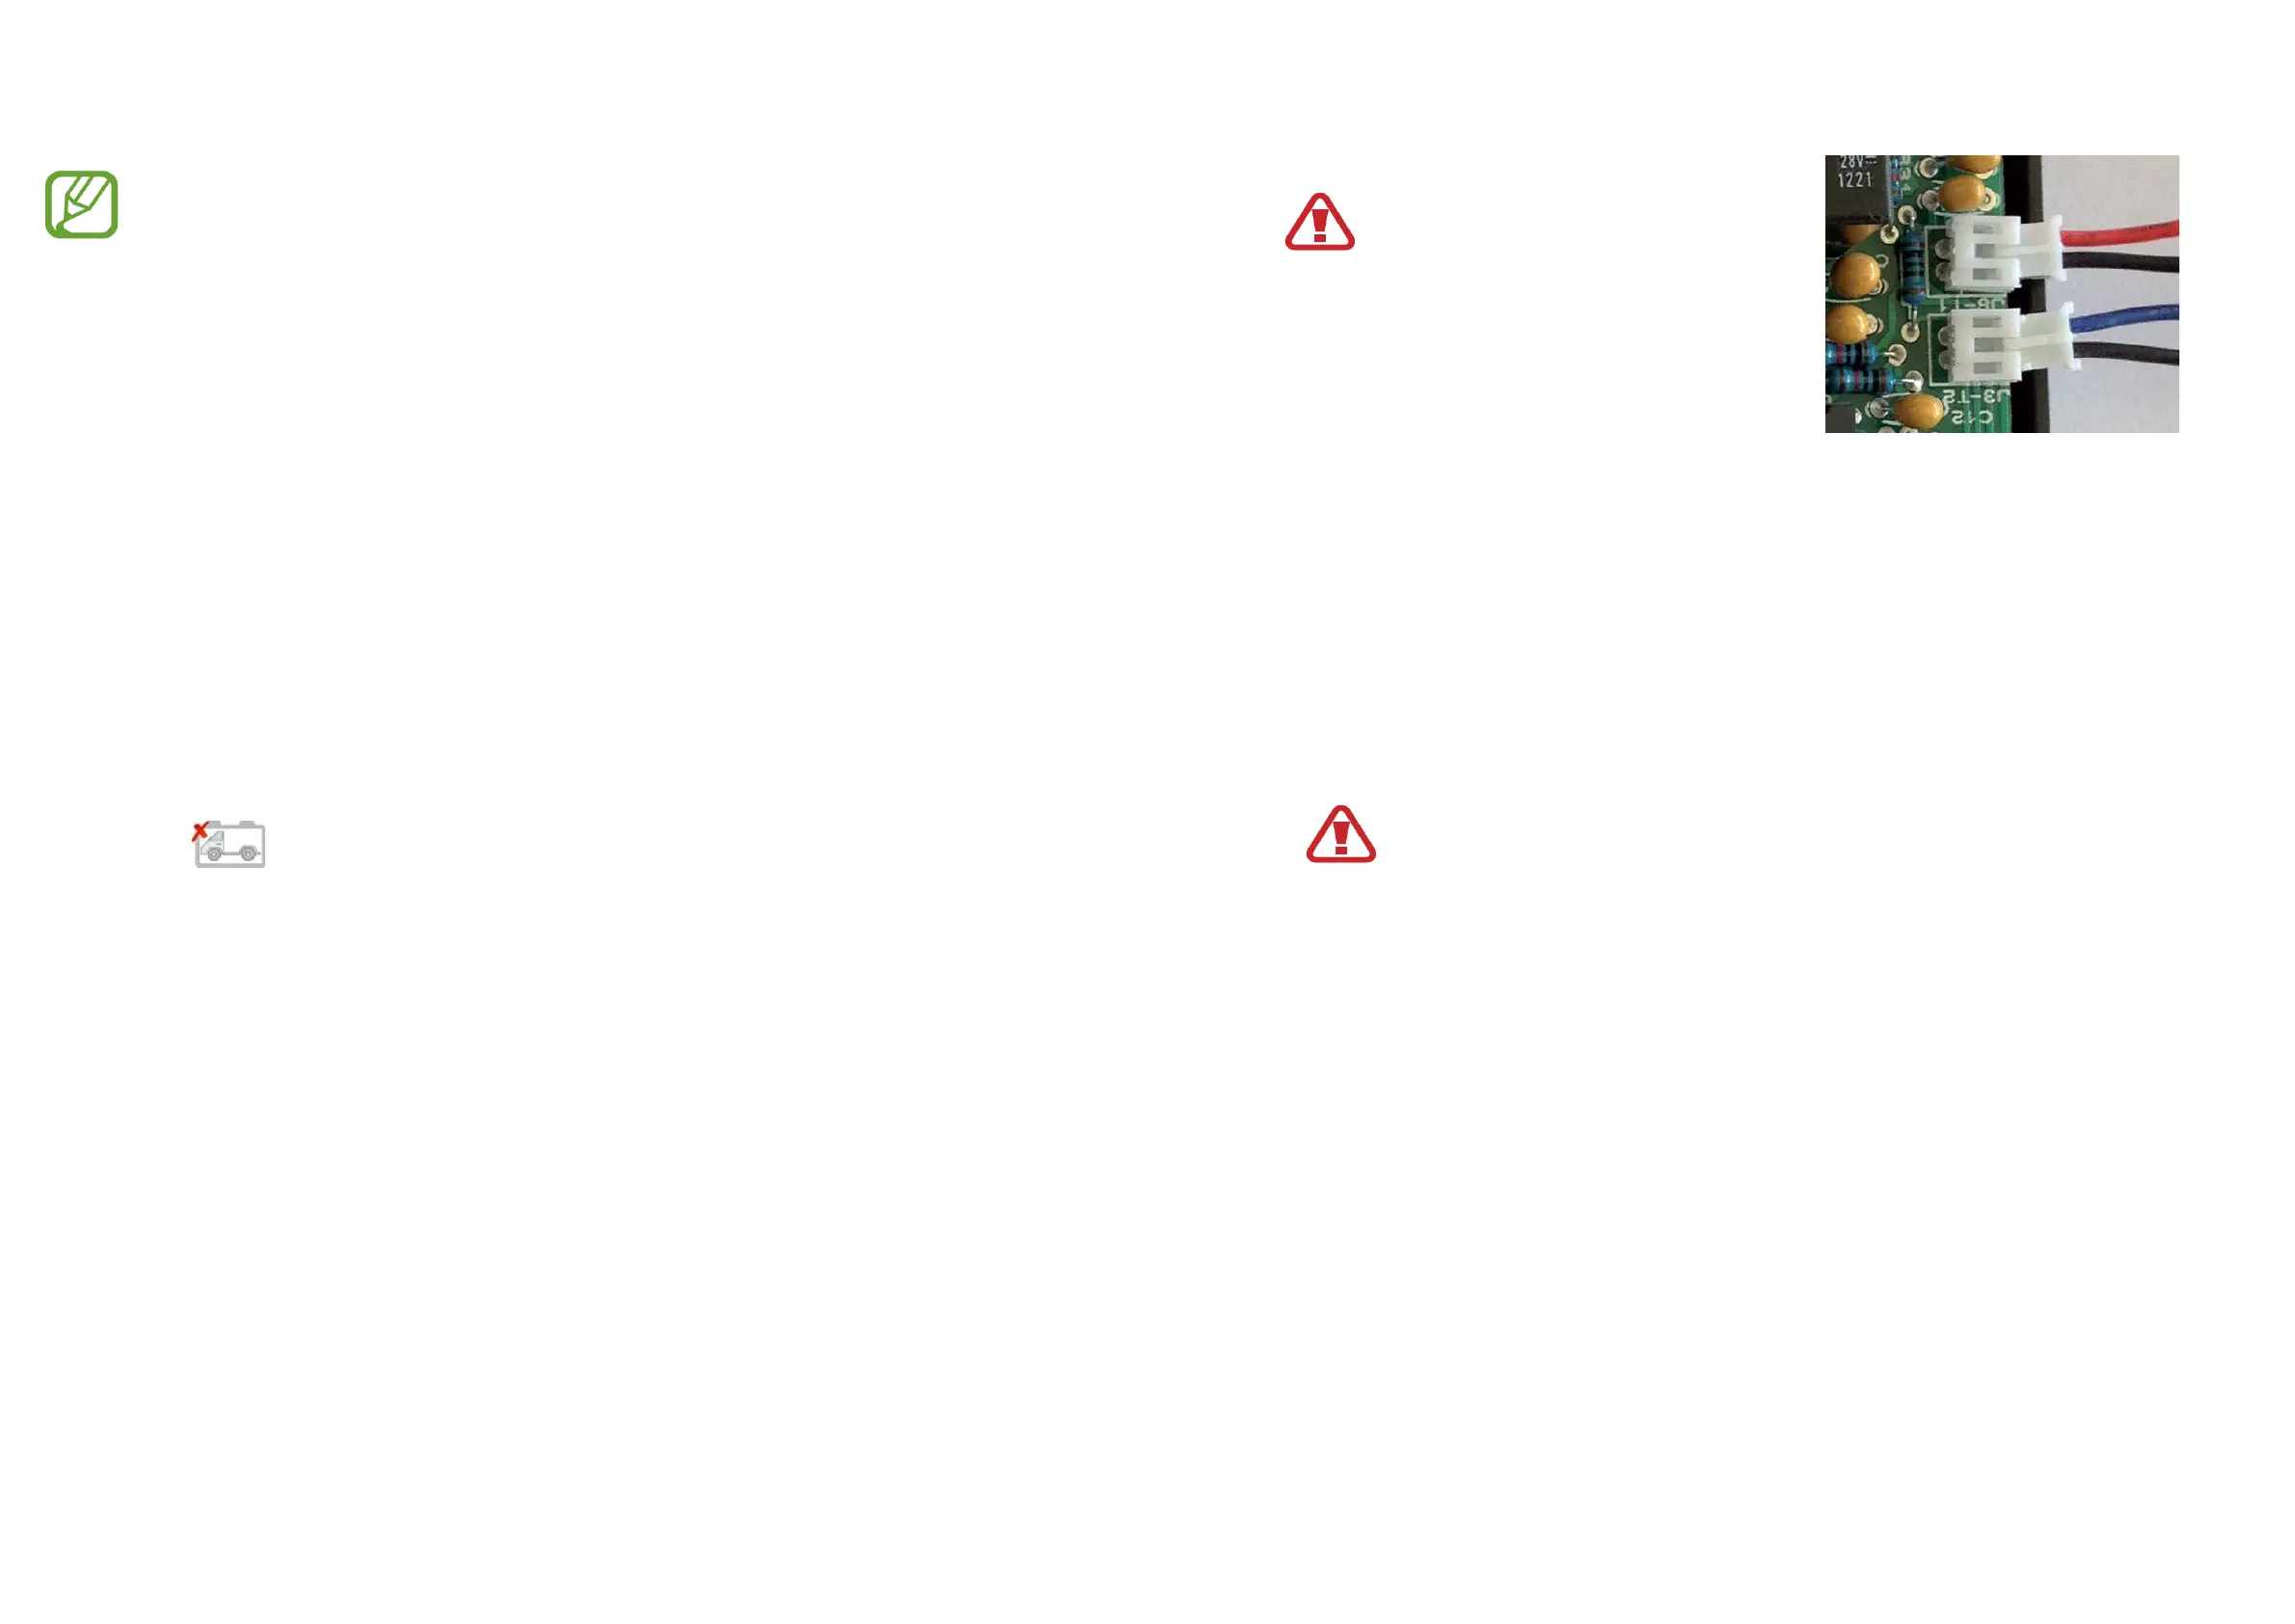
7. Delicately connect the temperature probes’ connectors to their housings on the
back of the device
DO NOT FORCE: connectors’
direction must be mandatorily
complied with
Place the temperature probes in central
position on a major side of the batteries (long
side). Use a drop of hotmelt glue or silicone,
being careful to attach the sensor to the
surface firmly.
8. Fix the base on the BlackBox to a wall or to the floor of the housing chosen for
the installation; use the 4 self-tapping screws in the holes provided on the
bottom of the base,
PLEASE DO NOT Place the BlackBox between the two leisure batteries,
otherwise can be affected the wireless communication quality.
9. Close the BlackBox cover by introducing the two tabs on the back inside the
proper housings on the base; fasten the 2 screws provided on the holes of the
cover’s front corners
During this operations, please pay attention to the two wires
connected internally at the Push Button on the Top cover of the
BlackBox!
7