E – 29
Set up the projector
1. Turn on the projector
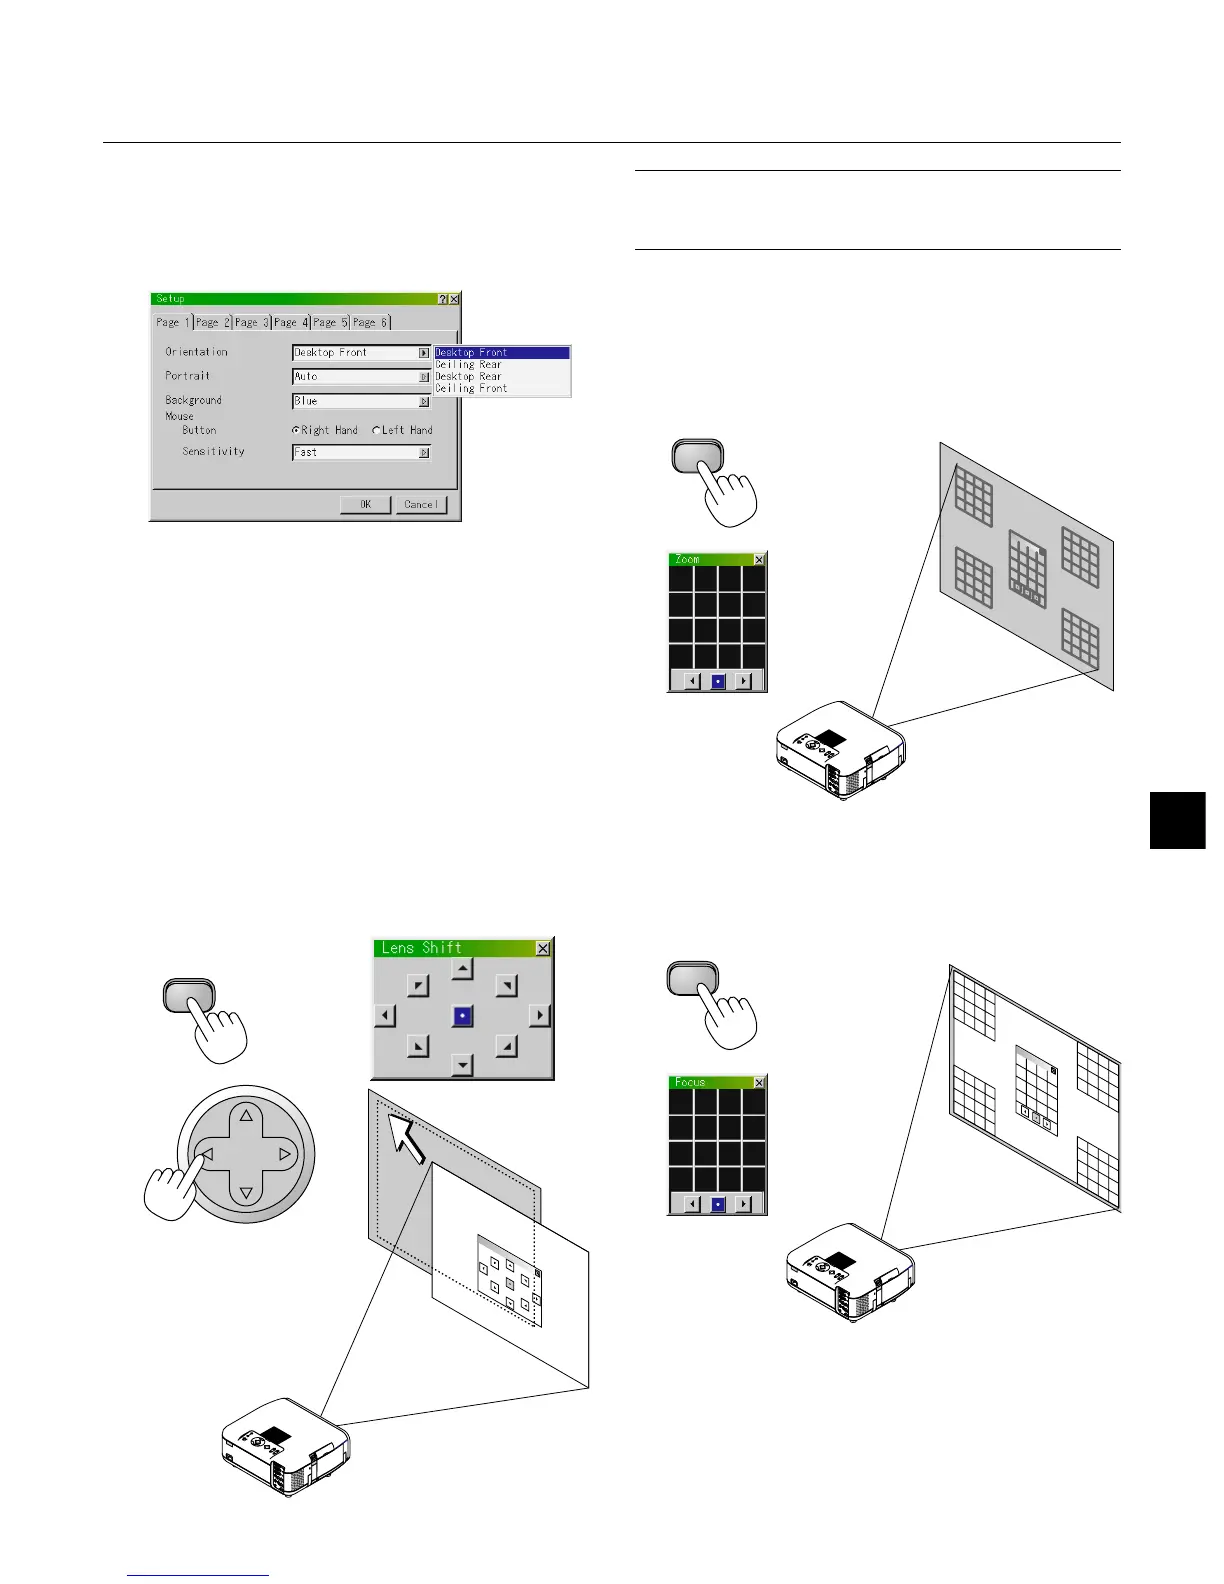
2. Select your type of projection:
Desktop front, ceiling rear, desktop rear, and ceiling front.
3. Select the Computer, Video Source or PC Card Viewer
Press a source button on the remote control or the projector cabi-
net to select “Video” (VCR, document camera, or laser disc
player), S-Video”, “RGB” (computer or DVD with component
output), “DVI DIGITAL/ANALOG” or “PC Card Viewer” to dis-
play the image.
Or press the “Menu” button on the remote control or the cabinet
and use the menu to select your video source: “Video”, “S-Video”,
“RGB”, “DVI DIGITAL/ANALOG”, or “PC Card Viewer”.
4. Adjust the image position and the image size.
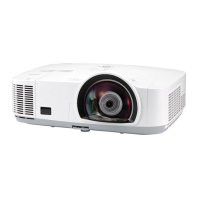
(1) Press the SHIFT button to display the Lens Shift adjustment screen.
Use the Select button on the remote control to move the image horizon-
tally, vertically or diagonally.
To close the Lens Shift adjustment screen, press the CANCEL button.
See page E-20 for “Lens Shift Adjustable Range”.
Projected image position can be shifted by using the LENS SHIFT button
on the cabinet.
Pressing two arrow buttons at the same time can move the lens diago-
nally.
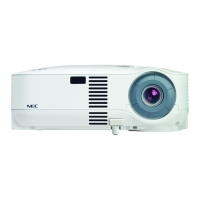
(2) Press the ZOOM button to display the Zoom adjustment screen.
Use the Select
/
button on the remote control to adjust the image
size.
To close the Zoom adjustment screen, press the CANCEL button.
You can also adjust the image size by using the ZOOM + or –button on the
projector cabinet.
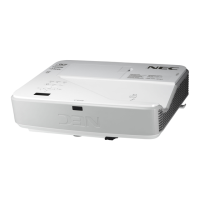
(3) Press the FOCUS button to display the Focus adjustment screen.
Use the Select
/
button on the remote control to adjust the focus.
To close the Focus adjustment screen, press the CANCEL button.
You can also adjust the image size by using the FOCUS + or –button on
the projector cabinet.
SELECT
SHIFT
ZOOM
ZOOM
FOCUS
FOCUS
NOTE: In some cases the image may move down a little immediately after a
lens shift adjustment has been made in the downward direction.
(When a lens shift adjustment has been made in the upward direction, this
image movement will not occur)