176
8. Appendix
❺ Mounting the cable cover (sold separately)
Mountingtheseparatelysoldcablecover(NP10CV)ontheprojectorallowsyouhidethecablesforacleaner
appearance.
CAUTION
• Aftermountingthecablecover,besuretofastenusingthescrewsprovided.Ifnot,thecablecovercouldfall
anddamagethecablecoverandpossiblyresultingininjury.
• Donotbundlethepowercordandplaceitunderthecablecover.Doingsocouldleadtore.
• Donotholdthecablecoverwhilemovingtheprojectoranddonotapplyexcessiveforcetothecablecover.
Doingsocoulddamagethecablecover,resultingintheprojectorfallingorcausinginjury.
Mounting
Preparations:
1. Connect the power cord and cables to the projector (the connection cords are omitted from the diagrams).
2. Prepare a Phillips screwdriver.
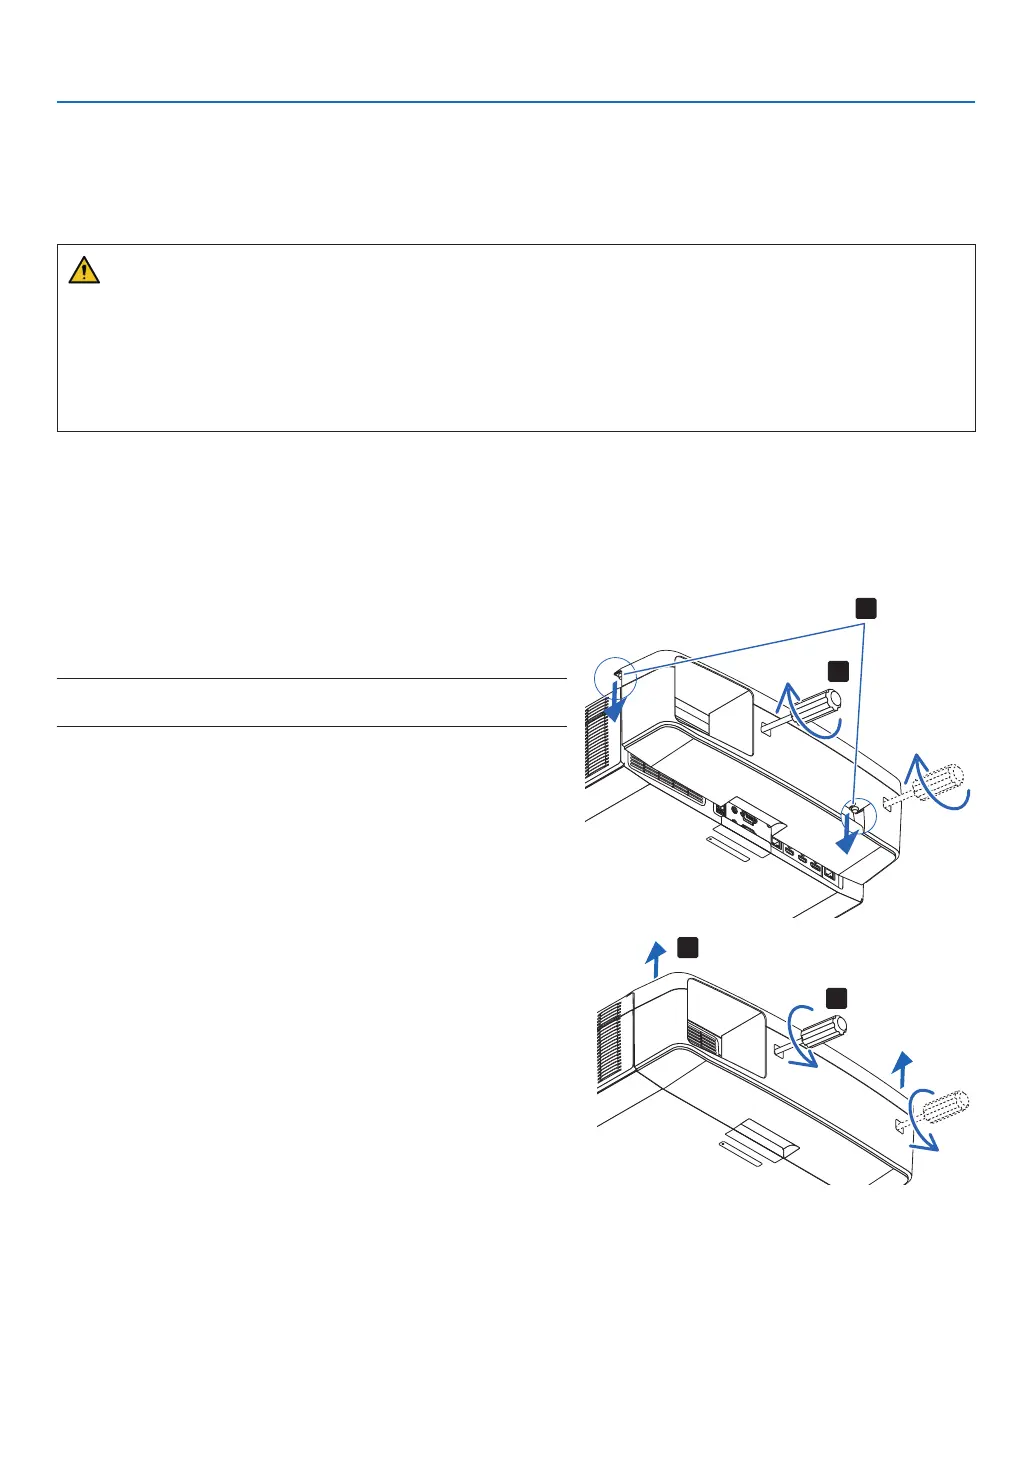
1. Insertthetworoundprotrusionsontheleftandrightedges
ofthecablecoverintothegroovesinthebottomofthe
projector to line it up.
NOTE:Becarefulnottoletthepowercordandcablesgetpinchedbythe
cable cover.
2. Turnthecablecoverscrewclockwise.
• Tightenthescrewsecurely.
2
1
Removing
1. Turnthecablecoverscrewcounterclockwiseuntilitturns
loosely.
• Hold the cable cover while doing this to prevent it from
falling.
• Thescrewdoesnotcomecompletelyoff.
2. Removethecablecover.
• Turnthecablecoveralittle,thenliftitoff.
1
2


 To Next Page