9
6 Wiring Networked Registers
Complete the steps to wire networked registers.
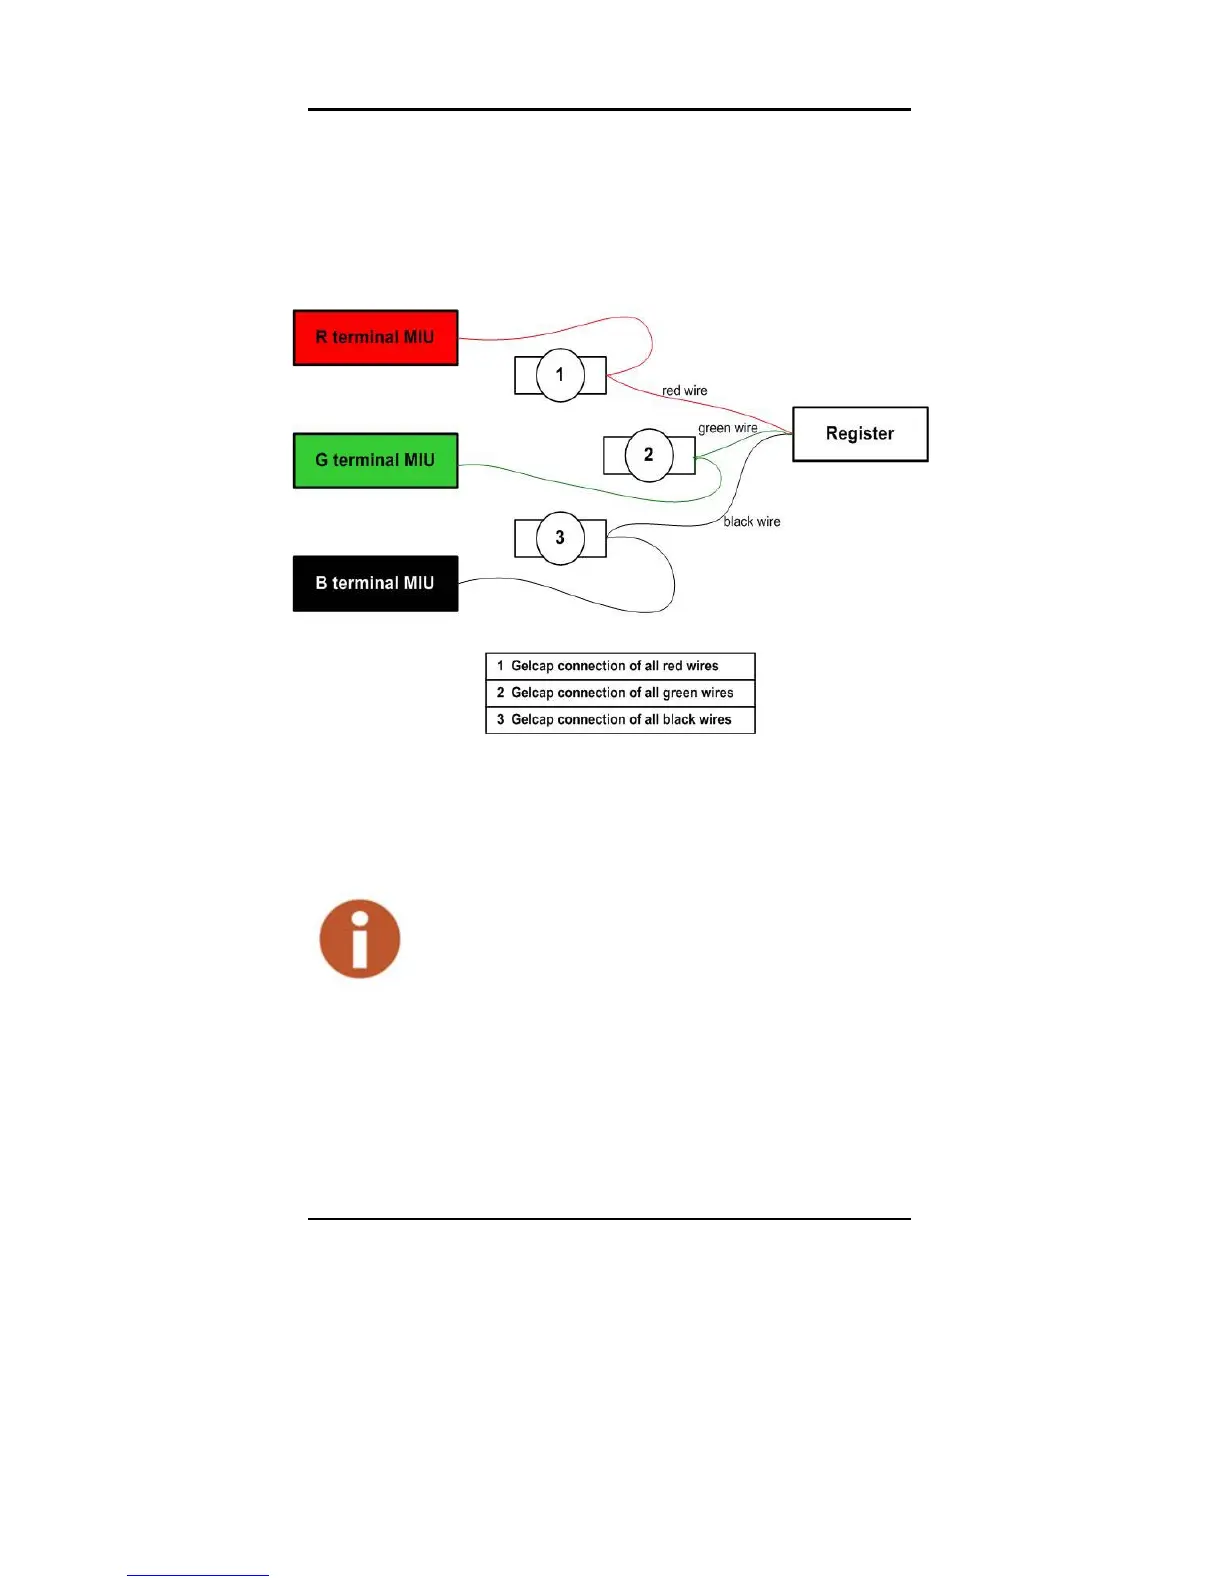
1 Connect each color wire with the appropriate color wire from
the pigtail and both registers, until all three colors have been
successfully connected. See Figure 19.
Figure 19 Interconnection of Like Terminals
2 Proceed to “How to Activate” on page 10.
7 Crimping Tool Manufacturers
To apply the Scotchlok connectors, Neptune requires the use of
a proper crimping tool. Table 3 on page 10 shows a list of various
manufacturers and model numbers.
• Remove any bare or non-insulated wire. Make
sure that you only insert insulated wire into the
splice connector.
• Observe proper polarity when wiring the
registers, so that all terminals are
interconnected with wires of the same color:
red, black, or green. Refer to Figure 19.