EasyManuals Logo

Neptune E-CODER Quick Install Guide

Neptune E-CODER
20 pages
To Next Page IconTo Next Page
To Previous Page IconTo Previous Page
Page #4 background imageLoading...
Page #4 background image
2
3 Wiring Inside Set Version
Run a three-conductor cable from the E-CODER register to the
MIU. Refer to the following steps.
1 Connect the three-conductor wire to the encoder register’s
terminals as described in the manufacturer’s instructions,
using the color code in Table 1.
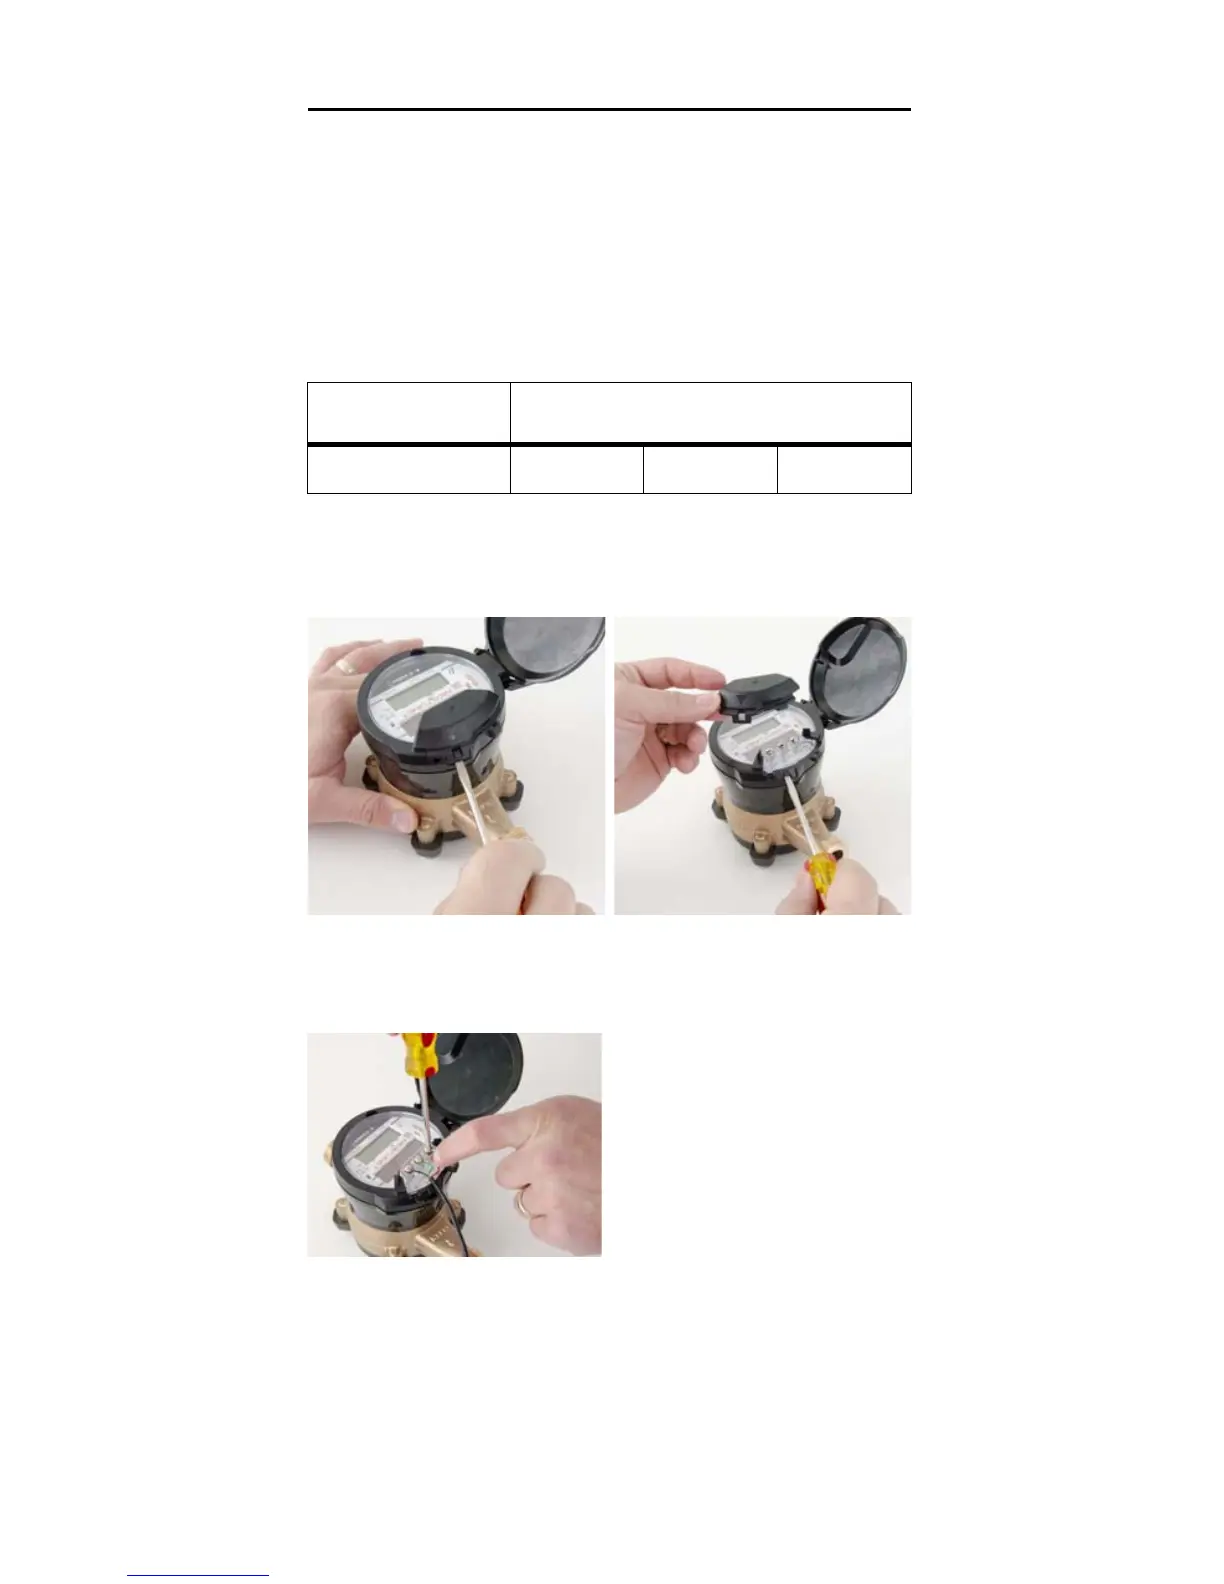
2 Remove the terminal cover with a flat-head screw driver as
shown in Figure 2.
Figure 2 Removing the Terminal Cover
Figure 3 Wiring with Proper Color Wire
Table 1 Encoder Wiring
Register Wire Color / Encoder Terminal
Neptune E-CODER Black/B Green/G Red/R
3 Wire the encoder register
with the proper colors. See
Figure 3.
4 Test the wiring to verify the
read.

Other manuals for Neptune E-CODER

Questions and Answers:

Question and Answer IconNeed help?

Do you have a question about the Neptune E-CODER and is the answer not in the manual?

Neptune E-CODER Specifications

General IconGeneral
OutputDigital
Power SourceBattery or external power
Operating Temperature-20°C to 60°C (-4°F to 140°F)
Power Supply3.6V Lithium Battery
DimensionsVaries depending on model
WeightVaries depending on model

Related product manuals