3. Rotate the cable management tray down by gently pulling the pins on the ends of the tray and rotating the
tray down.
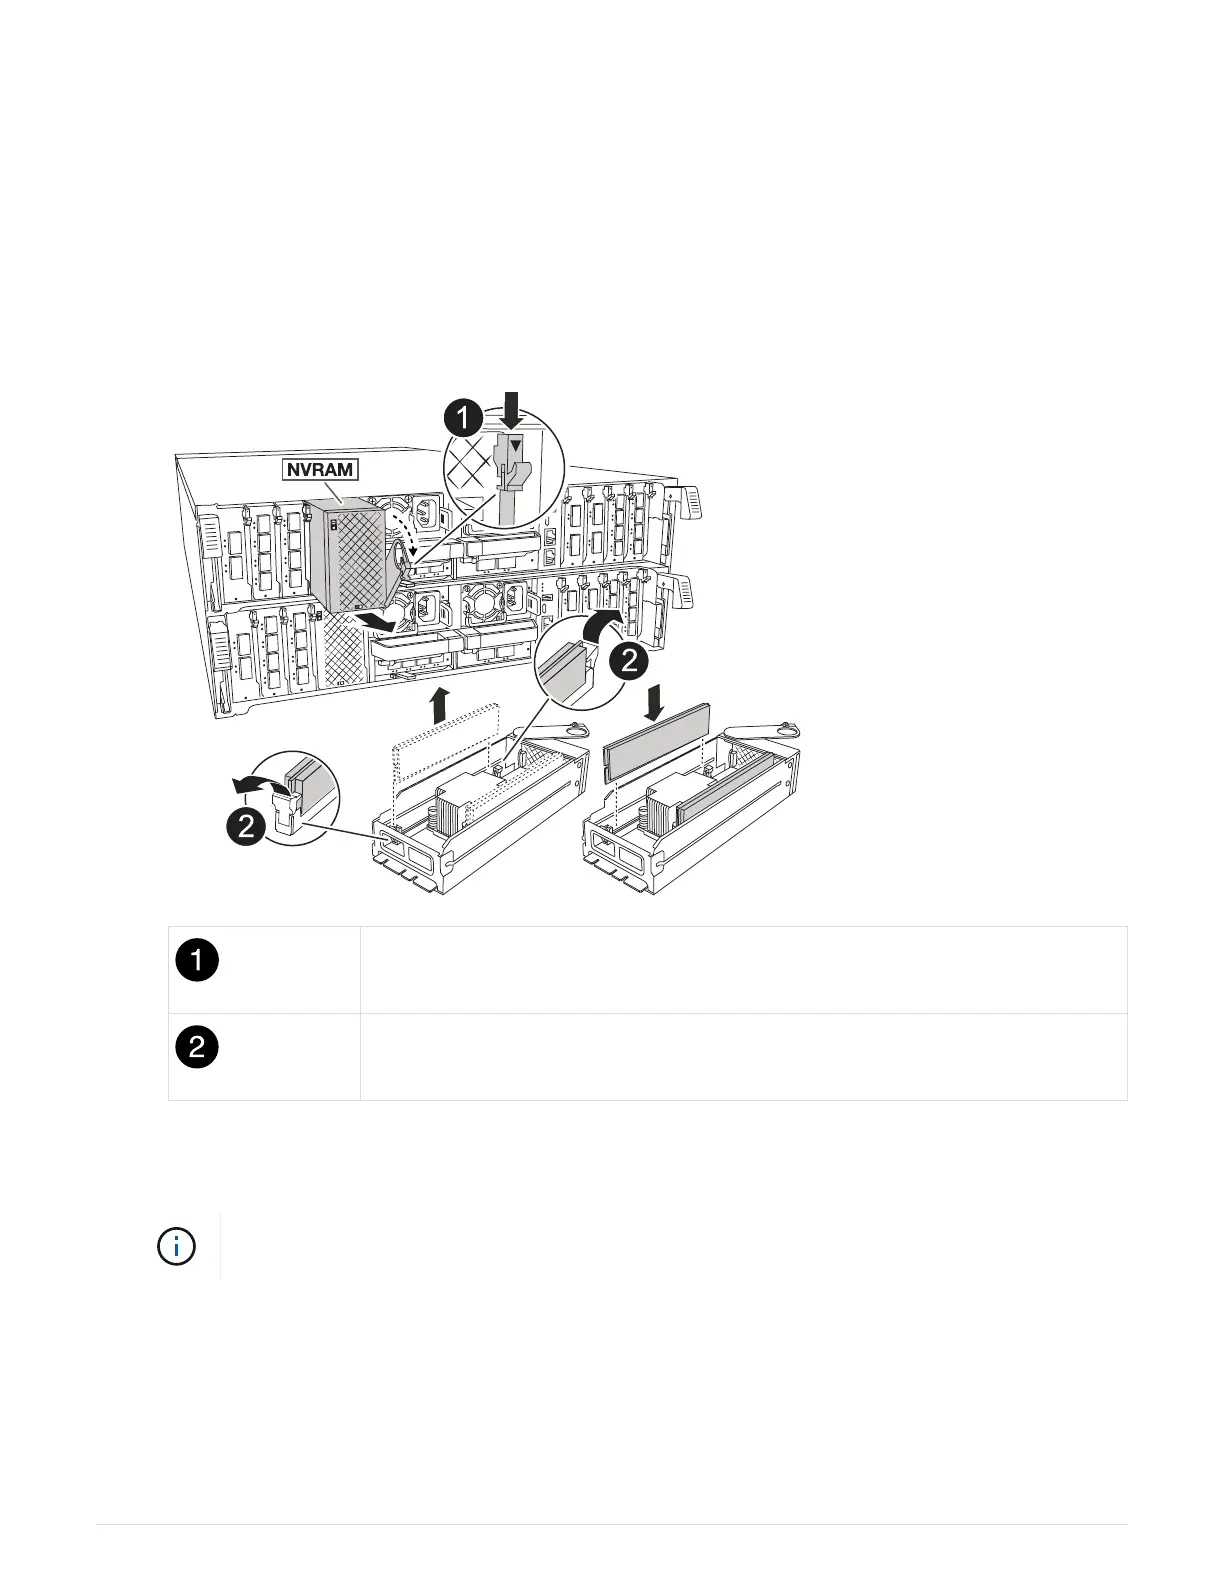
4. Remove the target NVRAM module from the chassis:
a. Depress the cam button.
The cam button moves away from the chassis.
b. Rotate the cam latch as far as it will go.
c. Remove the NVRAM module from the chassis by hooking your finger into the cam lever opening and
pulling the module out of the chassis.
Cam locking button
DIMM locking tabs
5. Set the NVRAM module on a stable surface.
6. Locate the DIMM to be replaced inside the NVRAM module.
Consult the FRU map label on the side of the NVRAM module to determine the locations of
DIMM slots 1 and 2.
7. Remove the DIMM by pressing down on the DIMM locking tabs and lifting the DIMM out of the socket.
8. Install the replacement DIMM by aligning the DIMM with the socket and gently pushing the DIMM into the
socket until the locking tabs lock in place.
9. Install the NVRAM module into the chassis:
a. Gently slide the module into the slot until the cam latch begins to engage with the I/O cam pin, and then
63