User Manual for the NETGEAR PS121 Mini Print Server
Setup 3-3
First, Connect the Print Server and Printer to Your Network
&RQQHFWWKH3ULQW6HUYHUWRWKH3ULQWHU
3686%3RUW
3ULQWHU
86%&DEOH
A
&RQQHFWLQJ
WKH3ULQW6HUYHUWRWKH
5RXWHU6ZLWFKRU+XE
5RXWHU6ZLWFKRU+XE
3ULQWHU
36
(WKHUQHW3RUW
(WKHUQHW&DEOH
C
B
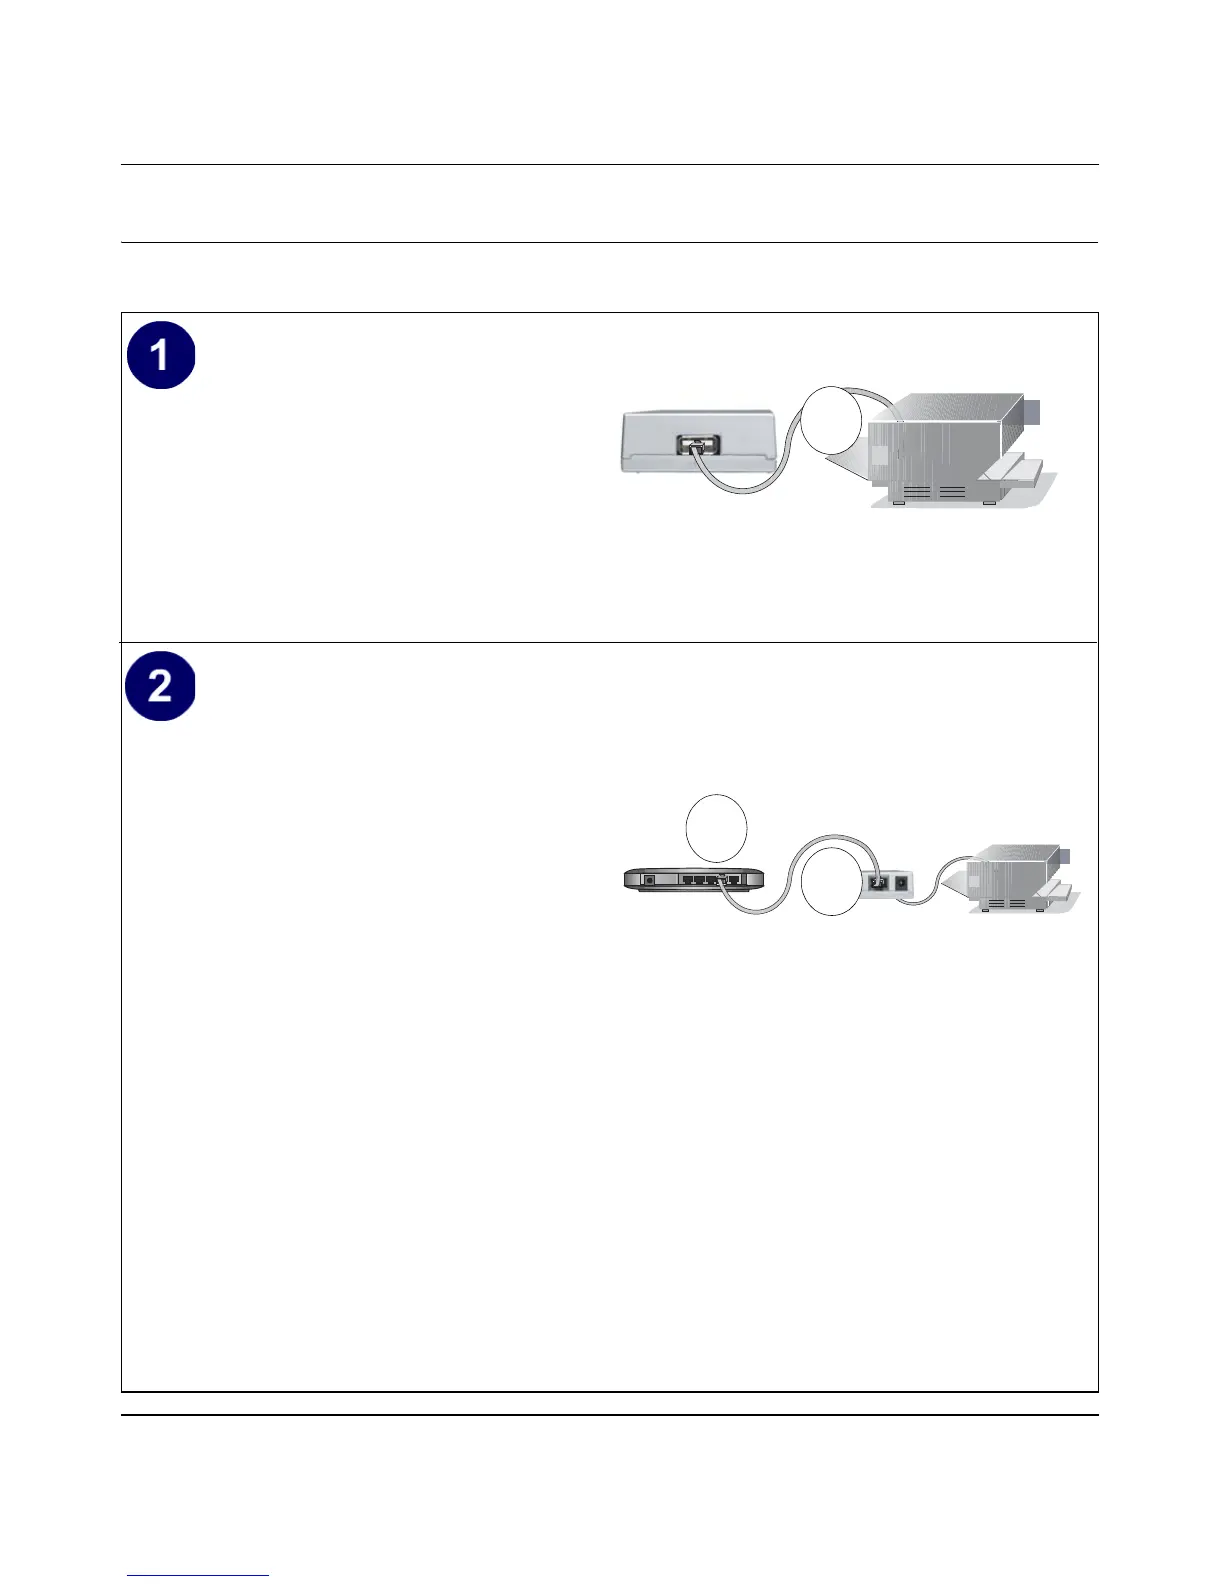
Connect the PS121 to your printer.
a. Ensure that the PS121 power is OFF.
b. Connect one end of the supplied USB
cable (A) to the PS121, and the other end
to the USB connector on your printer.
c. Turn on your printer.
d. Check the PS121 status lights and verify
the following:
• ACT light: When the print server is
powered on, the ACT light will blink
then turn solid green.
• ERROR light: The ERROR light
should be off.
Connect the Ethernet cable from the PS121
to a network device like a router.
a. Insert one end of an Ethernet cable (B)
into an open Ethernet port in the network
device like a hub, switch, or router.
b. Insert the other end (C) into the Ethernet
port on the PS121.
Your PS121 and printer are now
connected to your network!
c. Connect the 9v power cord to the PS121,
and plug the the power adapter.
Note: Ethernet specifications limit the cable
distance to 328 ft. in length.
Connect thePS121 to your printer