Do you have a question about the NETGEAR RAXE500 and is the answer not in the manual?
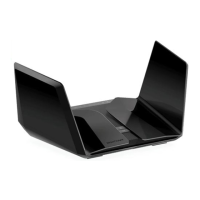
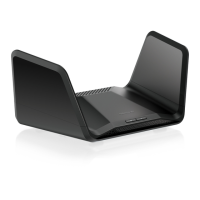
Describes the router, power adapter, and Ethernet cable included in the package.
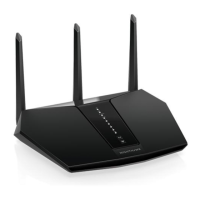
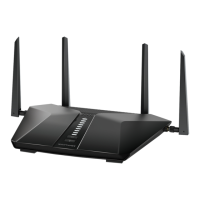
Explains the status LEDs and buttons on the router's top panel.
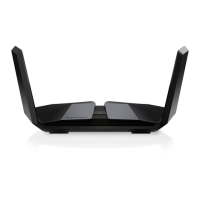
Details the connectors and buttons located on the router's rear panel.
Instructions on how to extend the router's antennas for optimal placement.
Information about the label on the router, including login details.
Guidelines for placing the router for best WiFi coverage.
Step-by-step guide to physically connect the router to the modem.
Instructions on how to mount the router on a wall using mounting holes.
Explains how to connect devices via wired Ethernet or WiFi.
Describes different login credentials needed for the router and services.
Guide to using the Nighthawk mobile app for setup and management.
How to access the router's web interface for configuration.
Steps to change the display language of the router's web interface.
Guided process to configure Internet connection settings automatically.
Detailed steps for manual Internet connection configuration.
Settings for high-speed Internet connections using Multi-Gig ports.
Configuration options for IPv6 network setup.
Adjusting Maximum Transmission Unit settings for network performance.
Activate and manage the NETGEAR Armor security service for network protection.
Configure rules to allow or block devices from accessing the Internet.
Block access to websites using specific keywords in URLs.
Remove previously added keywords from the website blocking list.
Prevent specific network services or applications from accessing the Internet.
Exempt a specific computer from Internet access controls.
Create and manage lists of devices allowed or blocked from the network.
Set time-based rules for blocking websites and services.
Configure the router to send email alerts for security events.
Configure wide area network settings like MTU and NAT.
Designate a device to bypass firewall for specific applications.
Assign a custom name to the router for network identification.
Modify local network IP address and subnet mask.
Configure the DHCP server's IP address pool.
Turn off the router's DHCP service.
Assign static IP addresses to specific devices.
Simplify WiFi device connection via WPS.
Configure SSID, security type, and channel for WiFi bands.
Adjust wireless standards and speeds for each band.
Update WiFi network name and security protocol.
Create isolated WiFi networks for visitors.
Turn the router's WiFi transmitters on or off.
Configure WiFi 6 (802.11ax) features for improved performance.
Optimize 2.4GHz band performance by managing channel widths.
Configure OFDMA for efficient data transmission in WiFi 6.
Adjust the WiFi signal's transmission power.
Define times when the WiFi network is active or inactive.
Configure the router to extend an existing network.
Configure port or VLAN bridging for specific traffic.
Define specific paths for network traffic.
Optimize WiFi signal direction towards connected devices.
Ensure equal network time allocation for all WiFi clients.
Configure Multi-User, Multiple Input, Multiple Output for better multi-device performance.
Combine 2.4GHz and 5GHz bands under a single SSID.
Enable UPnP for automatic device configuration and service discovery.
Configure the router to act as a transparent bridge.
Combine multiple LAN ports for increased bandwidth.
Check for and install the latest router firmware for security and features.
Update the password for accessing the router's administrative interface.
Set up security questions for password retrieval.
Procedure to retrieve a forgotten router admin password.
Access status and configuration details of the router.
View data transfer statistics for the WAN port.
Verify the router's current connection status to the Internet.
Access and review the router's event and activity logs.
List all devices connected to the router's network.
Track and manage data usage and traffic volume.
Back up, restore, or erase router settings.
Remotely manage router settings via the Nighthawk app.
Customize the behavior of the router's status LEDs.
Configure the router's local time zone.
Specify a Network Time Protocol server for time synchronization.
Configure the router as a media server for DLNA devices.
Reset the router to its original configuration.
Details supported USB storage devices and file system types.
Steps to physically connect a USB drive to the router.
How to access USB storage from Windows PCs.
Assign a drive letter to the USB storage on Windows.
How to access USB storage from Mac computers.
Activate FTP service for file transfer on the local network.
Browse and view shared folders on the connected USB device.
Create new network shares for folders on the USB drive.
Modify settings for existing network shares.
Procedure to disconnect USB storage without data loss.
Configure Dynamic DNS for remote network access using a domain name.
Enable FTP access to USB storage over the Internet.
Setting up a custom FTP server for remote file access.
Methods for accessing USB storage remotely via the Internet.
Establish a virtual private network connection to the router.
Configure the router's VPN server settings.
Install client software on devices for VPN access.
Establish and use a VPN connection from a Windows PC.
Access shared files via VPN tunnel.
Route home Internet traffic through the VPN.
Create rules to direct incoming Internet traffic to specific devices.
Dynamically open ports based on outbound traffic for specific applications.
General advice for resolving common router issues.
Use router LED indicators to diagnose problems.
Steps to resolve login access issues.
Guide for diagnosing and fixing Internet connectivity problems.
Resolve issues with loading web pages or accessing online content.
Address problems with saving router configuration changes.
Resolve issues connecting devices to the WiFi network.
Use the ping command for network diagnostics.
Details of the router's default configuration parameters.
Provides detailed hardware and performance specifications of the router.
| WiFi Speeds | Up to 10.8Gbps |
|---|---|
| WiFi Bands | Tri-Band |
| 2.4GHz Band Speed | Up to 1.2Gbps |
| 5GHz Band Speed | Up to 4.8Gbps |
| 6GHz Band Speed | Up to 4.8Gbps |
| Processor | 1.8GHz Quad-Core Processor |
| Beamforming Technology | Yes |
| MU-MIMO | Yes |
| OFDMA | Yes |
| WiFi Technology | 802.11ax |
| Memory | 512MB NAND Flash and 1GB RAM |
| Ethernet Ports | 1 x 2.5Gbps WAN, 4 x 1Gbps LAN |
| USB Ports | 2 x USB 3.0 |
| Antenna | 8 high-performance internal antennas |
| Security | WPA3, VPN support |
| Weight | 2.86 lb (1.3 kg) |