18
XS712T Smart Switch
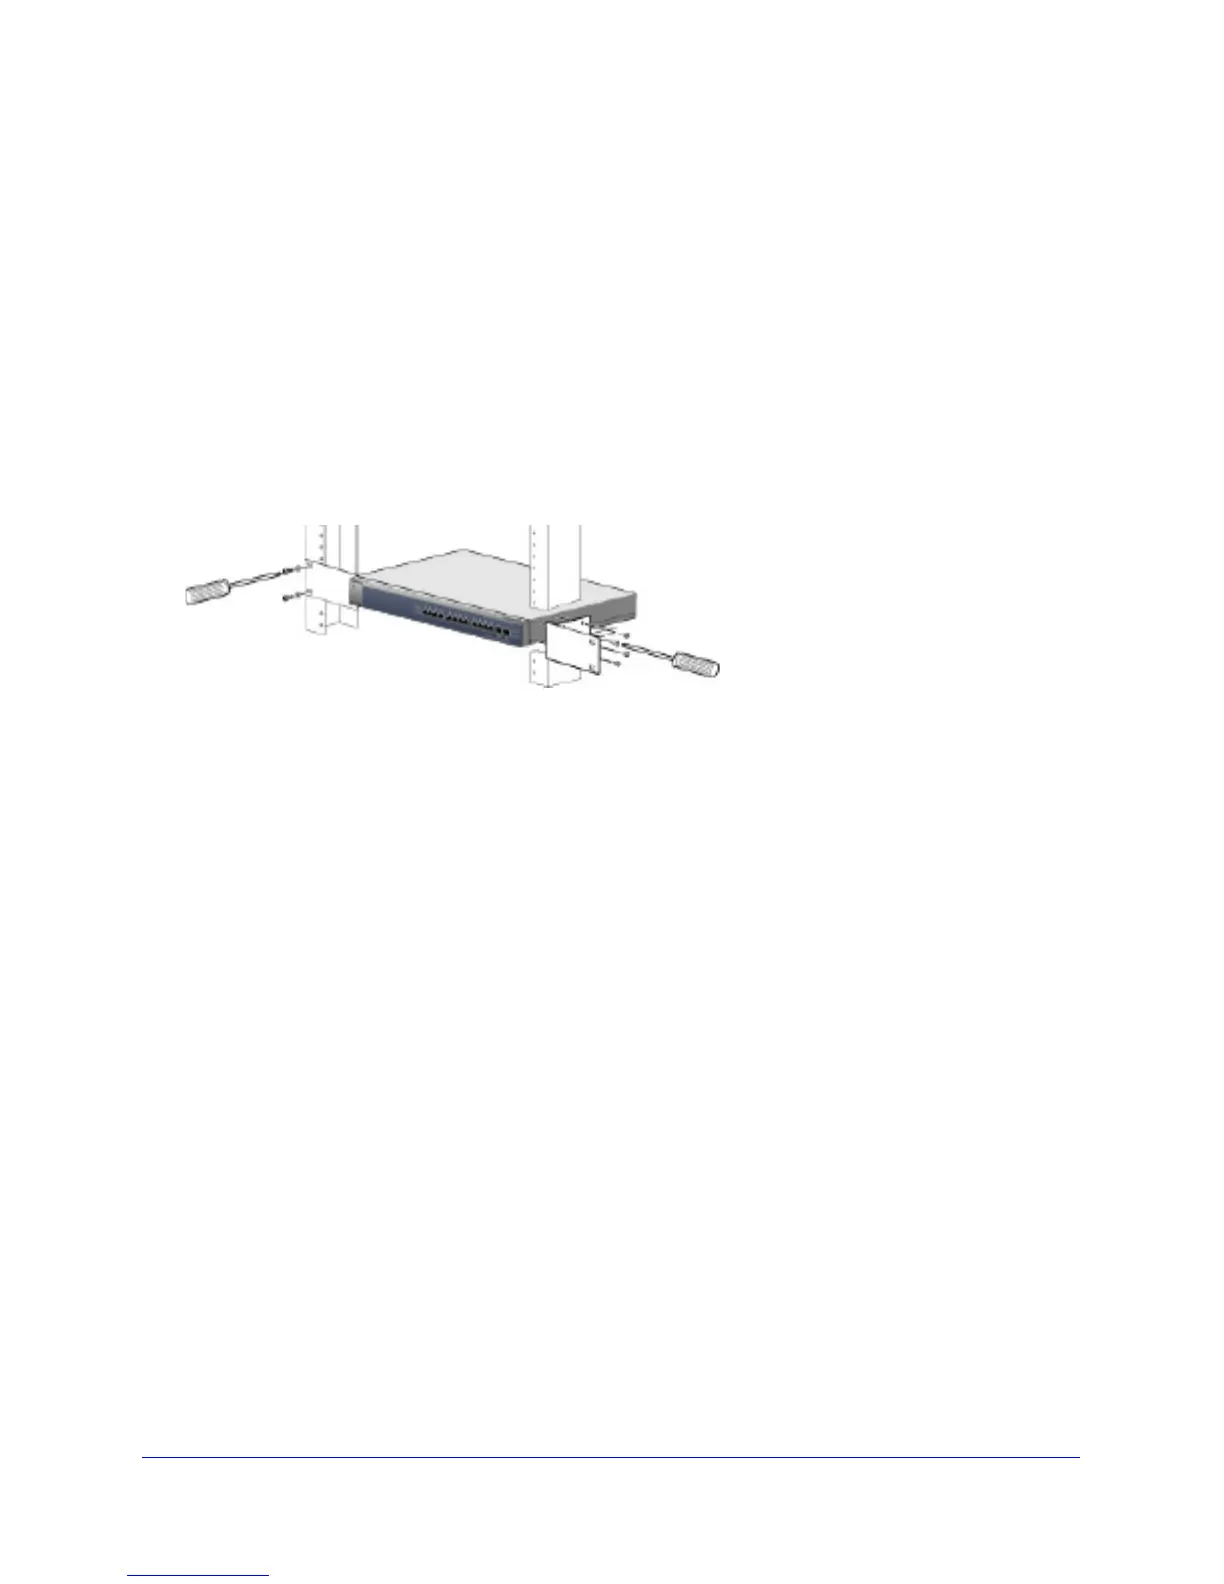
Install the Switch in a Rack
To install the switch in a rack, you need the 19 inch rack-mount kit supplied with the switch.
To install the switch in a rack:
1. Att
ach the supplied mounting brackets to the side of the switch.
2. In
sert the screws provided in the rack-mount kit through each bracket and into the bracket
mounting holes in the switch.
3. T
ighten the screws with a No. 1 Phillips screwdriver to secure each bracket.
4. Align the
mounting holes in the brackets with the holes in the rack, and insert two pan-head
screws with nylon washers through each bracket and into the rack.
5. T
ighten the screws with a No. 2 Phillips screwdriver to secure mounting brackets to the rack.
Figure 6. Rack mount
Step 3: Check the Installation
Perform the steps in this section before applying power to the switch.
To check the installation:
1. Inspect th
e equipment thoroughly.
2. V
erify that all cables are installed correctly.
3. Check
cable routing to make sure that cables are not damaged or creating a safety hazard.
4. Ensure tha
t all equipment is mounted properly and securely.
Step 4: Connect Devices to the Switch
The following procedure describes how to connect computers to the switch’s RJ-45 ports.
The smart switch contains Auto Uplink technology, which allows the attaching of devices
using either straight-through or crossover cables.
 Loading...