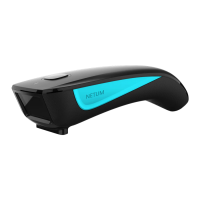
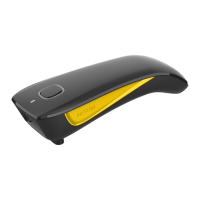
This document describes the NETUM NFC & RFID Reader/Writer, a versatile device designed for reading and writing NFC and RFID tags. It is a portable, handheld scanner that can connect to various devices via USB cable or Bluetooth, offering flexibility in its application.
Function Description
The NETUM NFC & RFID Reader/Writer is primarily used for scanning and interacting with NFC and RFID tags. It can read data from cards, tags, or smart devices, making it suitable for a range of applications such as inventory management, access control, and data collection. The device supports both NFC (Near Field Communication) and RFID (Radio-Frequency Identification) technologies, allowing it to interact with a broad spectrum of compatible tags.
Important Technical Specifications
- Connectivity: The reader supports two primary connection methods:
- USB Cable: For direct connection to a computer or other host device. It is plug-and-play for US keyboards, but other keyboard types may require software configuration.
- Bluetooth: Offers wireless connectivity, supporting both Bluetooth HID Mode and Serial Port Profile (SPP)/Apple Specific Serial Profile (BLE) Mode. The BLE mode is recommended for applications that support SPP or BLE.
- Power:
- DC Plug: V:5V; A>500mA for charging.
- Battery Light/Read Indicator Light: Displays green, blue, or red to indicate battery status and read operations.
- Indicators:
- Scanning Window: The area where tags are presented for reading.
- Power Button (On/Off): Controls the device's power state.
- Battery Light/Read Indicator Light (Green/Blue/Red): Provides visual feedback on battery charge and scan status.
- Trigger Button: Initiates a scan.
- Bluetooth Light: Indicates Bluetooth connection status.
- Beeper: Provides audible feedback for operations such as successful scans, power on/off, and errors.
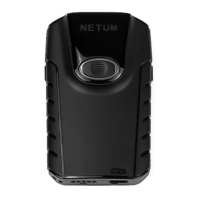
- Physical Features:
- Lanyard Eyelet: For attaching a lanyard, enhancing portability and preventing loss.
- Type C Port: For USB cable connection and charging.
- Software Compatibility: The device's configuration software is currently compatible only with Windows operating systems. A full manual and configuration software can be downloaded from the official Netum website.
Usage Features
- Charging:
- Turn the device on.
- Connect the reader to a computer via the provided USB cable or use a DC plug to charge it from an electrical wall outlet.
- Red Light On: Indicates charging in progress.
- Red Light Off: Indicates the battery is fully charged.
- Reading Tags:
- Connect the reader to your device via USB cable or Bluetooth.
- Hold the reader over the card, tag, or smart device to be read, ensuring it is parallel to the reader for best results.
- Press the trigger button momentarily. A blue LED light will illuminate, and a short beep will sound, indicating a successful scan.
- Scan Modes: The device supports different scan modes. By default, it operates in "Key Delay Mode," where pressing the button initiates a scan. The green LED will turn on and off within 3 seconds if no cards are read. For continuous scan mode, users need to download and use the configuration software to adjust settings on the "Para Setting" page.
- Data Storage and Upload: If the reader is disconnected from a device (USB or Bluetooth), scanned characters will be stored internally. Once reconnected, pressing the button for 5 seconds will upload the stored characters, and then they will be cleared from the device's memory.
- Keyboard Layout Configuration: For USB cable connections, if using a keyboard type other than US, the keyboard language needs to be configured using the "C RFID Para Setting" software under the "Keyboard layout" section.
- Bluetooth Connection Modes:
- Bluetooth HID Mode: To enable this, navigate to "Para Setting page" -> "BT Profile Mode" -> "HID" in the software.
- Serial Port Profile (SPP) / Apple Specific Serial Profile (BLE) Mode: Recommended for applications supporting SPP or BLE. This mode is enabled by navigating to "Para Setting page" -> "BT Profile Mode" in the software.
- LED Activity and Prompt Tones: The device provides comprehensive visual and audible feedback for various operations and statuses:
- Bluetooth Unpaired: Blue LED flashes slowly (HID Mode) or quickly (SPP/BLE Mode).
- Bluetooth Pairing: Blue LED flashes quickly and turns off after 30 seconds if no connection is made.
- Bluetooth Paired: Blue LED is solid blue.
- RFID Searching for Cards: ON indicator.
- Charging Power/Full Charged: ON/OFF indicator.
- Low Power Warning (less than 20%): Red LED flashes slowly.
- Low Power Warning (less than 10%): Red LED flashes quickly.
- Power On/Bluetooth Paired/Data Uploaded: Blue LED turns on and off quickly (0.3s) with a long beep in 3 tones.
- Successful Scan: Blue LED turns on and off very quickly (0.1s) with a short beep.
- Bluetooth Unpaired/Successful Scan in Low Power: Red LED flashes twice with 2 beeps.
- Data Transmit Failed: Red LED flashes three times with 3 beeps.
- Fail to Turn the Reader On: Red LED flashes five times with 5 beeps.
Maintenance Features
- Factory Reset: To reset the reader to its factory settings:
- Disconnect the USB cable.
- Switch the power button to "Off."
- Press and hold the trigger button.
- While holding the trigger button, switch the power button to "ON."
- Continue holding the trigger button for at least 15 seconds.
- Release the button after hearing one beep.
- Software Updates and Full Manual: A general manual is provided, but for a full manual and additional configurations, users are directed to download them from the official Netum website: www.netum.net. The configuration software is essential for advanced settings and troubleshooting.
- Troubleshooting: If scanned characters are not being transmitted, ensure the device is connected. If connection fails, characters are stored internally and can be uploaded later.
- Support: For any inquiries, users can contact Netum via telephone, WhatsApp, or email. Contact information for both Netum and APEX CE SPECIALISTS LIMITED (for EU support) is provided in the manual.