Do you have a question about the Netum E800 and is the answer not in the manual?
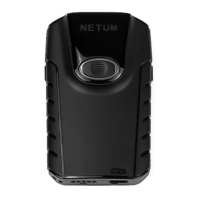
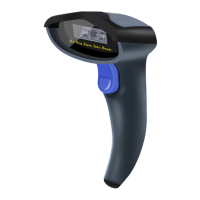
Identifies key components like scanning window, scan button, battery/read indicator light, lanyard eyelet, and USB Type C port.
Connect scanner via USB cable for charging. Red light indicates charging, green light indicates fully charged.
Scan the '%#IFSNO$B' barcode to restore scanner settings to factory defaults.
Change scanner settings by scanning command barcodes. Asterisk (*) indicates default settings.
Connect via USB cable, USB Dongle, or Bluetooth for character transfer.
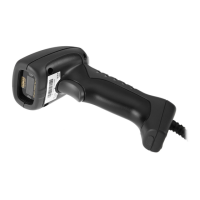
Connect via Type-C cable, set keyboard language, and position cursor to start scanning.
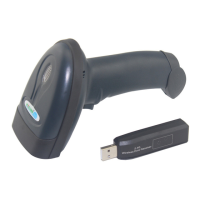
Plug in the USB dongle, set keyboard language, and position cursor to begin scanning.
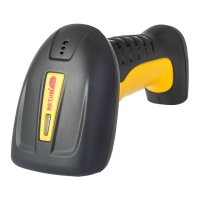
Scan 'Bluetooth Transmit', power on scanner, pair with 'E barcode scanner' via device Bluetooth settings.
No software needed, connects to most devices, acts like a keyboard (AT+MODE=2).
Details compliance with Part 15 of FCC Rules, limits for Class B digital devices, and measures to correct interference.
The NT033 is a versatile barcode scanner offered under the NetumScan and Zacoora brands, designed for efficient data capture in various environments. It supports multiple connection modes and offers a range of programmable features to suit different user needs.
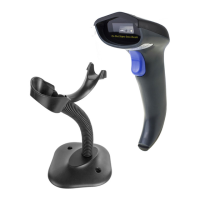
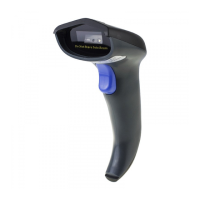
The NT033 functions as a barcode scanner capable of reading and transmitting barcode data to a host device. It is designed for both continuous and manual trigger scanning modes, allowing flexibility in operation. The device can connect to host systems via USB wired connection, USB wireless dongle, or Bluetooth, making it compatible with a wide array of devices including computers, smartphones, and tablets. It is suitable for applications requiring quick and accurate barcode scanning, such as inventory management, point-of-sale, and logistics.
While specific technical specifications like scan rate or decode capabilities are not explicitly detailed, the manual highlights several operational parameters. The device operates with a DC plug providing 5V and a current greater than 500mA for charging. It features a battery light/read indicator (Green/Blue/Red) and a scanning window. The scanner supports various keyboard languages including English (US), French, German, Italian, Portuguese, Spanish, UK, Hungarian, Turkey Q, and Turkey F, indicating its adaptability to international users. The device also includes a "Store Mode" for offline data collection when out of Bluetooth range, with data stored in buffer memory for later upload.
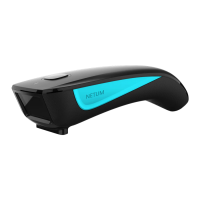
The scanner has a compact design with a scan button on the top for the NetumScan model and a power on/scan button on the side for the Zacoora model. It includes a lanyard eyelet for portability and a USB Type C port for wired connections and charging. A back clip is provided, which can be peeled off and stuck to the back of a remote device for convenient attachment.
The NT033 supports three Bluetooth transmission modes:
The transmission speed can be adjusted to High Speed (AT+HIDDLY=4), *Medium Speed (AT+HIDDLY=10, default), or Low Speed (AT+HIDDLY=25) by scanning the respective barcodes.
When paired with an iOS device, the iOS keyboard can be disabled. To pop out the iOS keyboard, users need to press and hold the scanning button for 4 seconds, then release it. The default setting is "Enable/*Disable".
The scanner supports various keyboard layouts. Users can select their preferred language (e.g., French, German, Italian, Spanish, UK, Hungarian, Turkey Q, Turkey F) by scanning the corresponding barcode. The default is "*America EN keyboard".
For operations outside Bluetooth range, the scanner can be set to "Store Mode". In this mode, all scanned data is stored in the device's buffer memory and saved permanently until manually uploaded to the working station. This allows users to collect data offline and upload it later. The default is "*Normal Mode". Users can also output stored data, output total entry count, or clear the memory using specific barcodes.
The time period before the scanner goes to sleep can be configured. Options include 0 Min-No Sleeping ($RF#ST00), 10 Mins ($RF#ST20), and 30 Mins ($RF#ST60).
The scanner offers options to convert the case of scanned characters:
The beep volume can be adjusted to *High Volume (default), Low Volume, or Mute by scanning the appropriate barcodes.
When enabled, function characters are sent over the keypad. The default is "*Disable Function Key Mapping", but it can be enabled using the "$KEY#M1" barcode.
The manual provides detailed tables outlining LED activity, beep patterns, and indications for different working modes under both wireless and Bluetooth connections. This includes states like "Wake up from sleep Mode", "Successful Scan", "Data transmit failed", "Normal Mode", and "Store Mode".
The scanner can be charged by connecting it to a host device via the provided USB cable or by using a DC plug with an electrical wall outlet. A red light indicates charging, while a green light signifies a full charge.
Users can check the rough battery volume by scanning the "%BAT_VOL#" command barcode.
The firmware version can be displayed by scanning the "$SW#VER" command barcode.
Scanning the "%#IFSNO$B" barcode will restore the scanner to factory settings and power it off.
The manual includes a FAQ section to address common issues:
The scanner can be turned off by pressing the scan button for 10 seconds. It enters sleep mode if unused for 3 minutes (default idle time).
A general quick setup guide is provided, applicable to models E800, E830, E740, E850, and E990. Full user manuals are available for download from the official website: www.netum.net.
| Brand | Netum |
|---|---|
| Model | E800 |
| Category | Barcode Reader |
| Language | English |