5
3 ASSEMBLY OF THE FIREPLACE
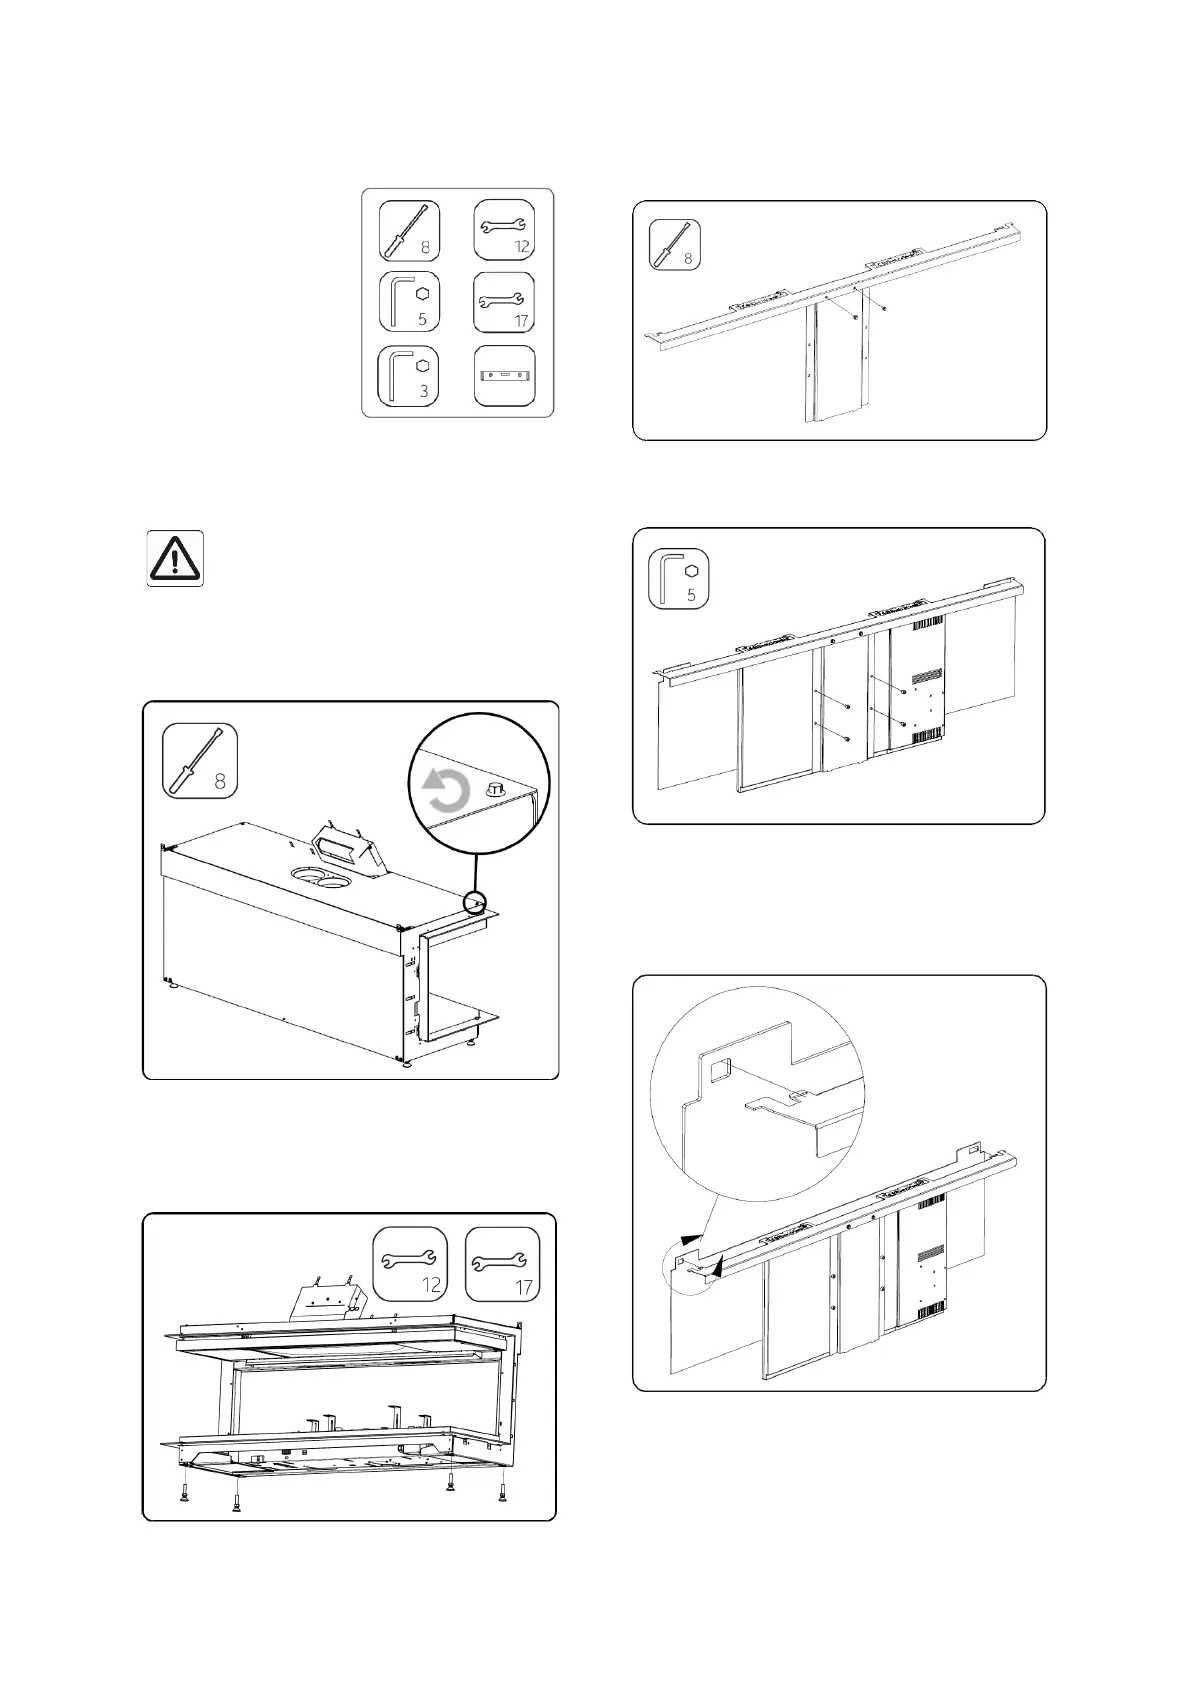
3.1 Required Tools
- 8mm Nut Driver or Socket
- 5mm Allen Wrench
- 3mm Allen Wrench
- 12mm Wrench
- 17mm Wrench
- Level
3.2 Included Hardware
- 4 X Adjustable feet
- 4 X (M6 x 8) Screws
- 2 X (M5 x 10) Screws
Do not use tie wraps to re-fasten cables during
installation.
While assembling the fireplace, place the
fireplace on a piece of cardboard or rug to
protect the floor from damage from metal parts.
3.3 Removal of Covers
Remove the top and rear cover from the fireplace.
3.4 Adjustable Feet
Lift the fireplace straight up to install the adjustable feet. Do
not tip it on its back or sides.
Note: Before installing the feet place the fireplace on a
protected surface such as carboard or a rug.
3.5 Rear Screen Assembly
Install the rear screen bracket to the top LED rear screen
bracket. Use 2 (M5 x 10) screws.
Use 4 (M6x8) screws to attach the rear screen to the
bracket. Remove the protective film from the screen.
Remove the protective film from the rear screen mask. This
is the plexiglass sheet with two tabs at the top. The mask
will hang on the tabs at the top of the rear bracket. The tabs
are different sizes. Align the larger tab with the larger slot
on the mask and the smaller tab with the smaller slot on the
mask.