Do you have a question about the New England Arbors Colonial Privacy Screen and is the answer not in the manual?
Lists and details all included parts for the privacy screen assembly, including part numbers and dimensions.
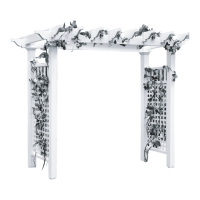
Provides visual illustrations and names for each component of the privacy screen, aiding in identification.
Lists screws, glue, pressure-treated wood posts, and concrete required for proper installation.
Arrange horizontal spindles with vertical ones, then attach horizontal rails to form the screen structure.
Secure the main posts to the assembled horizontal rails using screws for structural integrity.
Slide trim caps onto posts, followed by post caps, applying glue underneath for a secure and finished fit.
Apply glue to decorative end caps and insert them onto the ends of the main beams.
Position the first beam onto the posts, ensuring correct alignment and overhang for stability.
Fasten the mounted beams to the posts using the specified number of screws.
Apply glue around posts below beams and slide post trim caps into place for a finished look.
Excavate two holes of specified dimensions (8” diameter x 24” deep) and spacing (76” apart).
Place pressure-treated wood posts into the vinyl post bottoms and secure them with screws.
Place the assembled screen into the ground holes and ensure it is level both vertically and horizontally.
Use bricks and cement to secure the screen posts and prevent sinking into the ground.
| Brand | New England Arbors |
|---|---|
| Model | Colonial Privacy Screen |
| Category | Outdoor Furnishing |
| Language | English |