Do you have a question about the newell Dymo LabelManager 210D and is the answer not in the manual?
Connect the label maker to a power source using batteries or an AC adapter for operation.
Details on how to insert six AA alkaline batteries into the label maker for power.
Instructions for connecting an optional 9 Volt, 1.5 A power adapter to the label maker.
Guide on how to open the compartment and insert the DYMO D1 tape cassette.
Description of the power button function for turning the device on and off.
Information on the label maker's LCD display, including character limits and feature indicators.
Explanation of how to use navigation keys for editing labels and menu selections.
Details on switching between Arabic, Latin uppercase, and Latin lowercase input modes.
How to use the Shift key for secondary characters or case changes in different input modes.
Function of the NEW key to clear current text and formatting for a new label.
How the Backspace/Cancel key deletes characters or cancels actions.
Function of the Menu key to access Symbols/Clip Art, Format, Memory, and Settings.
How the Cancel key exits menus or cancels actions without making a selection.
Guide on selecting from five available font sizes for label text.
Instructions for toggling between normal and wide font widths.
Details on selecting from six different font styles like Bold, Italic, and Outline.
How to add borders or underline styles to highlight label text.
Instructions for creating labels with up to two lines of text.
Guide on how to align text to be left, right, or centered justified.
How to enable mirror text printing for right-to-left reading.
Instructions for inserting punctuation and special symbols into labels.
How to insert clip art images into your labels.
Using the extended Latin character set with variations via RACE technology.
Instructions for saving up to nine frequently-used labels for later recall.
Guide on how to access and use previously saved labels from memory.
Procedure for cleaning the cutter blade using alcohol and a cotton ball.
Instructions for cleaning the print head using a cleaning tool or contacting support.
Solutions for when the label maker display shows no output.
Troubleshooting steps for improving label print quality.
Information on handling printing issues and error messages.
Solutions for exceeding character or line limits during label creation.
Steps to resolve tape jam errors and ensure proper operation.
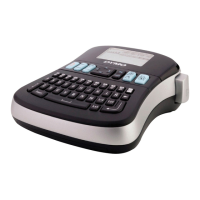
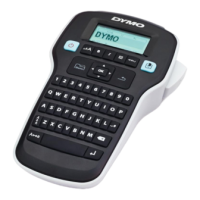
The DYMO LabelManager 210D is an electronic label maker designed for creating a wide variety of high-quality, self-adhesive labels. It offers users flexibility in choosing font sizes and styles, and it utilizes DYMO D1 tape cassettes available in widths of 6 mm, 9 mm, or 12 mm, and a range of colors.
The core function of the LabelManager 210D is to allow users to input text and format it into printable labels. It features a QWERTY keyboard for text entry, an LCD display for previewing labels, and dedicated keys for various formatting and operational functions.
The device can be powered by six high-capacity AA alkaline batteries or an optional 9 Volt, 1.5 A AC power adapter. To conserve power, the label maker automatically turns off after two minutes of inactivity. When first turned on, the device prompts the user to select a language, units of measurement (inches or mm), and the width of the tape cassette currently inserted. These settings remain until changed or the device is reset.
Users can enter up to 99 characters and spaces. The LCD displays approximately 13 characters at a time, with the number varying due to proportional spacing. The device supports three input modes: Arabic, Latin uppercase, and Latin lowercase, toggled using the "Input Mode" key. The "Shift" key allows for entering secondary characters in Arabic mode or toggling between uppercase and lowercase in Latin modes. The "Backspace/Cancel" key deletes characters to the left of the cursor in Latin mode and to the right in Arabic mode, with a long press deleting multiple characters. The "NEW" key clears the current text and formatting, preparing for a new label.
The LabelManager 210D offers extensive formatting options to customize labels:
The label maker supports a wide range of symbols, clip art, and special characters:
While label length normally adjusts to text length, users can set a fixed label length for specific applications, up to 400 mm (15"). If the text cannot fit the chosen fixed length, the device displays a message indicating the smallest possible label length for that text.
The LabelManager 210D includes a memory feature to save and recall up to nine frequently used labels, including their text and all formatting. This allows users to quickly access and reuse common label designs.
The label maker comes with one tape cassette, and additional cassettes can be purchased. To insert a cassette, the tape compartment cover is lifted, the cassette is placed with the label facing up between guideposts, and pressed firmly until it clicks into place. The cover is then closed. A crucial safety note warns users about the extremely sharp cutter blade and advises keeping fingers away from it during cassette replacement.
After entering and formatting text, users press the "Print" button. They can then use navigation keys to select the number of copies before pressing "OK" to initiate printing. Finally, the cutter button is pressed to cut the label.
The "Menu" key provides access to four tabs: Symbols/Clip Art, Format, Memory, and Settings. Repeatedly pressing "Menu" cycles through these tabs. Within menus, all four navigation keys are used to move through selections, and "OK" is pressed to confirm a choice. The "Cancel" key exits a menu without making a selection or cancels an action like printing.
The DYMO LabelManager 210D is designed for long, trouble-free service with minimal maintenance. Regular cleaning helps ensure proper operation.
The cutter blade should be cleaned each time the tape cassette is replaced. To do this, the tape cassette is removed, and the cutter button is pressed and held to expose the blade. A cotton ball with alcohol is then used to clean both sides of the blade. Again, a warning emphasizes the sharpness of the blade and the need to avoid direct contact.
To clean the print head, the tape cassette is removed. A cleaning tool, typically found inside the label compartment cover, is used. If a cleaning tool is not available, users are advised to contact DYMO Customer Care. The padded side of the tool is gently wiped across the print head.
To prevent battery leakage and damage, batteries should be removed if the label maker will not be used for a long period. When using the optional AC power adapter, it's important to ensure the label maker is turned off before disconnecting the adapter from the main power source, as disconnecting it while on may result in the loss of recent memory settings.
The manual provides a troubleshooting guide for common issues such as "No display," "Poor Print Quality," "Poor Cutter Performance," "Too many characters," "Too many lines," "Batteries almost discharged," and "Tape Jam." Solutions include checking power, replacing batteries, adjusting contrast, ensuring proper tape cassette installation, cleaning the print head or cutter blade, deleting text, inserting a wider tape cassette, or removing jammed labels. For further assistance, DYMO Customer Support contact information is provided.
| Display | LCD |
|---|---|
| Keyboard | QWERTY |
| Printing Technology | Thermal transfer |
| Maximum Print Height | 9mm |
| Resolution | 180 dpi |
| Cutter | Manual |
| Print Speed | 12mm/sec |
| Power Source | Batteries or AC adapter |
| Tape Width | Up to 12mm |
| Power | 6 AA batteries or optional AC adapter |
| Memory | 9-label memory |
| Label Width | 12 mm |
| Label Material | Plastic |
| Tape Type | D1 |