6
INSTALLATION ON THE BURNER PLATE - COMBINATIONS
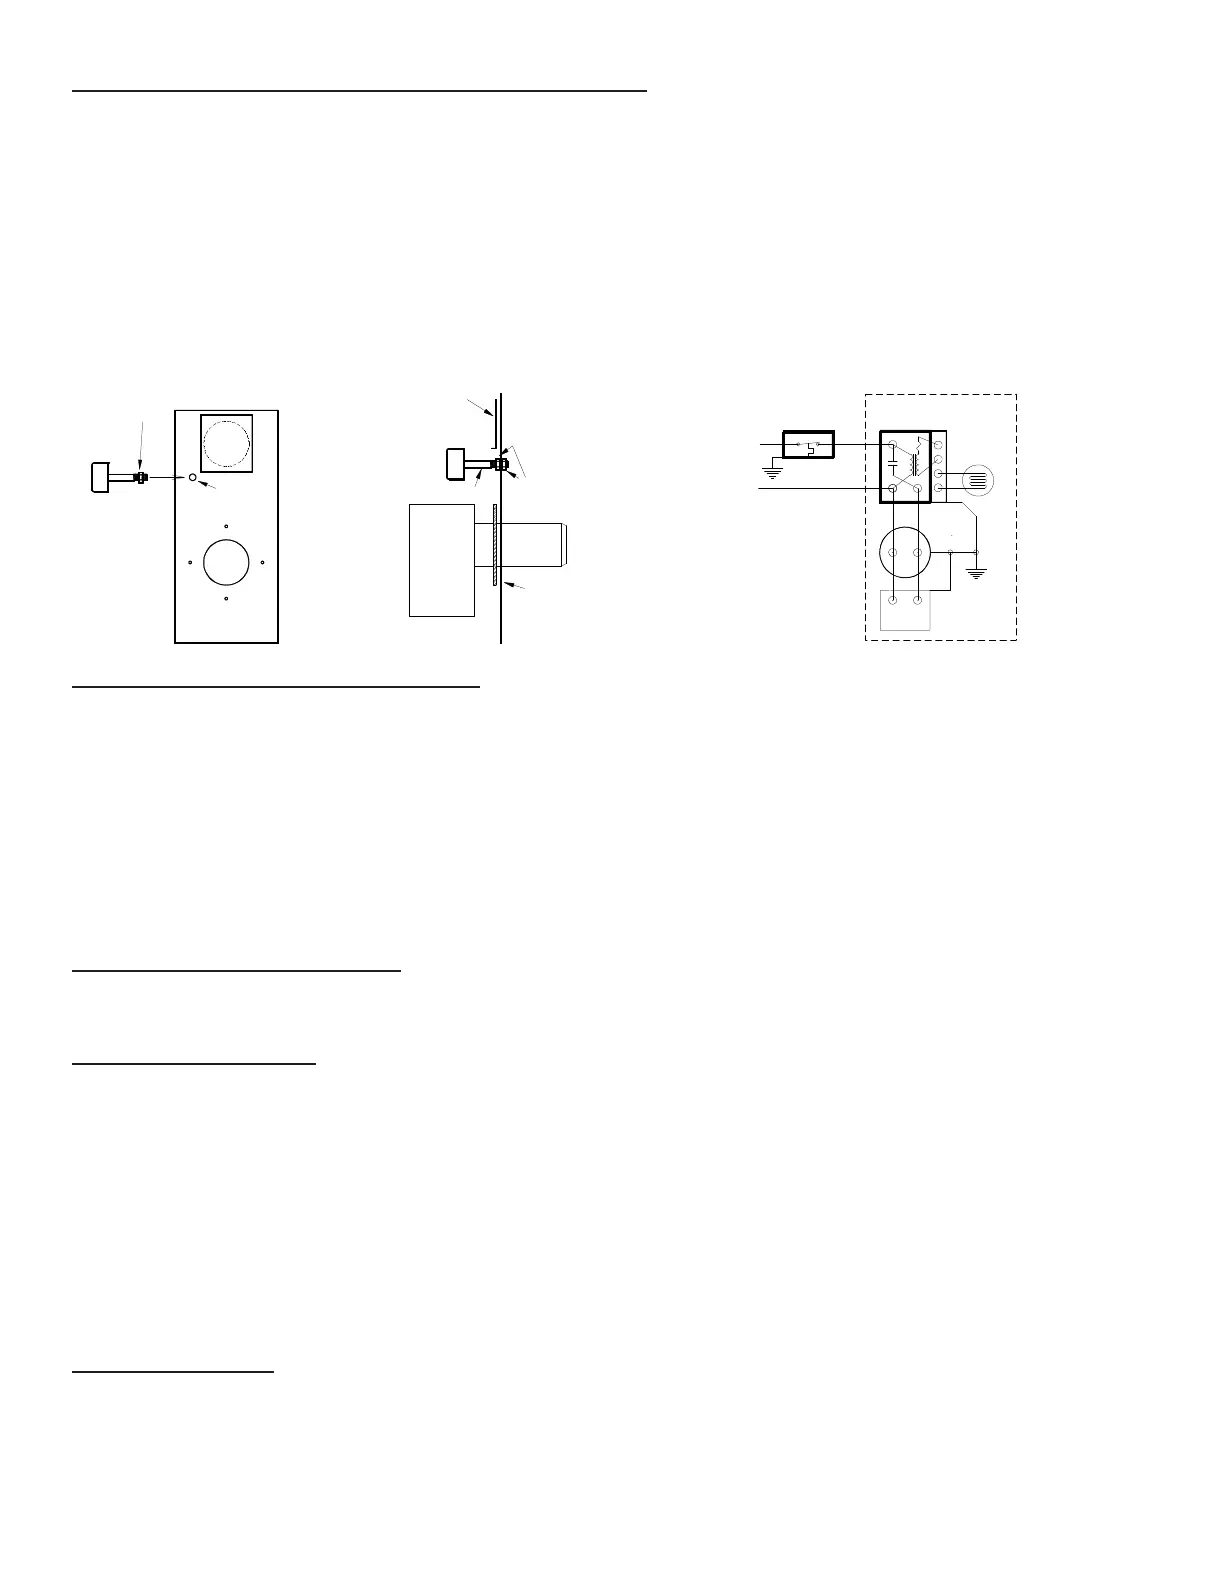
1. Remove the 5/8” diameter plug in the burner plate. Cut or le a hole in the rigid breglass insulation, behind
the 5/8” hole in the burner plate, large enough that the WMO-1 securing nut will seat against the back of the
burner plate. Remove one of the securing nuts from the tube of the WMO-1 assembly. Tighten the remaining
nut onto the tube as far as possible.
2. With the WMO-1 assembly outside the burner plate, insert the threaded tube end into the 5/8” diameter
hole in the burner plate, re-install the rst securing nut onto the tube on the inside of the burner plate. Tighten
securely.
CAUTION: Disconnect the electrical power supply before wiring the WMO-1 assembly.
3. Using suitable AC90 exible (BX) conduit or equivalent, wire the WMO-1 switch in series with the appliance
limit circuit. Connect at the burner junction box.
4. Check the operation of the WMO-1 switch before leaving the appliance. The WMO-1 switch is reset by
pushing the square red button.
WMO-1 BLOCKED VENT SWITCH CHECK
Note: take appropriate precautions - this test can produce soot, smoke and fumes. The appliance should not be
left unattended during the test.
1. With the appliance shut down, block the vent pipe at the downstream (chimney) side of the barometric
damper.
2. Start the appliance.
3. The WMO-1 switch should stop the oil burner in less than 10 minutes.
4. After the test, turn off the appliance and let it cool.
5. Remove the blockage from the vent pipe.
6. Reset the WMO-1 switch by pushing in the square red button until it clicks.
7. Ensure that the appliance is in a safe condition.
MAINTENANCE AND CLEANING
The WMO-1 switch assembly should be checked and cleaned at least once a year and after any time the switch
has shut off the burner.
CLEANING PROCEDURE
1. Switch off the electrical power to the appliance.
2. Remove the WMO-1 cover.
3. Remove the two mounting screws for the thermodisc temperature sensor.
4. Carefully pull the sensor to one side.
5. Using a suitable soft brush or cloth carefully clean any soot from the surface of the sensor and the inside of
the 5/8” diameter tube.
6. Replace the sensor and secure with its mounting screws.
7. Check that the wiring is in good condition and secure.
8. Check that the 5/8” diameter tube and its securing nuts are tight.
9. Replace the cover and tighten the mounting screws.
10. Check the operation of the WMO-1 switch as described above.
TROUBLESHOOTING
If for any reason the WMO-1 switch shuts the appliance down during operation, the cause of the shut down
should be investigated and corrected before resetting the switch and restarting the appliance. The blockage
switch is reset by pushing the square red button until it clicks.
Securing Nut
5/8" hole
WMO-1
Burner Plate
Viewport
Securing Nuts
WMO-1
Burner Plate
Burner
View Port
Tube Horizontal
Cad
Cell
T
T
F
F
Limit
Motor
Ignition
WMO-1
Primary Control
Connect WMO-1 at
appliance junction box
CL series combination furnaces:
Connect WMO-1 at the burner
control junction box
(except CL series)
Burner
N
Figure 6A Figure 6B Figure 6C