Pyrocam IV Operator’s Manual Document No. 50337-001 Rev F 2/21/2017 Page 39
Spiricon will also provide you with a pair of files that contain these tables upon request.
These files form a backup source in case you accidentally load a bad gain correction
table into your Pyrocam. They can be a source of the original valid table to restore to the
Flash memory. The backup files are named:
~<serial_number>.py4gcc (for chopped mode)
~<serial_number>.py4gcp (for pulsed mode)
Where <serial_number> is the 5 digit serial number of the applicable Pyrocam and the ~
symbol indicates that these files are write protected to prevent accidental deletion or
corruption.
Gain Correction Procedure
Before beginning a gain correction process, setup the Pyrocam to operate and provide a
reasonably bright and uniform source of illumination. By “reasonably bright” we
recommend a source that can drive the output intensity to at least 20% of its dynamic
range with the gain set to a low setting. Don’t forget to Calibrate/Ultracal the Pyrocam.
Open Utilities
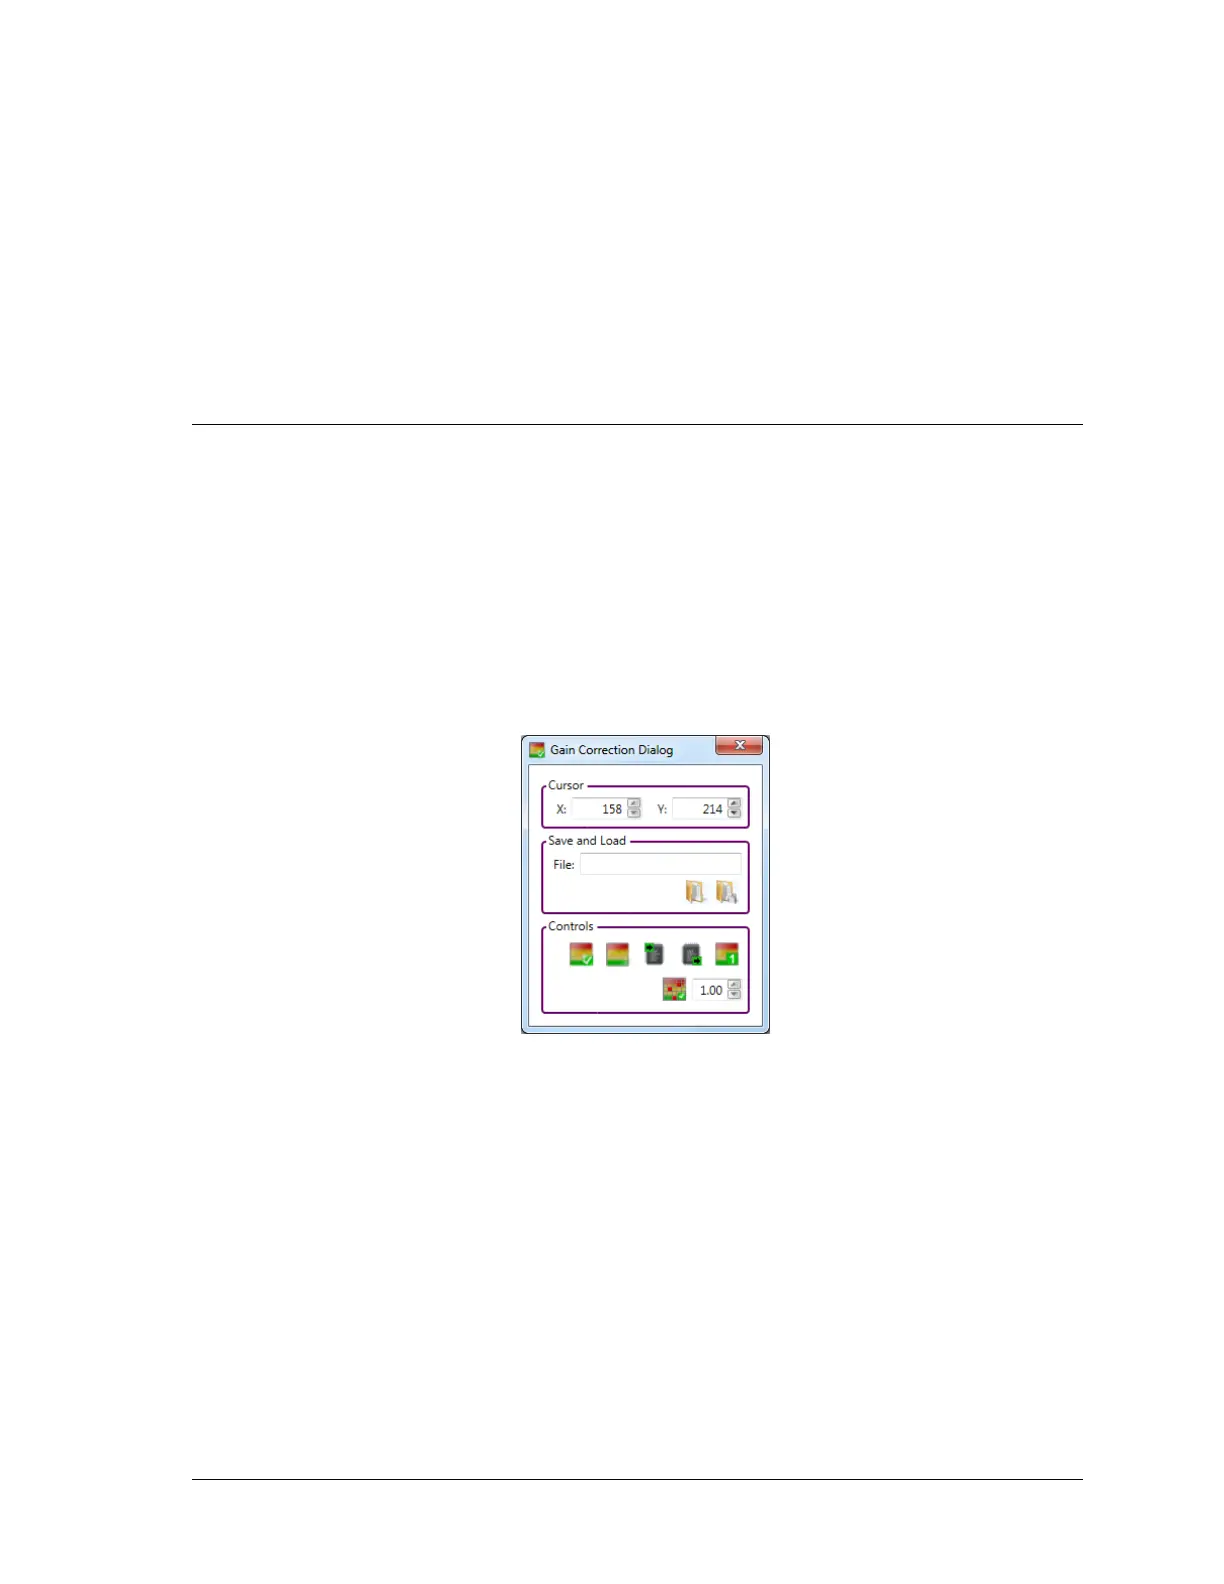
With the Pyrocam operating as described above, click on the Gain Correction
expansion button to access the gain correction tools as shown below.
Doing this will cause the following events to occur:
The Gain Correction Dialog window will open.
A live image will appear in the 2D BeamGage display window.
A previously loaded gain correction table (if any) will download from the
Pyrocam.
Step by Step
STEP 1. Verify that the displayed image is uniformly illuminating the detector array.
Then click on the Create Gain Table button.
STEP 2. It can take a few seconds to compute the entire gain correction table, longer
if using a very slow trigger rate to the Pyrocam. The lower status bar will
indicate when the process in completed.
 Loading...