Do you have a question about the Newport INFINITY INFCR and is the answer not in the manual?
This manual shows you how to set up and use the Programmable Digital RTD Meter.
Lists essential steps for operating the RTD meter.
Lists advanced or alternative methods for meter configuration and operation.
Informs about the risk of electric shock.
Highlights circumstances affecting meter functionality and requiring document reference.
Instructions for verifying received equipment and reporting damage.
Important information regarding safety and electromagnetic compatibility (EMC).
Guidelines for managing electromagnetic interference.
Overview of the RTD meter's capabilities as an indicator/controller.
Lists the basic functionalities of the RTD meter.
Lists features available at the time of purchase.
Lists optional accessories and add-ons for the meter.
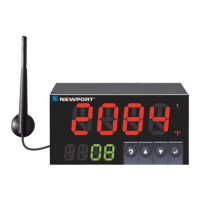
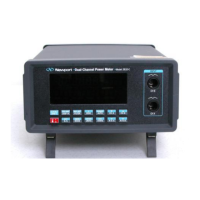
Explains the components and indicators on the meter's front panel.
Describes the functions of the SETPTS, ▲/MAX, and ►/DEV buttons.
Explains how to enter configuration mode and store changes.
Details the reset functions in run and configuration modes.
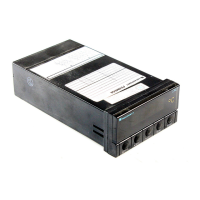
Illustrates and describes the connector labels on the rear of the meter.
Outlines reasons and steps for opening the meter.
Instructions and diagrams for configuring main board power jumpers.
Provides instructions and dimensions for mounting the meter in a panel.
Details how to connect RTD sensors using 2, 3, or 4-wire configurations.
Instructions for connecting AC and DC main power with safety warnings.
Guides for connecting analog voltage, current, and relay outputs.
Steps to select the appropriate input signal type for the RTD meter.
Instructions for selecting the display decimal point position.
Steps to determine if the meter displays temperature in Fahrenheit or Celsius.
Guides to configure Setpoint 1 active band and operation mode (latched/unlatched).
Guides to configure Setpoint 2 active band and operation mode (latched/unlatched).
Steps to set the deadband (hysteresis) for Setpoint 1.
Steps to set the deadband (hysteresis) for Setpoint 2.
Explains how to enable/disable analog output and select its type.
Steps to choose between voltage and current analog output.
Guides to select analog output as retransmission or proportional control.
Details how proportional control eliminates cycling and defines the proportional band.
Explains manual reset for offsetting errors between display and setpoint 1.
Guides for scaling analog output to match display or engineering units.
Covers enabling/disabling setpoint changes and the RESET button.
Instructions for calibrating RTD offset errors.
Explains how to tune the proportional controller for optimal performance.
Lists and describes various messages displayed by the RTD meter.
Summarizes menu items for input type, decimal point, and reading configuration.
Describes front panel display options for input, decimal point, and setpoint configurations.
Explains displays shown in run mode, including PEAK, SP.RS, and DEV.
Lists display options for Setpoint 1 and Setpoint 2 configuration.
Details specifications for signal input, including isolation, noise rejection, and protection.
Specifies analog-to-digital conversion parameters like technique, resolution, and read rate.
Specifies signal type, level, function, linearity, and load regulation for analog output.
Details voltage, frequency, power, and fuse requirements for the meter.
Lists operating and storage temperature, and humidity specifications.
Specifies panel cutout dimensions, weight, and case material.
Specifies current and voltage ratings for alarm outputs.
Details specifications for isolated analog output, similar to non-isolated versions.
Provides detailed mechanical dimensions for panel mounting and overall size.
Lists the default factory preset values for various menu items.
Provides instructions for warranty and repair requests, including obtaining an AR number.
| Type | Optical Power Meter |
|---|---|
| Display | LCD |
| Connectivity | USB |
| Measurement Range | 100 pW to 2 W |
| Detector Type | Silicon |
| Output | Analog |
| Power Supply | Battery |
| Storage Temperature | -20°C to 70°C |