4
Configuring The Meter
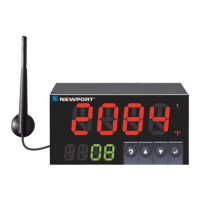
4.3 READING CONFIGURATION ("RD.CF")
To determine if your meter shows in ¡F (Fahrenheit) or ¡C (Celsius).
1. Press the MENU button until the meter shows "RD.CF" .
2. Press the
©
/DEV button. The meter shows one of the following:
* "R.1=F" (¡F)
* "R.1=C" (¡C)
3. Press the
/MAX button to toggle between choices.
4. Press the MENU button to store your selection. The meter momentarily shows "STRD",
followed by "S1.CF" (Setpoint 1 Configuration).
4.4 SETPOINT 1 CONFIGURATION (S1.CF)
Setpoint 1 is not active unless your meter has dual relay output capabilities. The LED's will
display whether the (S1.CF) is active or not. You may use Setpoint 1 Configuration (S1.CF) for
the following:
* To set the setpoint's active band above or below your chosen value
* To select whether the setpoint operation is latched or unlatched
1. Press the MENU button until the meter shows "S1.CF".
2. Press the
©
/DEV button. The meter shows one of the following:
* "S.1=A" (Active above the setpoint)
* "S.1=B" (Active below the setpoint)
3. Press the
/MAX button to toggle between choices.
4. Press the
©
/DEV button again. The meter shows one of the following:
* "S.2=L" Setpoint 1 to be latched
* "S.2=U" Setpoint 1 to be unlatched
5. Press the
/MAX button to toggle between choices.
6. Press the MENU button to store your choices. The meter momentarily shows "STRD",
followed by "S2.CF" (Setpoint 2 Configuration).
20
 Loading...