22 23
3
DESIGN OF TRINO ZOOM STEREO MICROSCOPE
3
DESIGN OF TRINO ZOOM STEREO MICROSCOPE
4
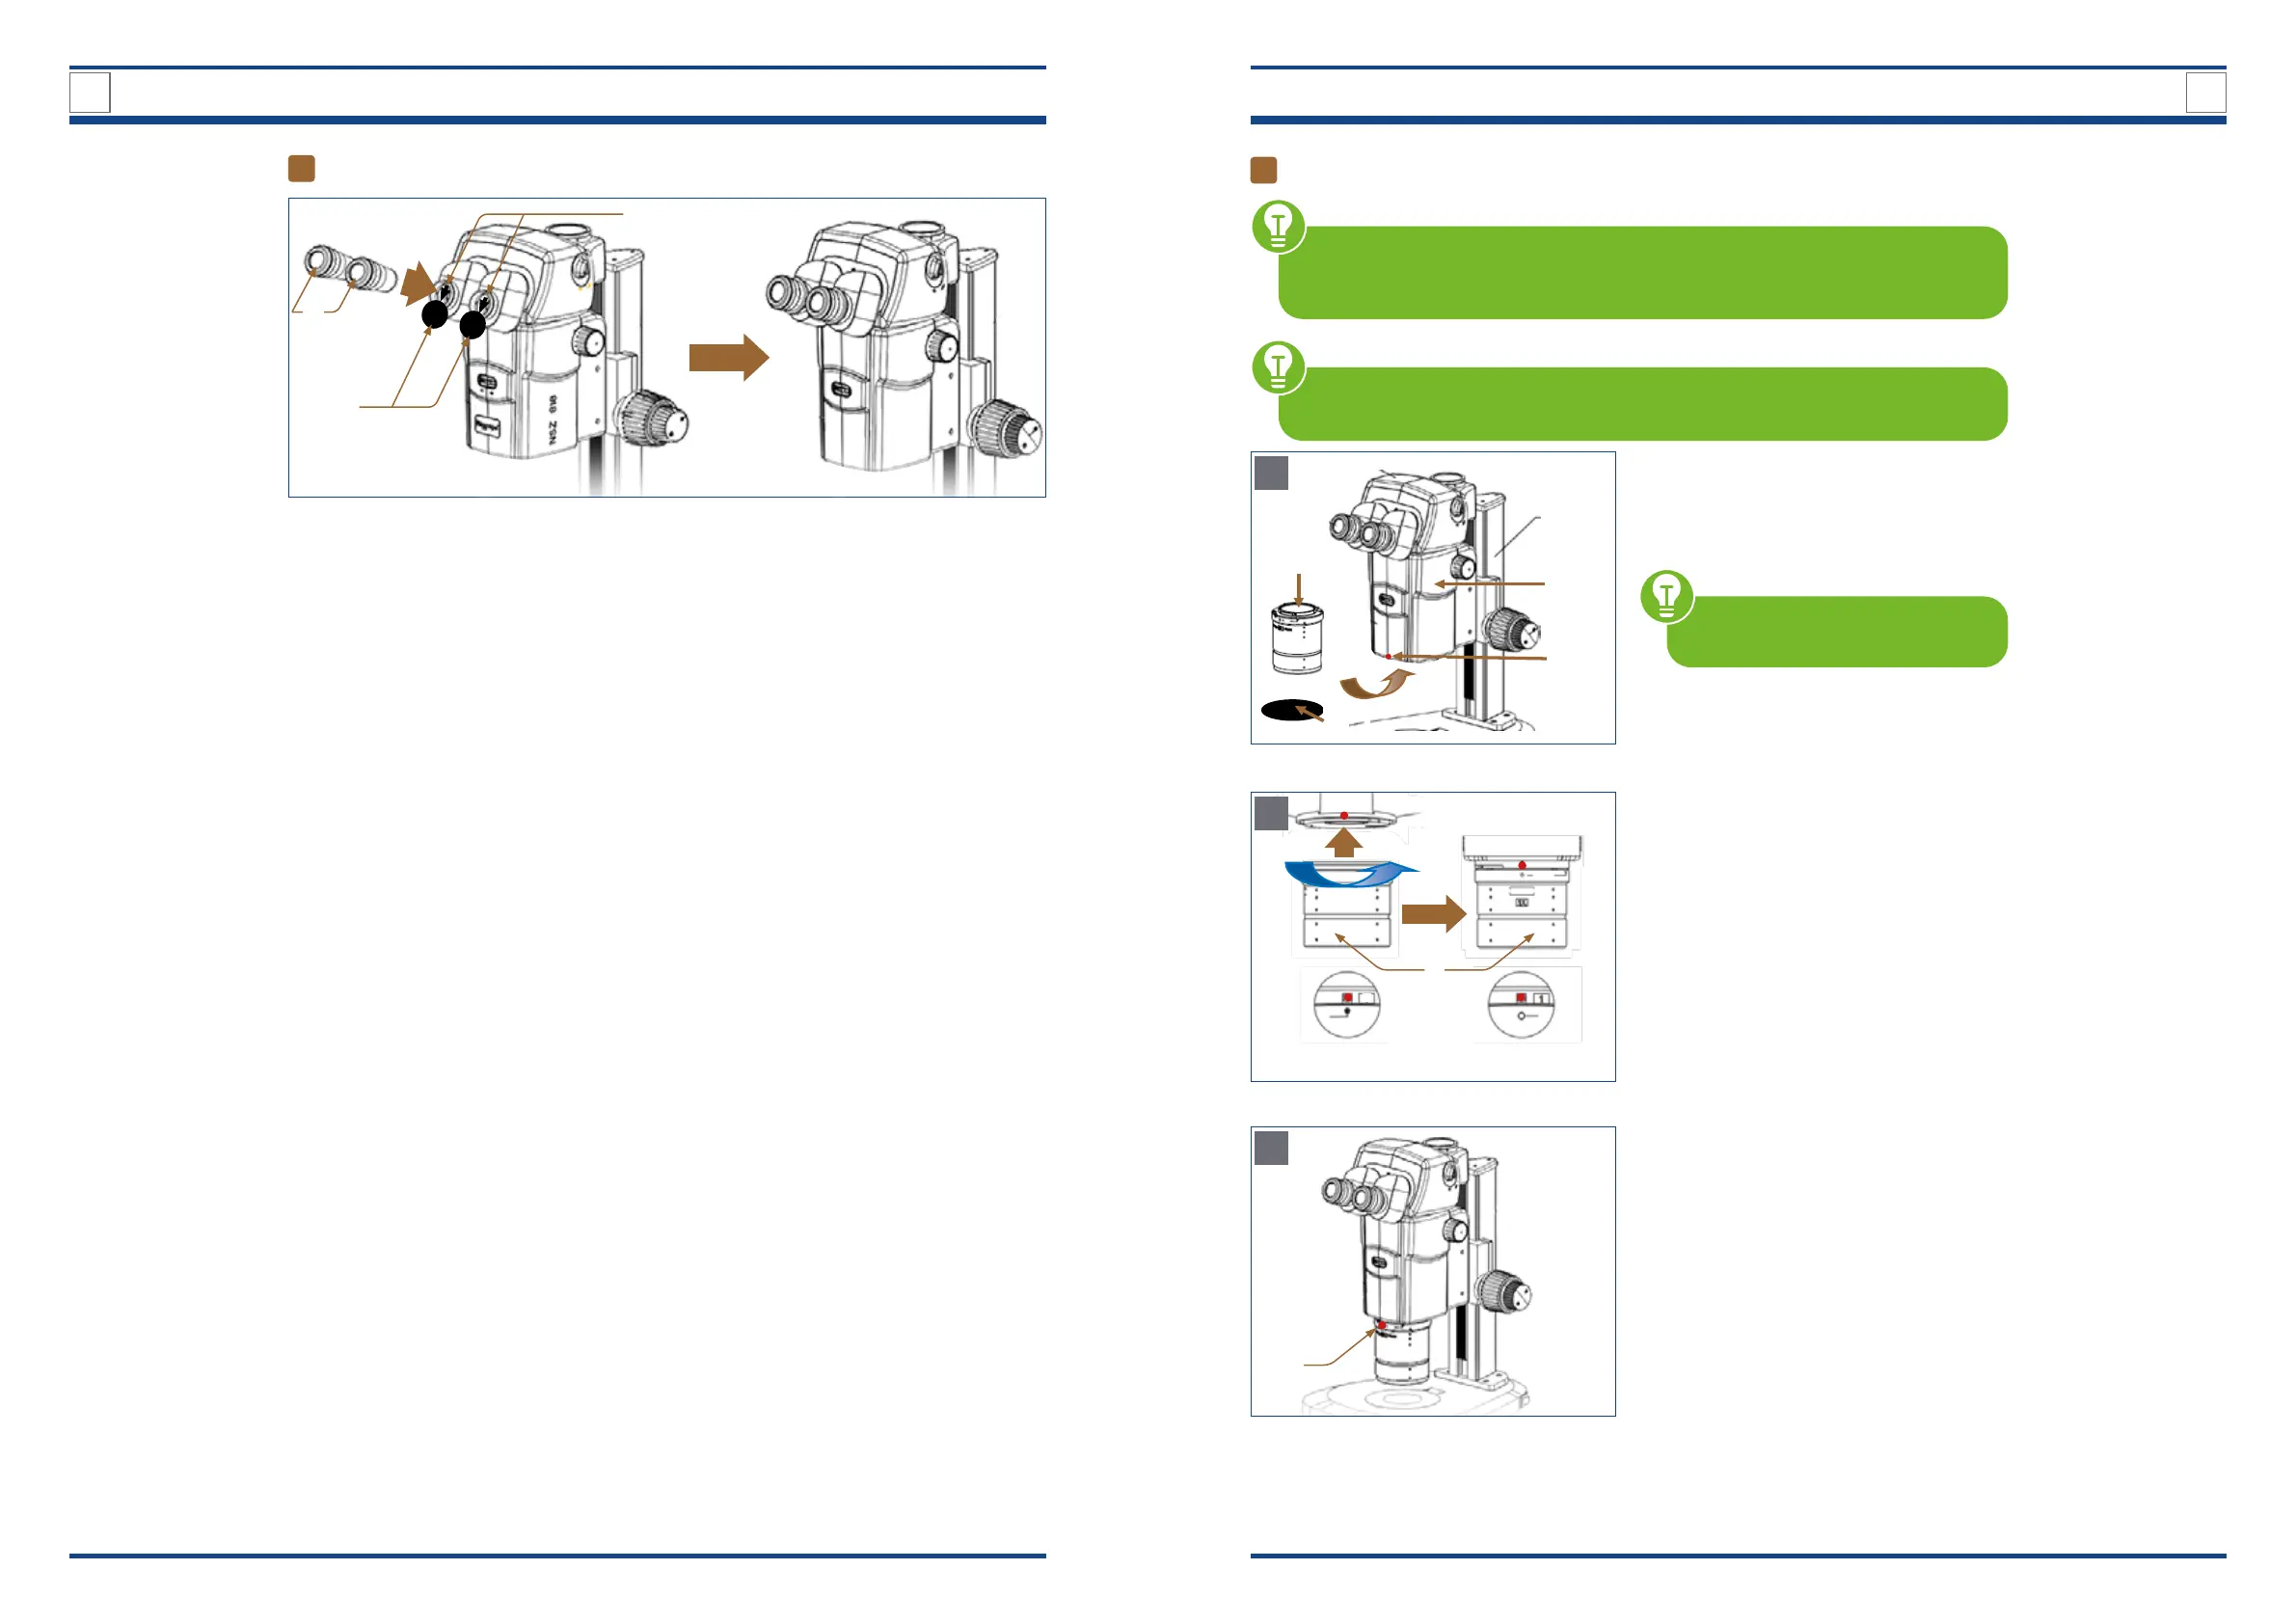
Inserting the eyepieces
IIllustration 007: Inserting the eyepieces.
II
I
III
Remove the black protective caps (I)
from the eyepiece sleeves (II).
Press eyepieces (III) gently into the eye-
piece sleeves.
5
Attaching the plan Apo 1x objective
HANDLE THE 1X OBJECTIVE WITH CARE
The objective is very heavy. Therefore, make sure that you hold it with both
hands when you tighten or loosen the objective holding screw.
BEFORE EACH USE, check the front lens of the objective for dirt. A contamina-
tion will degree the microscope images. Therefore clean the objective regularly.
Illustration A: Loosen the objective holding screw on the zoom
unit.
If present, remove the protective cap (I)
from the 1x objective lens (II).
Completely loosen the objective holding
screw (III) on the lower front of the zoom
unit (IV).
USE the supplied hexagonal
screwdriver.
B
II
Start position
a
End position
b
Illustration B: Aligning the objective with the zoom unit.
Insert the 1x objective (II) loosely into the
xture without pushing it upwards.
Align the mark on the top of the objective
according to the starting position a.
Rotate the objective in the direction of
the arrow until the mark on top of the
objective aligns exactly according to the
end position b.
C
III
Illustration xx C: Fixing the objective and the zoom unit.
After the 1x objective is properly seated
and aligned with the zoom unit, tighten
the objective holding screw (III).
B