26 27
4
QUICK GUIDE
4
QUICK GUIDE
2
Placing the specimen on the glass plate
Illustration xx: Placing the specimen on the glass plate.
1
Place the sample vessel with the sample
to be examined (1) on the glass plate (2)
of the stand base (3).
3
Switching on the lighting and brightness control
Illustration xx: Adjusting the brightness.
1
This microscope has an illumi-
nation unit with a permanently in-
stalled LED light source.
To adjust the brightness, proceed as fol-
lows:
Turn the brightness control knob (1) in
the direction of the arrow the light in-
tensity increases and vice versa.
1
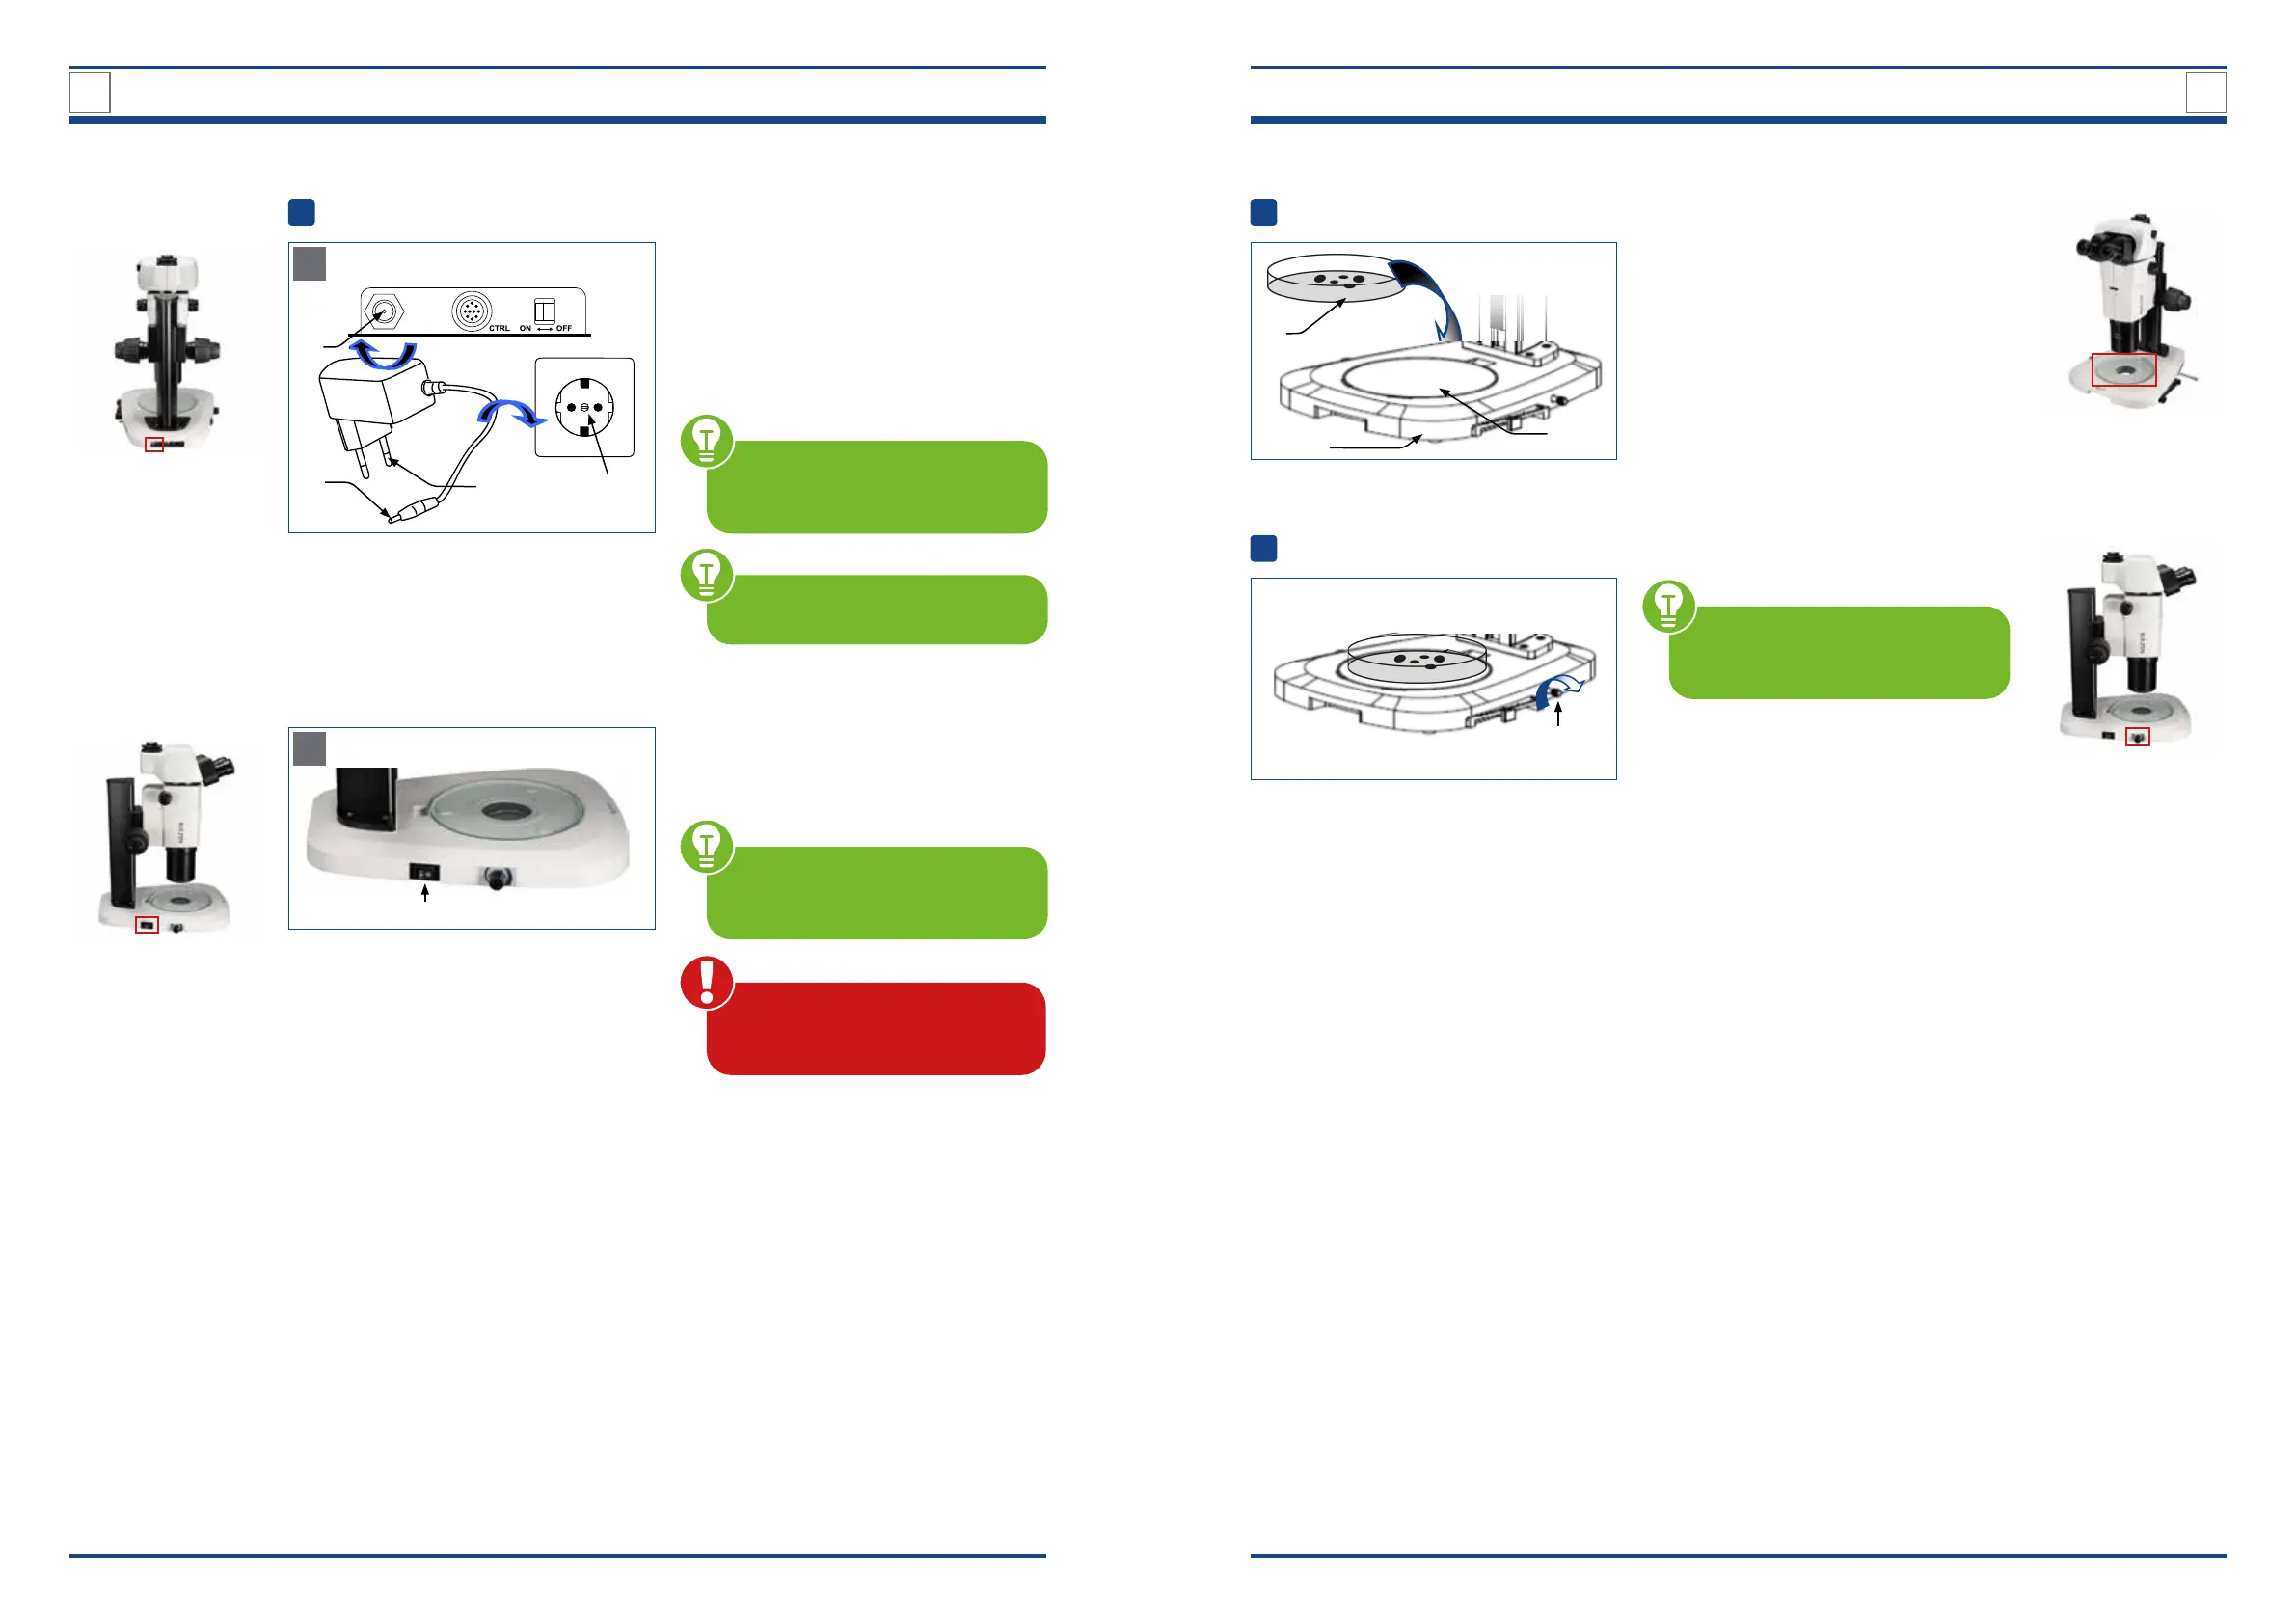
Setting up the power supply and start-up
Illustration xx: Setting up power supply.
A
3
1
4
2
Setting up the power supply
Connect the AC adapter (1) of the power
supply to the AC adapter input terminal
(2) on the back of the microscope.
Insert the main power plug (3) into the
power socket (4).
MAKE SURE the supplied voltage
matches the instrument specica-
tions: DC 12 V; 2 A.
4.2. Detailed description of the Quick Guide steps
B
Illustration xx: Starting up the microscope.
5
Start-up
Move the main power switch (5) to
position I (ON) to turn on the device.
MAKE SURE that the main power
switch ON/OFF is set to O (OFF) be-
fore connecting the power plug.
Cables and cords are vulner-
able when bent or twisted. Never
subject them to excessive force.
The unit may only be operated
with the mains adapter supplied.
3
2