25
Video Instruction: bit.ly/nlrbuild
PARTS:
• • NIL
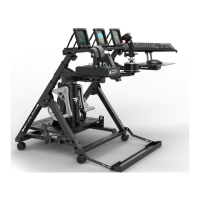
40
Uninstall the 2 x M8 Bolts. Loosen the through Bolt securing the Pre-Assembled HOTAS Plate to the HOTAS Swivel
Bracket. Adjust the HOTAS Plate to the desired height, install Bolts previously uninstalled and tighten to secure.
PARTS:
• • NIL
41
Loosen the Ratchet Handles securing the HOTAS Swivel Bracket to the HOTAS Mounting Bracket and loosen the Bolts
securing the HOTAS Plate Assembly to the HOTAS Swivel Bracket. Adjust to the desired angle and tighten to secure.
PARTS:
• • 1 x Keyboard Angle Bracket
• • 2 x M6 16mm Sockethead Bolt
• • 2 x M6 Washers
• • 2 x M6 Flange Nuts
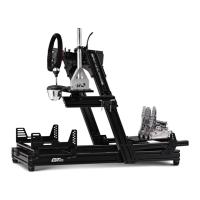
42
Align the curved slots on the Keyboard Angle Bracket with the mounting holes on the Mouse Plate.
Bolt through and secure with 2 x M6 Bolts, Washers and Flange Nuts.
KEYBOARD PLATE INSTALLATION
HOTAS CENTRE POLE HEIGHT ADJUSTMENT
A) B)
HOTAS CENTRE POLE ANGLE ADJUSTMENT