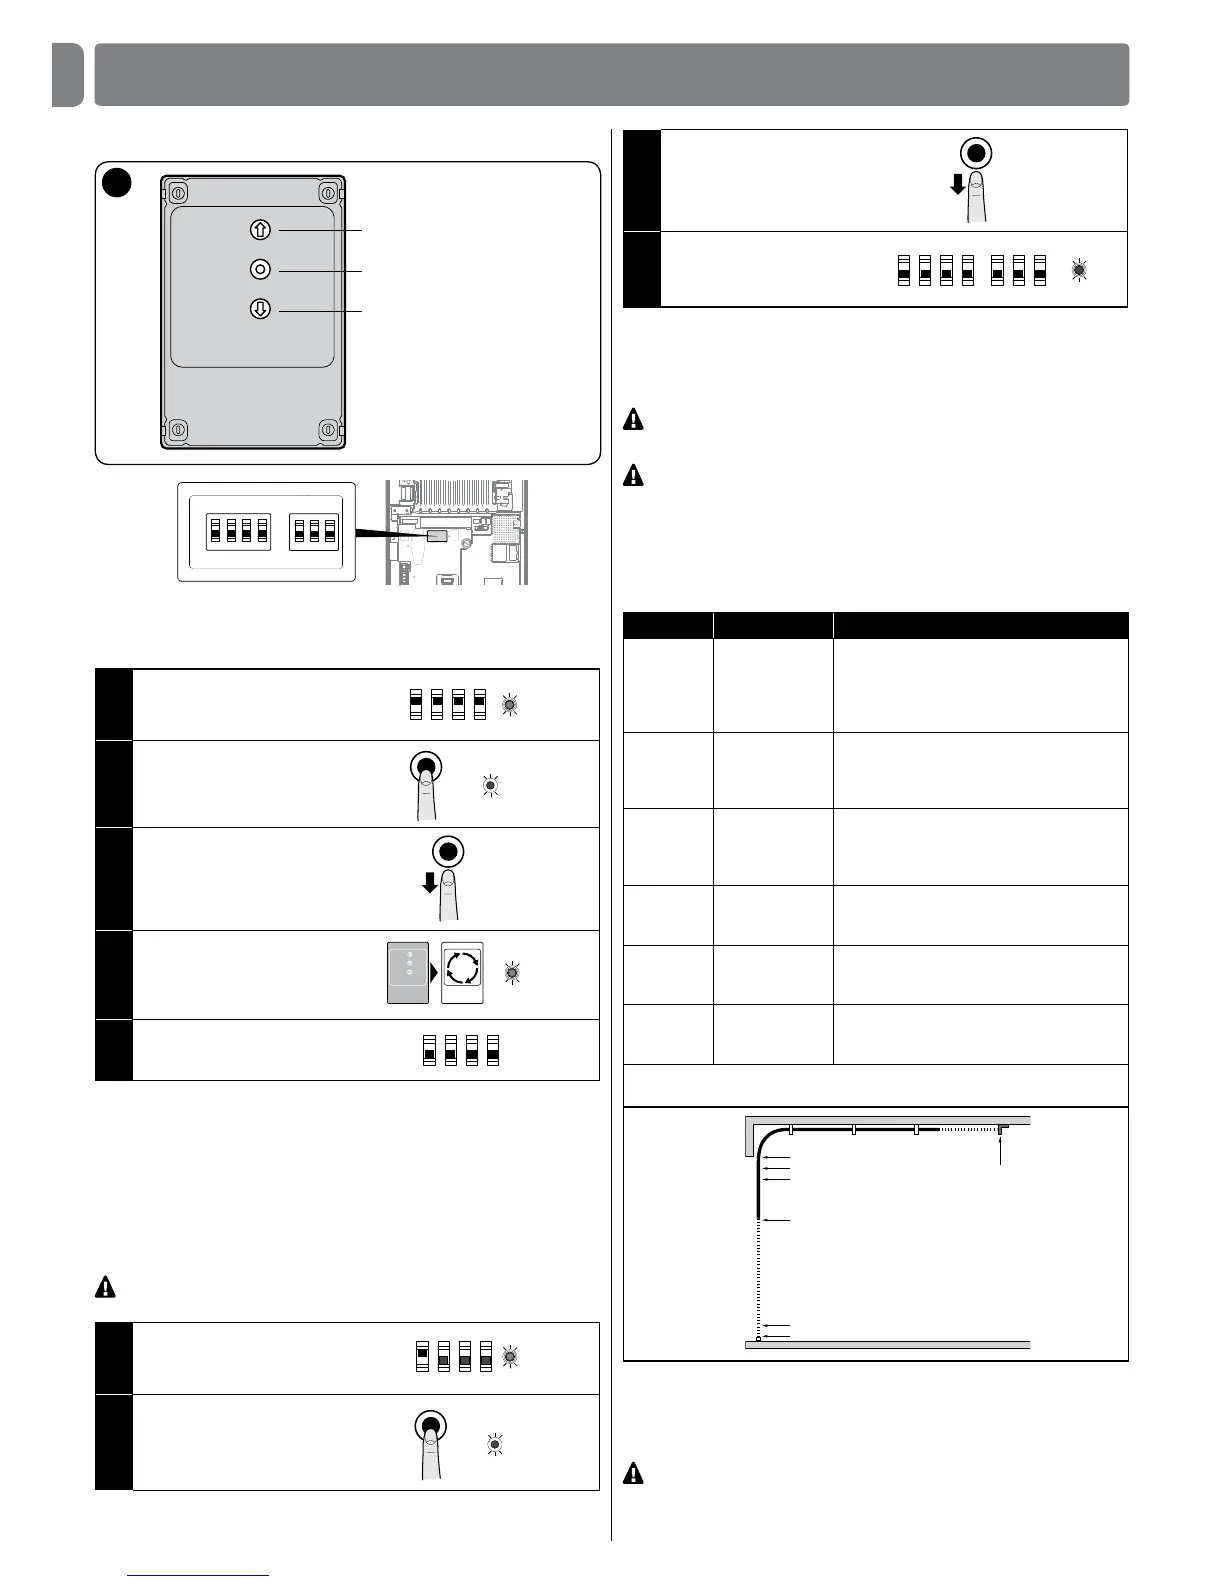
4.3 - Learning about the safety devices and DIP SWITCH pro-
gramming
After switching on for the rst time (paragraph 3.7) and before setting the door
Opening and Closing positions, the control unit must recognize the:
- safety devices connected to the “STOP Safety Edge” input
- photocell connection in standard or phototest mode
- settings of dip switches A and B.
NOTE: when dip switch A or B is modied, the OK led ashes alternatively
green and red to highlight that the device learning phase must be carried out
again.
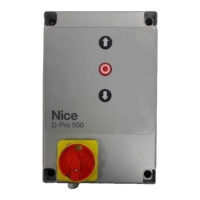
CAUTION! - During the learning phase, at least one safety device
must be connected to the control unit.
01. Set dip switch A-1 to
ON = the led ashes
quickly with green light
ON
OFF
1 2 3 4
A
02. Keep the STOP button
pressed for 3 seconds
until the led is on with
xed red light (after
about 3 seconds)
3”
4
PROGRAMMING
03. Release the STOP
button
04. Set all dip switches to
OFF = the green led
ashes slowly or as per
previous programming
OFF
1 2 3 4
A
1 2 3
B
This procedure must be repeated when a change to the “STOP Safety Edge”
terminal (e.g. after connecting a device to the control unit) or the phototest
connection or dip switches A or B is made.
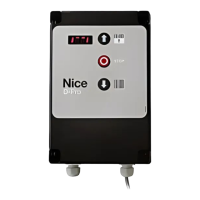
After learning about the safety devices in the automation, the control unit must
recognize the door Opening and Closing positions.
CAUTION! - The procedures to learn about the safety devices and the
door Opening and Closing positions must be carried out one after the other
and without interruptions. They cannot be performed at different times.
CAUTION! - Procedure for motors with incremental encoders: after per-
forming the Opening and Closing position learning procedure, the control unit
must perform a self-learning procedure of the forces (5 cycles of complete
manoeuvres, the door stops in the Closing position).
4.4 - Learning the Opening and Closing positions with an
incremental encoder
3 positions can be programmed, as described below:
Position Action Meaning
0 Close Maximum closing value. When the door
reaches this position, it stops; this match-
es the mechanical stop (generally the oor).
It can be programmed with the electronic
board or Oview programmer.
1 Opening
stop
Door maximum opening position, correspond-
ing to the opening mechanical stops (M in the
picture below). The opening value must be
smaller than this point.
A Open
Door stop desired position during opening
(does not match the opening mechanical
stops).
It can be programmed with the elec-
tronic board or Oview programmer.
B Partial
opening
Door stop desired position during
partial
opening. It can be programmed with the
electronic board or Oview programmer.
RA Slow down
Open
Door desired position for
slow down start
during opening. It can be programmed only
with the Oview programmer.
RB Slow down
Close
Door desired position for
slow down start
during closing. It can be programmed only
with the Oview programmer.
Note: positions B, RA and RB are calculated automatically by the control
unit; to change them, the Oview programmer must be used (accessory).
1
A
M
RA
B
RC
0
These manoeuvres are carried out at low speed. If the door is in the closing po-
sition, it must be positioned manually at about 50 cm from the ground, using the
emergency system (see the motor instruction manual) in order to prevent, if the
rotation is reversed, the track ropes from coming out of their housing (sectional
doors) or the excessive winding of the shutters (rolling shutters).
Important - Unlocking with Nice SUMO motor: when the SUMO mo-
tor is unlocked, if the DPRO924 control unit is on, it stores the command. To
synchronize the encoder position again, closing as far as the maximum closing
position must be performed. The opening manoeuvre must be carried out in