English – 10
English
... Step 10 Step 11 ...
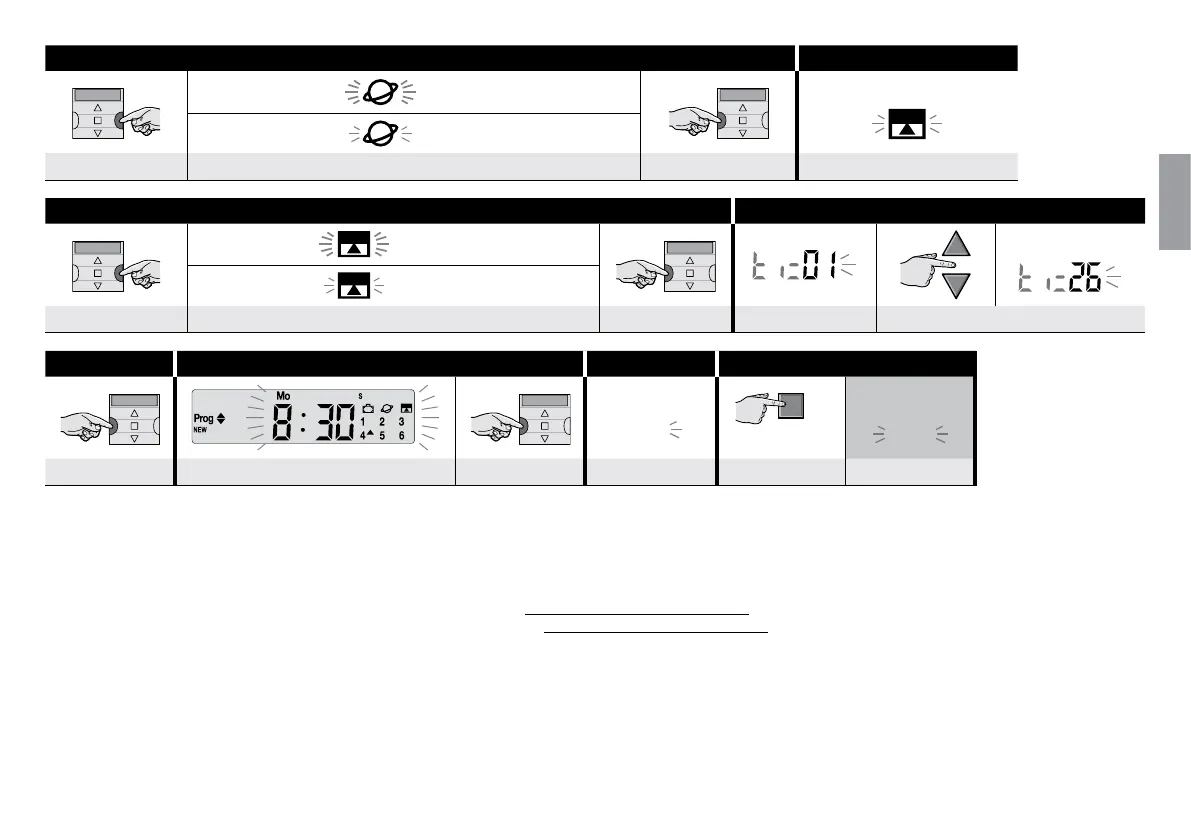
• fast ashing = function selected
(4)
slow ashing
• slow ashing = function deselected
several times ...... ....... to select / deselect the function conrm PARTIAL MANOEUVRE
... Step 11 Step 12
(5)
...
• fast ashing = function selected
example:
• slow ashing = function deselected
several times ...... ....... to select / deselect the function conrm TIME Part. Man.
(6)
select the TIME Part. Man.
(7)
... Step 12 Step 13 Step 14 Step 15 - end
Prog
NEWU
main
screen
Auto
conrm
(8)
(display = set values) conrm
(9)
(display) several times ... (display)
NOTES:
(1) - The following days are available: Su = Sunday; Mo = Monday; Tu = Tuesday; We = Wednesday; Th = Thursday; Fr = Friday; Sa = Saturday. To add other DAYS to the
first one, repeat Step 7 for each day you wish to add.
(2) - To add other GROUPS to the first one, repeat Step 8 for each group you wish to add.
(3) - Caution! – if you wish to activate the special “on vacation” function you need to set its parameters first, using Procedure 4.
(4) - Caution! – if you wish to activate the special “planetary time” function you need to set its parameters first, using Procedure 5.
(5) - The system only displays Step 12 if you have enabled the special “partial manoeuvre” function in Step 11.
(6) - Time of the Partial Manoeuvre.
(7) - Set the (required) time between sending the manoeuvre and the time when the automated system blocks the movement of the shutter or awning so as to obtain their
partial opening/closing.
(8) - If, when you press “ok”, the system flashes “Err1”, this means that the memory is full (100 events already memorized) and the new event cannot be memorized.
(9) - When you press “ok”, the system memorizes the new event and “NEW” starts flashing again on the display (Step 14) to show that the transmitter is ready for you to
programme a new event. To program a new event, repeat Procedure 6 from Step 4 onwards, otherwise, to quit programming mode and return to the main screen,
execute Step 15.