English – 12
English
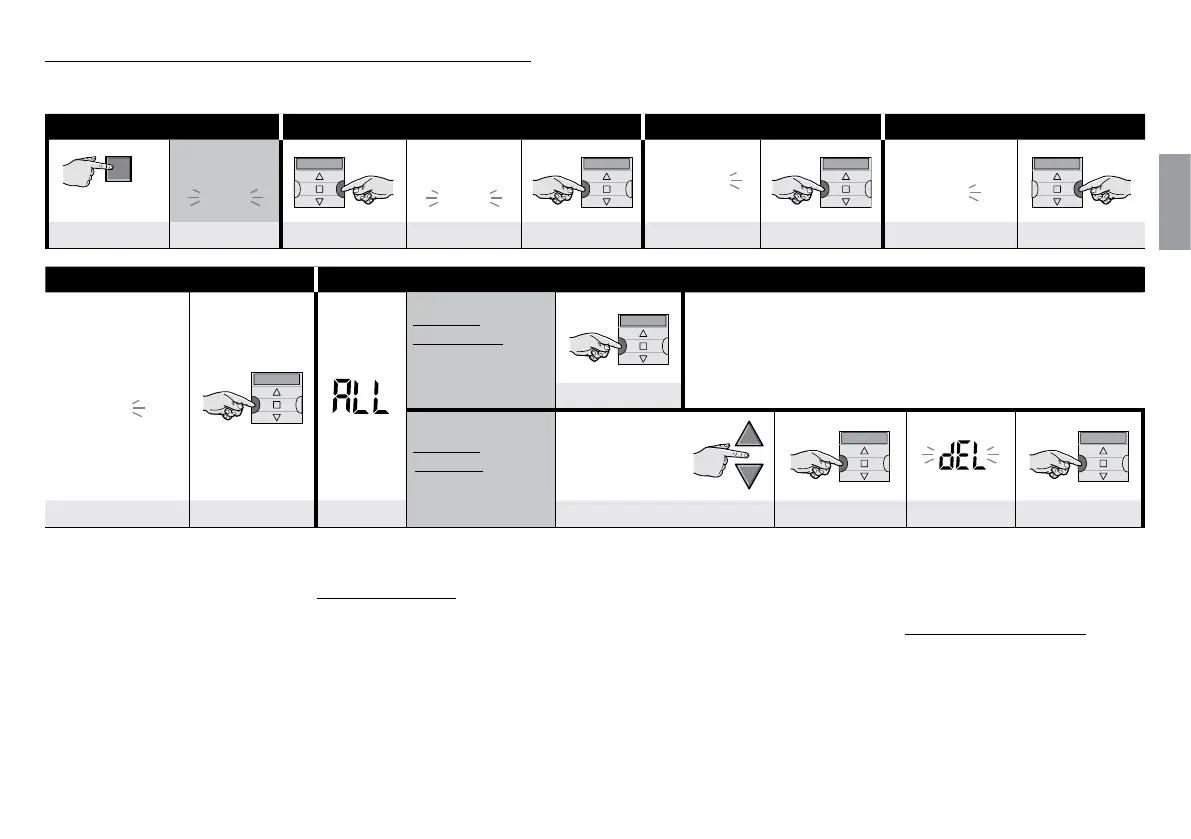
PROCEDURE 8 - Deleting (“DEL”) an existing event
Any programmed event can be deleted at any time. To delete an event, first find and select it from the events stored in the transmitter’s memory.
Step 1 Step 2 Step 3 Step 4 ...
main
screen
Auto
Auto
Man
Prog
Prog
Prog
NEWU
several times ... (display) 2 times (display) conrm (display) conrm (display) 2 times
... Step 4 Step 5 - end
Prog
DELU
Option A: to delete
all the events simul-
taneously
1 time
Option B: to delete
one event at a time
select the
event to be
deleted
(1)
DELETE event conrm (display)
forwards (▲); backwards (▼)
conrm (display) delete
(2) (3)
NOTES:
(1) - The system displays (in chronological order) the days of the week that contain events plus details of the events themselves. By repeatedly pressing the
▲ button (*) the system displays the first programmed day of the week (this flashes while the others remain ON); then it displays the programmed events for that day.
On finishing, it shows the next day, from among the valid ones, followed by the programmed events for that day, and so on, until it displays the last programmed day.
Note – After displaying the last day and the last event the system displays the message “ALL”. In this case, if you want to delete all the events simultaneously, perform
option “A” of Step 5.
(*) – To scroll through the days and programmed events, in the opposite direction, use the ▼ button.
(2) - If you do not want to confirm the deletion of the event press the n/esc key instead of the “ok” key; then perform option “B” of Step 5 again to select another event to
be deleted.
(3) - After pressing the “ok” key, the system deletes the selected event and prepares for the deletion of another event (flashing “DEL” symbol). So if you want to delete
another event without exiting the procedure, perform Steps 4 and 5 again. If, on the other hand, you wish quit the procedure and return to the main screen, press n/
esc repeatedly until “Auto” starts flashing.