EN
12 – English
7.1 - Total deletion of control unit memory
It is possible to delete all memorised data on the control unit and reset it to the
original factory settings:
01. Press and hold down “▲” and “▼” keys at the same time;
02. Release the keys when all Led illuminate (after approx.3 seconds);
03. When leds L1 and L2 start flashing, this means that the procedure is ter-
minated.
Note – With this procedure it is also possible to delete any errors remaining in
the memory.
Important – This procedure does not delete
the parameter regarding the
direction of motor rotation and the number of manoeuvres performed.
7.2 - Other functions
• “Always open” function
This function is a special feature of the control unit; it is associated with the
“Step Step” input and enables an “always open” command when the Step
Step command remains active for more than 3 seconds. This function is valid
for any setting of the Step Step input (see “SS Function” in Table 8).
For example, it can be used to connect a clock for programming permanent
opening of the barrier during a specific time band.
• “Move anyway” function
If one or more safety devices malfunctions or is out of service, this function
enables control of the barrier in “hold-to-run” mode (for details, see chapter
“operation manual”).
FURTHER DETAILS
7
• “Maintenance notification” function
This function enables notification of when an automation maintenance check is
necessary. The “Maintenance notification” parameter can be set by using the
Oview programmer. The maintenance notification is signalled via the Flash
flashing light or by the maintenance indicator according to the type of setting.
The signals emitted by the Flash flashing light and the maintenance indicator
are shown in Table 10.
• Check of number of manoeuvres performed
To check the number of manoeuvres performed, the Oview programmer is
required; parameters that can be checked under the item “Maintenance”.
• Manoeuvre counter reset
The manoeuvres can be reset at the end of the automation maintenance phase
and must be carried out by deactivating the “Maintenance indicator” function
related to the LIGHT output.
Note - Temporarily disconnect the device connected to the 1 LIGHT
output.
Procedure to
activate the Maintenance indicator (when it is not already
active):
01. Press and hold down the “Set”“ key for approx. 3 seconds;
02. Release the key when LED “L1” starts flashing;
03. Press the key “▲” or “▼” to move from the LED that is flashing to LED L4
(“LIGHT output” input LED);
04. Press and hold the “Set” key through to completion of point 07;
05. Wait approx. 3 seconds, until the LED of the programmed output illumi-
nates;
06. Press keys “▲” or “▼” to move the lit LED on L8;
07. Release the key “Set” and wait for the output for the timeout from the pro-
gramming procedure.
Procedure to
deactivate the Maintenance indicator (when it is not already
active):
01. Press and hold down the “Set”“ key for approx. 3 seconds;
02. Release the key when LED “L1” starts flashing;
03. Press the key “▲” or “▼” to move from the LED that is flashing to LED L4
(“LIGHT output” input LED);
04. Press and hold the “Set” key through to completion of point 07;
05. Wait approx. 3 seconds, until LED L8 illuminates;
06. Press keys “▲” or “▼” to move the lit LED on a LED other than L8;
07. Release the key “Set” and wait for the output for the timeout from the pro-
gramming procedure.
Now the maintenance notification has been cancelled.
Note – Reset the programming of the LIGHT output with the device to be used
and then reconnect it to the output.
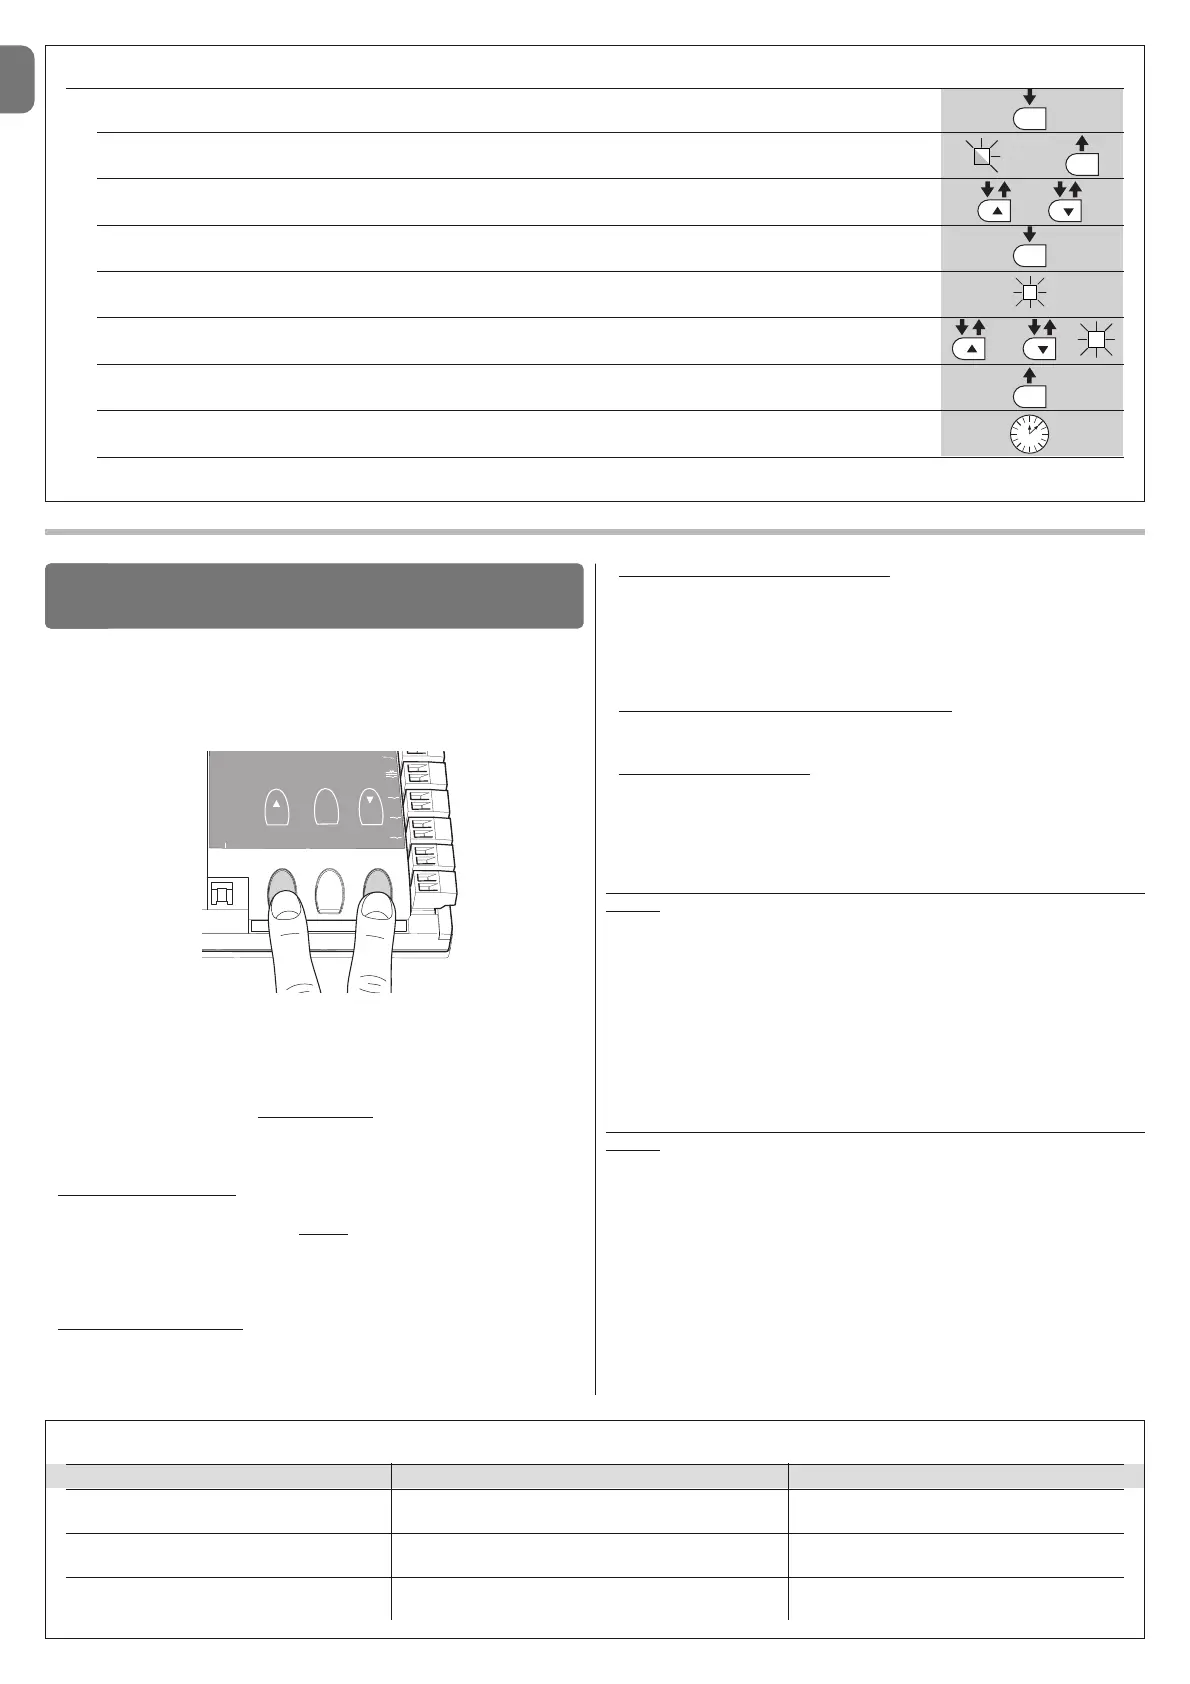
TABLE 9 - Programming procedure (second level functions)
01. Press and hold down the “Set” key for approx. 3 seconds;
02. Release the key when LED L1 starts flashing;
03. Press keys “▲” or “▼” to move from the flashing led to the led associated with the function to be modified;
04. Press and hold the “Set” key through to completion of point 06;
05. Wait approx. 3 seconds, until the LED representing the current level of the parameter to be modified illuminates;
06. Press keys ▲ or ▼ to move the LED representing the value of the parameter;
07. Release the “Set” key;
08. Wait 10 seconds (maximum time) to exit the programming mode.
Note – During this procedure, points 03 to 07 need to be repeated when programming other parameters during the phase itself.
 Loading...