7d
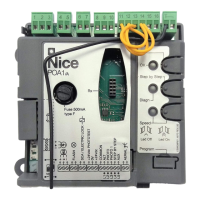
DE- Bei aktivem “Stand by - alles”, die Klemme Nr. 8 und und nicht 11
anschließen
PL - Z aktywną funkcją “Stand by całego urządzenia” należy
połączyć zacisk nr 8 a nie nr 11
NL- Met actieve “Alles stand by” sluit u klem 8 aan en niet klem 11
EN- With “Everything in stand by” active connect terminal no. 8 and
not no. 11
IT - Con “Stand by tutto” attiva collegare il morsetto n° 8 e non il
n° 11
FR- Avec « Stand-by total » actif connecter la borne n° 8 et pas la
n° 11
ES- Con “Stand by todo” activo, conecte el borne n° 8 y no el n° 11
IT - Bordo sensibile
FR - Bord sensible
ES - Banda sensible
DE - Schaltleiste
PL - Listwa optyczna
NL - Contactlijst
Sensitive edge
IT - Bordo sensibile
FR - Bord sensible
ES - Banda sensible
DE - Schaltleiste
PL - Listwa optyczna
NL - Contactlijst
Sensitive edge
IT - Bordo sensibile
FR - Bord sensible
ES - Banda sensible
DE - Schaltleiste
PL - Listwa optyczna
NL - Contactlijst
Sensitive edge
7b 7c

 Loading...