M
Matthew BergerSep 2, 2025
How to set the clock on Nikon Digital Camera?
- AAmanda ReynoldsSep 2, 2025
To correct the camera clock on your Nikon Digital Camera, set the correct date and time from [Date] in the setup menu.
How to set the clock on Nikon Digital Camera?
To correct the camera clock on your Nikon Digital Camera, set the correct date and time from [Date] in the setup menu.
Why do my Nikon Digital Camera settings keep resetting?
If the settings on your Nikon Digital Camera reset, the clock battery may be exhausted. Charge the clock battery.
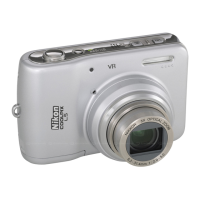
How to fix blurred pictures on Nikon Coolpix L5 Digital Camera?
If the pictures from your Nikon Digital Camera are blurred, try using the flash, vibration reduction, or the A setting. You can also use a tripod and the self-timer.
Why is the monitor blank on my Nikon Digital Camera?
If the monitor on your Nikon Digital Camera is blank, first ensure that the camera is turned on. If it is on, replace the batteries, as they may be exhausted. If the camera is in standby mode to save power, press the shutter-release button halfway. Also, wait until the flash has charged if the flash lamp is blinking. Disconnect the USB or A/V cable if either is connected.
Why are my Nikon Digital Camera pictures too dark?
If the pictures from your Nikon Digital Camera are too dark, make sure the flash is turned on. Check that the flash window isn't blocked. If the subject is too far, move closer. You can also adjust the exposure compensation. If the subject is backlit, select the [Back light] scene mode or use fill flash.
What to do if Nikon Coolpix L5 cannot focus using auto-focus?
If your Nikon Digital Camera is unable to focus using auto-focus, it may be because the subject is low in contrast; try using focus lock to focus on another subject at the same distance. If there is a focus error, turn the camera off and then on again.
What to do if my Nikon Coolpix L5 Digital Camera doesn't take a picture when I press the shutter button?
If your Nikon Digital Camera isn't taking pictures when you press the shutter-release button, ensure that the camera is not in playback mode by pressing the i button. Also, make sure no menus are displayed by pressing m. Check if the batteries are exhausted and replace them if necessary. Finally, if the flash lamp is blinking, wait until the flash has finished charging.
| Brand | Nikon |
|---|---|
| Model | Coolpix L5 |
| Category | Digital Camera |
| Language | English |
Crucial safety guidelines to prevent injury and camera damage during use.
Safety guidelines for operating the battery charger to prevent hazards.
Warnings about flash usage, especially near eyes, and minimum distance.
Statement on compliance with FCC rules for radio frequency interference.
Details on separate collection and disposal of the product in Europe.
Explanation of symbols and conventions used throughout the manual.
Information on storing pictures on internal memory or removable cards.
Warning about using non-Nikon accessories and potential warranty voiding.
Advice to take a test shot before important occasions to ensure normal function.
Guidance on securely erasing data from storage devices before disposal.
Step-by-step instructions for attaching the camera strap.
Explanation of icons and indicators appearing on the monitor during shooting.
Instructions for using the mode selector for Auto, Scene, and Movie modes.
Functions of the multi selector for navigation and operations within menus.
How to navigate pictures in full-frame playback.
How to view descriptions for selected items using the help function.
Step-by-step instructions for inserting batteries into the camera.
Steps for charging Nikon EN-MH1 rechargeable batteries using the charger.
Procedure for refreshing NiMH batteries to restore capacity after long disuse.
List of supported battery types (alkaline, NiMH, oxyride, lithium).
How to power the camera on and off using the power switch.
Setting the correct battery type in the setup menu for accurate display.
Explanation of power saving via monitor dimming and auto-off functions.
Turning on camera, selecting language, confirming date/time setting.
Configuring home and travel time zones, and daylight saving time.
How to adjust the clock for daylight saving time.
Step-by-step guide for inserting a memory card into the camera.
How to safely remove a memory card from the camera.
Instructions for formatting and information on the write protect switch.
Guide to selecting Auto mode and powering on the camera.
How to check battery status and remaining picture count on the monitor.
Overview of functions like flash, self-timer, and exposure compensation in Auto mode.
How to hold the camera steady and position it correctly for shooting.
Instructions on composing a shot using zoom and positioning the subject.
How to use vibration reduction to minimize camera shake and its different modes.
How to half-press the shutter to focus and set exposure.
Instructions for fully pressing the shutter to capture the image.
Detailed explanation of the shutter-release button's function for focus, exposure, and capture.
How to view pictures one by one in full-frame playback.
Steps to delete the currently displayed picture.
A quick way to delete the most recently taken picture.
Explanation of different flash modes (Auto, Red-eye, Fill, Slow Sync).
Indicates flash status and explains the red-eye reduction system.
Step-by-step guide to using the 10-second self-timer for delayed shots.
How to activate and use macro mode for close-up photography.
How to adjust exposure compensation to make pictures brighter or darker.
Introduction to scene modes for automatic optimization of camera settings.
Explanation of scene assist modes that offer framing guides.
Lists eleven scene modes for specific shooting situations.
How to set the image mode for size and quality.
Steps to select a scene assist mode and compose shots using framing guides.
Steps to select a scene mode and take a picture.
Preserving deep hues of sunsets and sunrises.
How to use the one-touch portrait mode for quick portraits.
Overview of settings available within the one-touch portrait mode.
How to apply tone effects like 'Brighter' or 'Softer' to portraits.
How to view multiple pictures simultaneously as thumbnails.
How to zoom in and out on pictures during playback.
How to crop a picture and save it as a new file.
How to record voice memos attached to pictures.
How to play back and delete voice memos associated with pictures.
How to select Movie mode and start recording video clips.
Options for single AF or full-time AF during movie recording.
Steps to play back and delete movie files from the camera.
How to connect the camera to a TV to view pictures.
How to transfer pictures from the camera to a computer.
How to connect the camera directly to a printer for printing.
Precautions to take before connecting the camera to external devices.
Options for printing pictures, including DPOF and direct printing.
Instructions for connecting the audio/video cable to the camera and TV.
Setting the camera's video mode to match the television standard.
Information on installing the PictureProject software required for transfer.
Overview of USB transfer methods (Mass Storage, PTP) and OS compatibility.
Turning on computer, connecting camera, and powering on camera.
Methods for transferring pictures using PictureProject or the camera's E button.
Precautions for connecting and disconnecting the USB cable.
Selecting pictures and connecting the camera to a printer.
Procedure for printing individual pictures one at a time.
Procedure for printing multiple selected pictures.
Setting USB option to PTP and turning on the printer.
Precautions for connecting and disconnecting the USB cable.
Selecting pictures and specifying the number of copies for printing.
Selecting the desired paper size for printing.
Procedure for printing multiple selected pictures.
Accessing the print menu to choose options like Print selection.
Confirming the print selection and initiating the printing process.
Accessing the playback menu to create DPOF print orders.
Selecting specific pictures for DPOF printing.
Notes on DPOF print order and comparison with date imprint.
Overview of options available within the shooting menu.
How to access the shooting menu from Auto mode.
Adjusting colors for vividness or monochrome effects.
How to lock focus on an off-center subject.
How to access the playback menu to manage pictures.
Protecting selected pictures from accidental deletion.
Choosing menu display style and selecting the welcome screen.
Setting camera clock, time zones, and monitor display.
Configuring sound, auto-off timer, and memory formatting.
Selecting language, interface, and resetting camera settings.
Selecting battery type and viewing firmware version.
Setting the time before standby or sleep mode to save power.
Adjusting settings for computer or video connections.
Displaying the camera's current firmware version.
List of tested and approved memory cards for the COOLPIX L5.
Precautions for handling camera parts, avoiding damage from light, power, moisture, shock, fields, and temperature.
Tips for battery maintenance and cleaning camera components like lens, monitor, body.
Instructions for cleaning the lens, monitor, and camera body.