20
Introduction—First Steps
4
.1 Turn the camera off
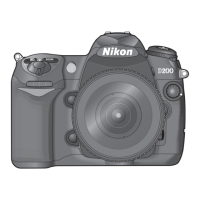
Turn the camera off before attaching or
re mov ing lenses.
4
.2 Attach a lens
Keep ing the mounting mark on the lens
aligned with the mounting mark on the
cam era body, position the lens in the cam-
era’s bayonet mount. Being careful not to
press the lens-release button, ro tate the lens
counter-clockwise until it clicks into place.
4
.3 Lock aperture at the minimum setting
This step is not necessary if you are using a
type G lens not equipped with an aperture
ring. If you are using a lens of another type,
lock aperture at the minimum setting (high-
est f/-num ber).
If this step is omitted when attaching a CPU
lens, the ap er ture dis plays in the con trol
panel and viewfi nder will show a blinking
when the camera is turned on. Pho to -
graphs can not be taken until the cam era is
turned off and ap er ture locked at the high-
est f/-num ber.
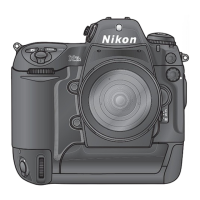
Step 4—Attach a Lens
Nikon recommends using a type G or type D CPU lens to take full ad van tage
of the features the camera offers.
4
Type D lensType G lensCPU lenses have CPU
contacts