Do you have a question about the Nikon TSM and is the answer not in the manual?
Handle the instrument gently, avoiding sharp knocks to prevent damage.
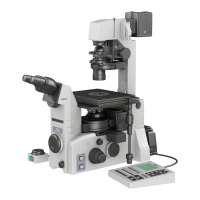
Carry by the base and observation tube, not the illuminator support stand.
Avoid dusty, humid, vibrating, hot, or direct sunlight locations for use.
Do not touch hot lamp housing; keep flammables away from it.
Turn off power before replacement; avoid touching halogen lamp glass with bare hands.
Keep lenses clean; dirt and marks impair image quality.
Do not readjust focus knobs by turning one while holding the other.
Use soft brush or gauze; alcohol for marks, benzine for objectives.
Avoid organic solvents like thinner or alcohol on painted parts.
Do not dismantle the instrument to maintain performance and accuracy.
Cover with vinyl, store dry; keep optics in airtight containers with desiccant.
Recommend periodic inspection and adjustment by a qualified service engineer.
Insert the green filter into the filter receptacle for phase contrast.
Ensure the aperture diaphragm is fully open for phase contrast observation.
Place the annular diaphragm on the Ph-slider matching objective and condenser.
Attach the Ph-slider to the condenser, noting type differences.
Align the annular diaphragm with objective and condenser indications.
Position the specimen on the stage and focus for observation.
Adjust centering telescope for phase plate ring and annular diaphragm coincidence.
Remove centering telescope and reinsert eyepiece for observation.
Adjust interpupillary distance until the right and left viewfields merge into one.
Focus the right eyepiece using the focus knob while viewing with the right eye.
Adjust the left diopter ring while viewing with the left eye to focus the specimen.
Attach the auxiliary stage for observing large culture bottles or specimens.
Troubleshooting for optical issues like darkness, dirt, or unclear images.
Troubleshooting for operational problems such as focusing or field alignment.
Troubleshooting for electrical issues like lamp failure or unstable brightness.
Controls the aperture diaphragm for brightfield and phase contrast observations.
Indicates lamp status; high brightness may shorten lamp life.
Used for focusing; avoid readjusting by turning one while holding the other.
For inserting filters like blue or green for brightfield/phase contrast.
Used with the Ph-slider for phase contrast observation.
Component for phase contrast, available with or without centering.
Platform for mounting specimens; accepts various holders and microplates.
Accessory for precise X-Y movement of the stage.
Controls Y-axis movement of the mechanical stage.
Controls X-axis movement of the mechanical stage.
Specifies available power sources (100, 120, 220/240V, 50/60Hz).
Details the lamp bulb type: 6V-20W Halogen lamp.
Specifies the fuse rating: 1A/250V or 0.5A/250V.
| Brand | Nikon |
|---|---|
| Model | TSM |
| Category | Microscope |
| Language | English |