ENGLISH / A-35
FORM NO. 56041980 - CS7000 - A-35
HOPPER DUST CONTROL FILTER
The hopper dust control f lter must be cleaned regularly to maintain the eff ciency of the vacuum system. Follow the recommended f lter service
intervals for the longest f lter life.
CAUTION!
Use only the approved Nilf sk high capacity dust control f lter in this machine. Use of standard pleated f lters will result in insuff cient
air f ow, inadequate clean shaking, and potential machine damage.
Wear safety glasses when cleaning the f lter.
Do not puncture the paper f lter.
Clean the f lter in a well-ventilated area.
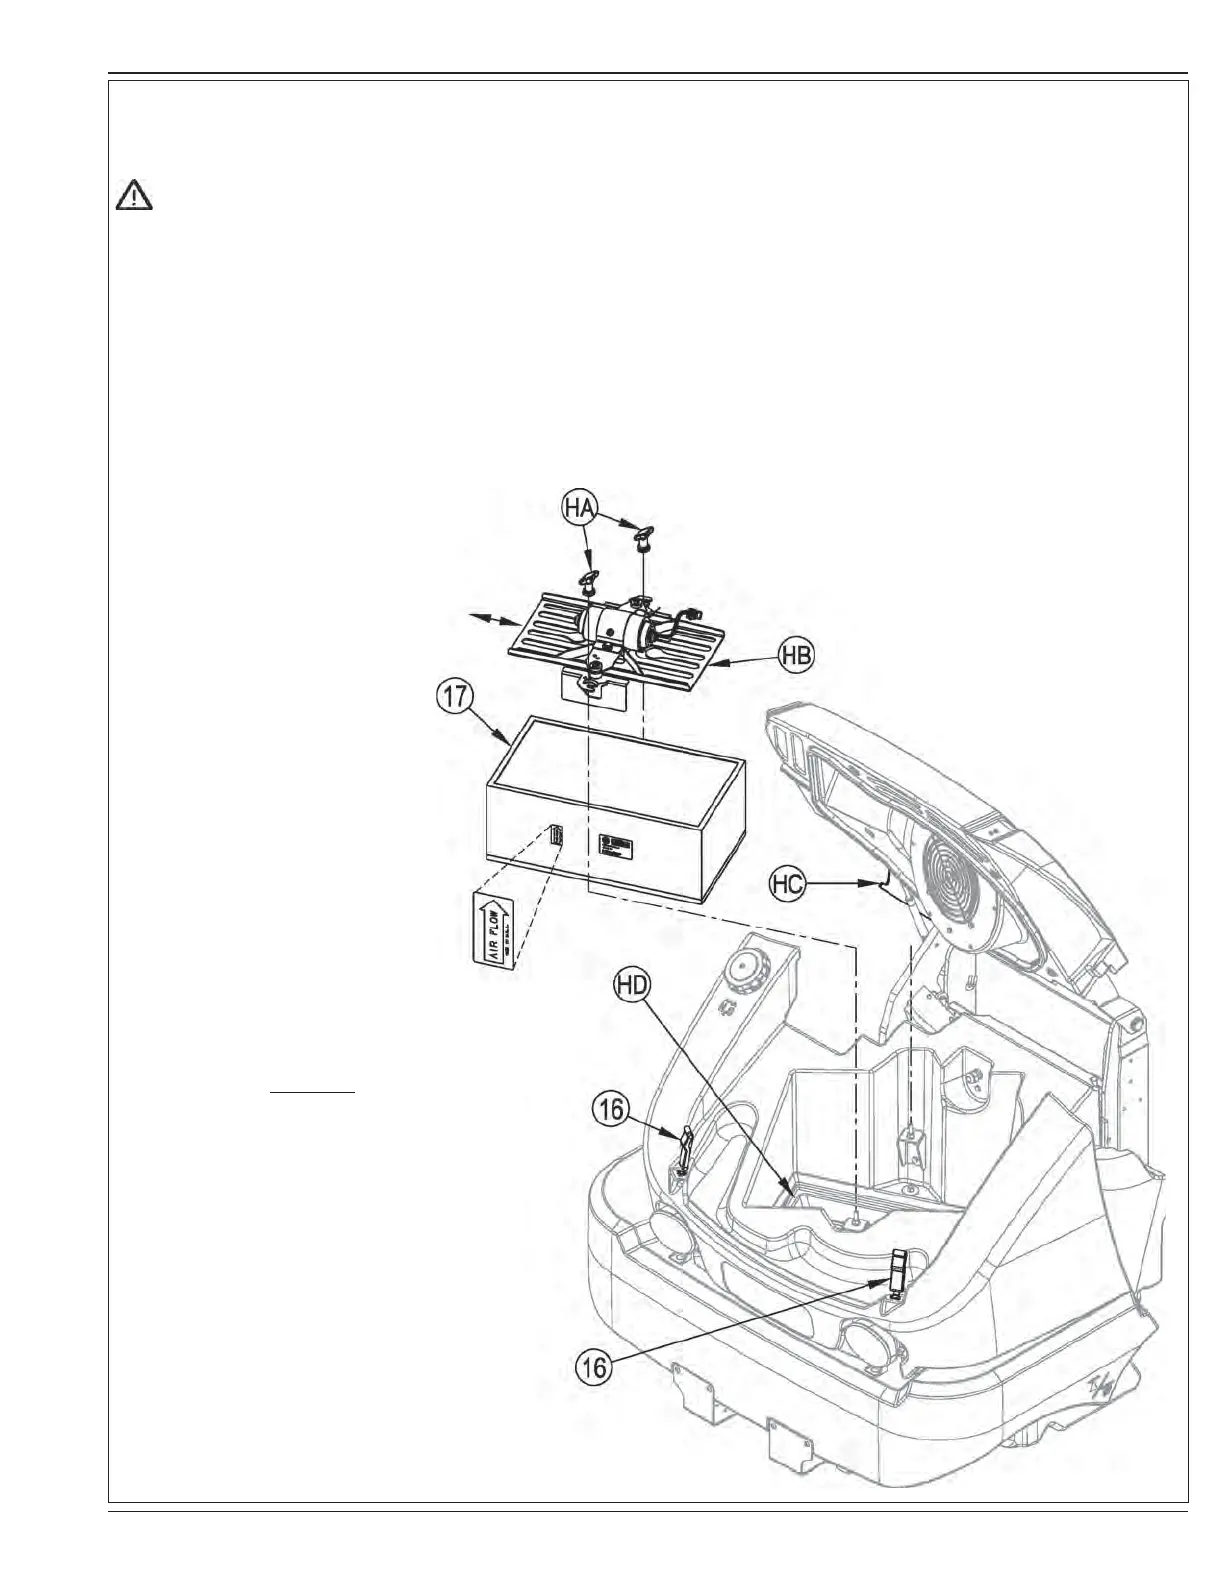
To remove the hopper dust control fi lter...
1 See Figure 16. Unlatch the Hopper Cover Latches (16) and lift the Hopper Cover.
2 Loosen the two Thumb Nuts (HA), then slide the Filter Shaker Motor Assembly (HB) to the left and lift it out of the hopper.
3 Hang the shaker assembly on the hopper cover Hinge Hook (HC).
4 Inspect the top of the Hopper Dust
Control Filter (17) for damage. A
large amount of dust on top of the
f lter is usually caused by a hole in
the f lter or a damaged f lter gasket.
5 Lift the Hopper Dust Control Filter
(17) out of the machine.
6 Clean the fi lter using one of the
methods below:
Method “A”
Vacuum loose dust from the f lter.
Then gently tap the f lter against
a f at surface (with the dirty side
down) to remove loose dust and dirt.
NOTE: Take care not to damage the
gasket.
Method “B”
Vacuum loose dust from the
f lter. Then blow compressed air
(maximum pressure 100 psi) into
the clean side of the f lter (in the
opposite direction of the airf ow).
Method “C”
Vacuum loose dust from the f lter.
Rinse the f lter under a gentle stream
of water (maximum pressure 40 psi).
Let the f lter dry completely before
putting it back into the machine. It is
recommended to have a spare f lter
on hand to use while the washed
f lter is drying out.
7 Keep Ledge (HD) clean of any dust
or debris, this is where the f lter
gasket contacts the hopper.
8 Follow the instructions in reverse
order to install the f lter. If the gasket
on the f lter is torn or missing, it must
be replaced. NOTE: Be sure to
reinstall so that the air f ow decal is
pointing up as shown.
FIGURE 16