E
Nilfisk
ALTO
Attix7_ver.1.0_140105
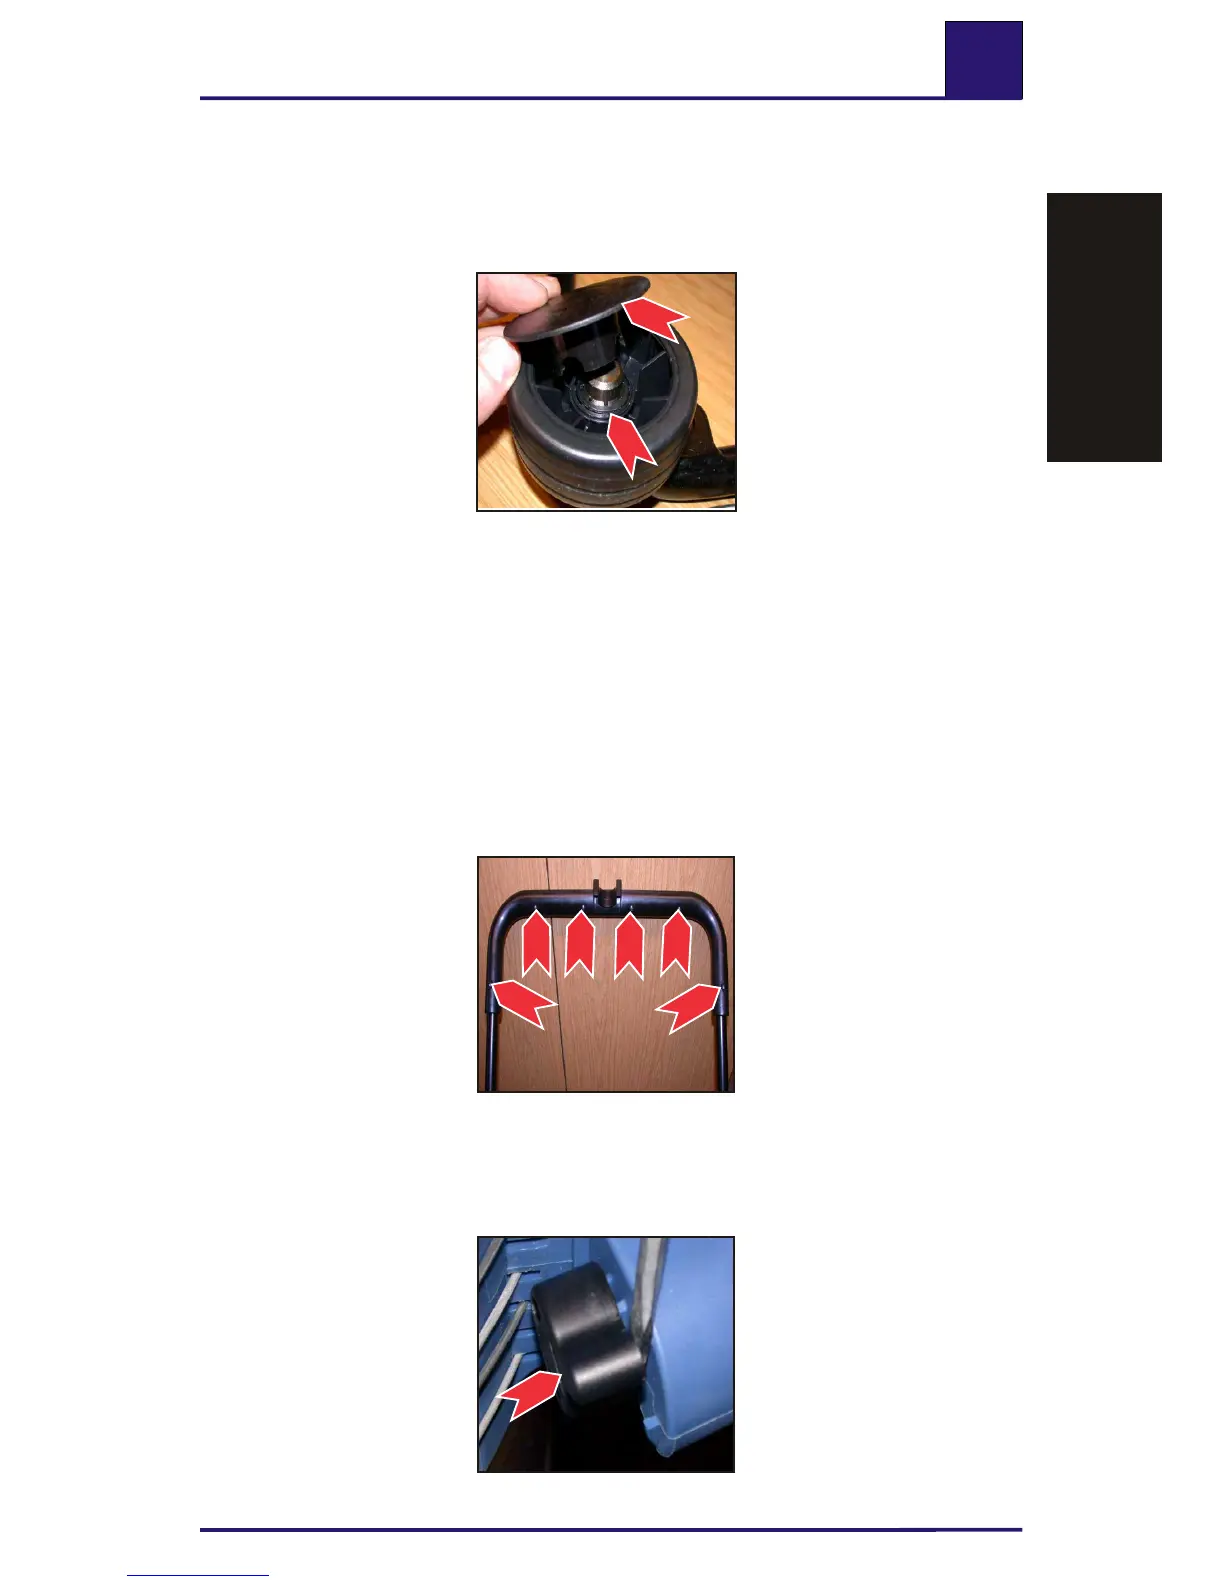
1. Lever off the wheel cap
(1) with a screwdriver.
2. Lever the clamping ring
(2) off the axle with a
screwdriver, and remove
the wheel.
3. Fit in the reverse order.
Do not push the clamping
ring too far onto the axle
otherwise the wheel will
not turn freely.
3.4 Removing/fitting wheels (Attix 751-71)
3.5 Removing/fitting grips (all models except Attix 751-71)
1. Undo the six screws (1)
with a Phillips screwdriver,
and remove the grips.
2. Fit in the reverse order.
3.6 Removing/fitting lock (all models)
1. Lever off the lock (1)
with a screwdriver.
2. Fit in the reverse order,
pressing the lock (1) firmly
over the latch so that you
hear it snap into place.
Attix7 3650
2
1
Attix7 3655
1
Attix7 3652
1
1
1
1
1
1
☞
Troubleshooting
r h
T o
ubl
e
s
ootin
g
 Loading...