EasyManuals Logo

Nilfisk-ALTO ATTIX 751-01/-11/-21 User Manual

Nilfisk-ALTO ATTIX 751-01/-11/-21
59 pages
To Next Page IconTo Next Page
To Previous Page IconTo Previous Page
Page #35 background imageLoading...
Page #35 background image
E
Nilfisk
ALTO
Attix7_ver.1.0_140105
7 Electrical
Following repairs or servi-
cing, perform a thorough
electrical check.
Caution!
Make sure the power plug
is pulled out while you are
carrying out repairs.
7.1 Removing / fitting
electrical components
Caution!
Work with the appropriate
wiring diagram (see secti-
on H). It is helpful if you
make a sketch to clearly
show which cable (note
the color) matches which
terminal.
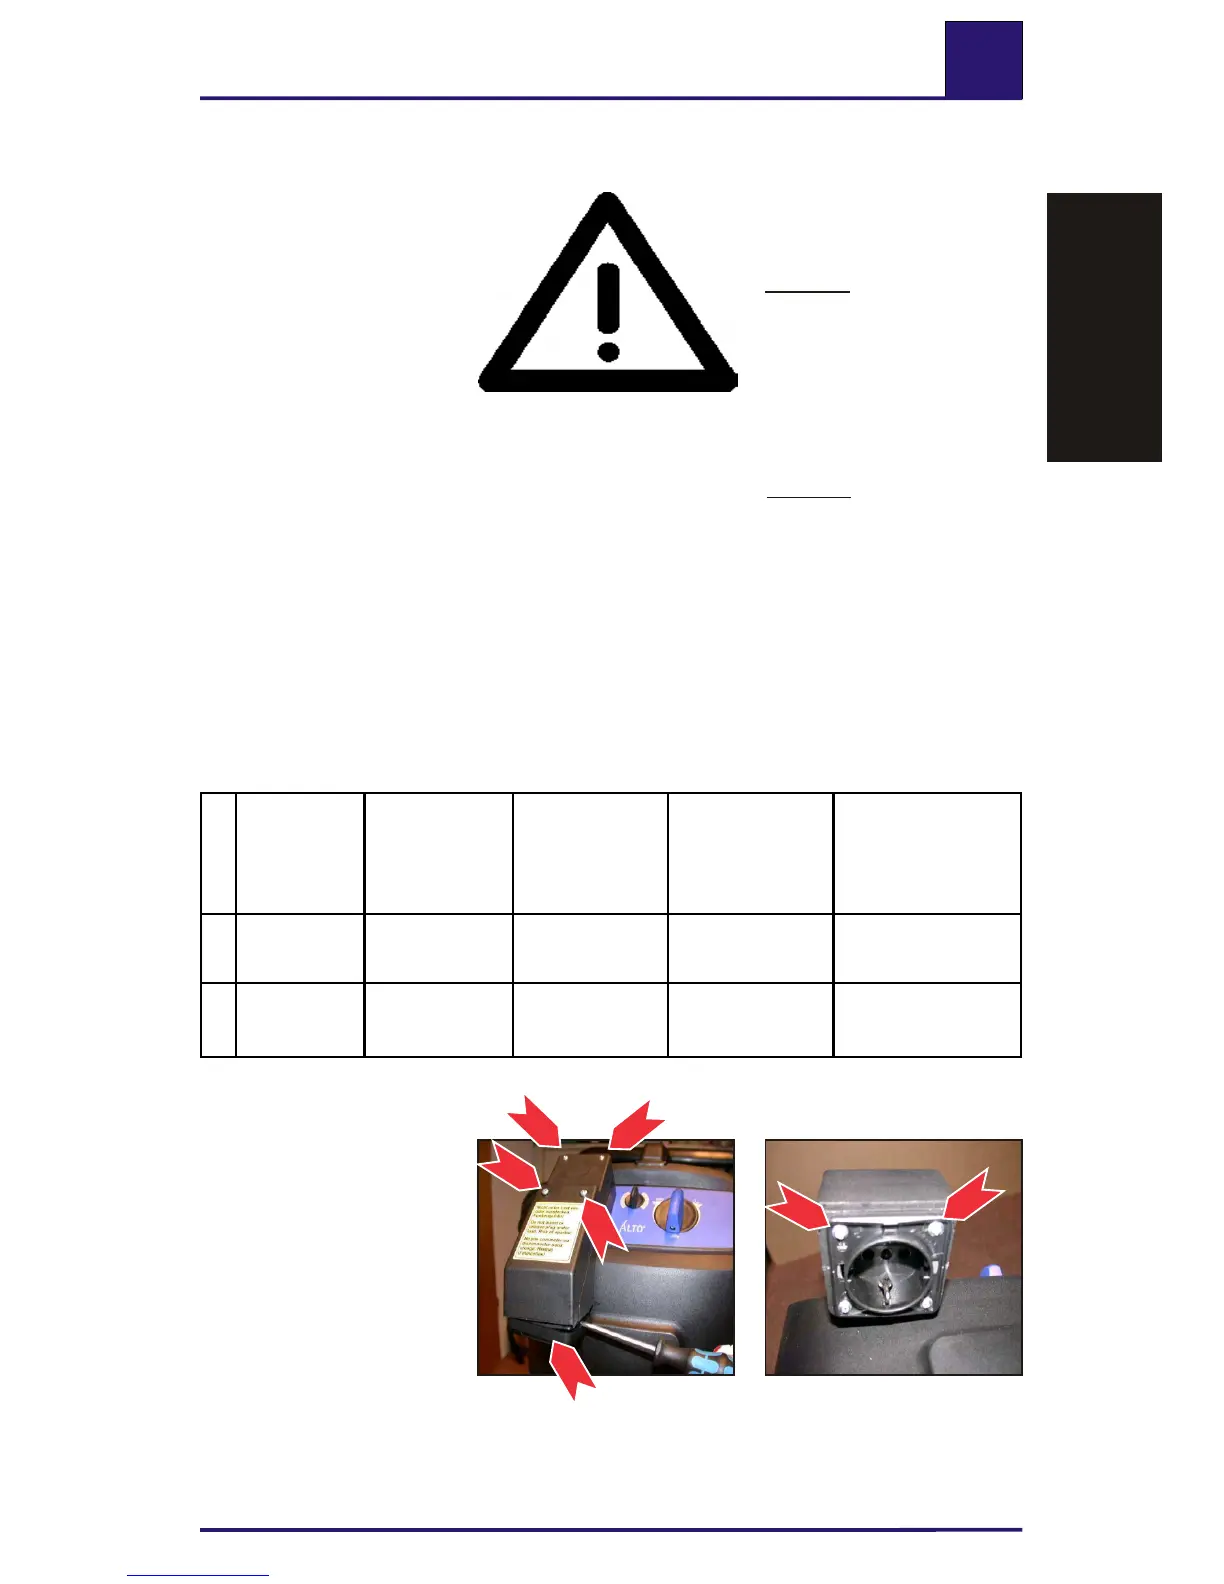
7.4 Removing/fitting
socket
Attix 791-2M/B1
2. Undo the six screws (2)
holding the cover with a
Phillips screwdriver, and
take off the cover.
1. Use a screwdriver to
take off the cover frame
(1).
The following repairs are identical as with other models.
Attix
751-01/-11/-21
751-2M/-0H
19 Gallon/-AE
751-61/-71
791-21
761-21XC
761-2MXC
763-21ED
763-2MED
19 Gal./AS/PE2
Identical to Attix
See section
"Troubleshooting"
in repair manual
7.2
Removing /
fitting power
cord
X
550-01
12 Gallon/- RDF
Attix 550/560
page 45
7.3
Removing /
fitting power
cord
X
560-21
12 Gallon/- RDFD
Attix 550/560
page 45
Attix7 3623
1
2
2
2
2
Attix7 3624
2
2
Troubleshooting
r h
T o
ubl
e
s
ootin
g
35/59

Table of Contents

Questions and Answers:

Question and Answer IconNeed help?

Do you have a question about the Nilfisk-ALTO ATTIX 751-01/-11/-21 and is the answer not in the manual?

Nilfisk-ALTO ATTIX 751-01/-11/-21 Specifications

General IconGeneral
BrandNilfisk-ALTO
ModelATTIX 751-01/-11/-21
CategoryYard Vacuum
LanguageEnglish

Related product manuals