EasyManuals Logo

Nilfisk-ALTO ATTIX 751-01/-11/-21 User Manual

Nilfisk-ALTO ATTIX 751-01/-11/-21
59 pages
To Next Page IconTo Next Page
To Previous Page IconTo Previous Page
Page #39 background imageLoading...
Page #39 background image
E
Nilfisk
ALTO
Attix7_ver.1.0_140105
The following repairs are identical as with other models.
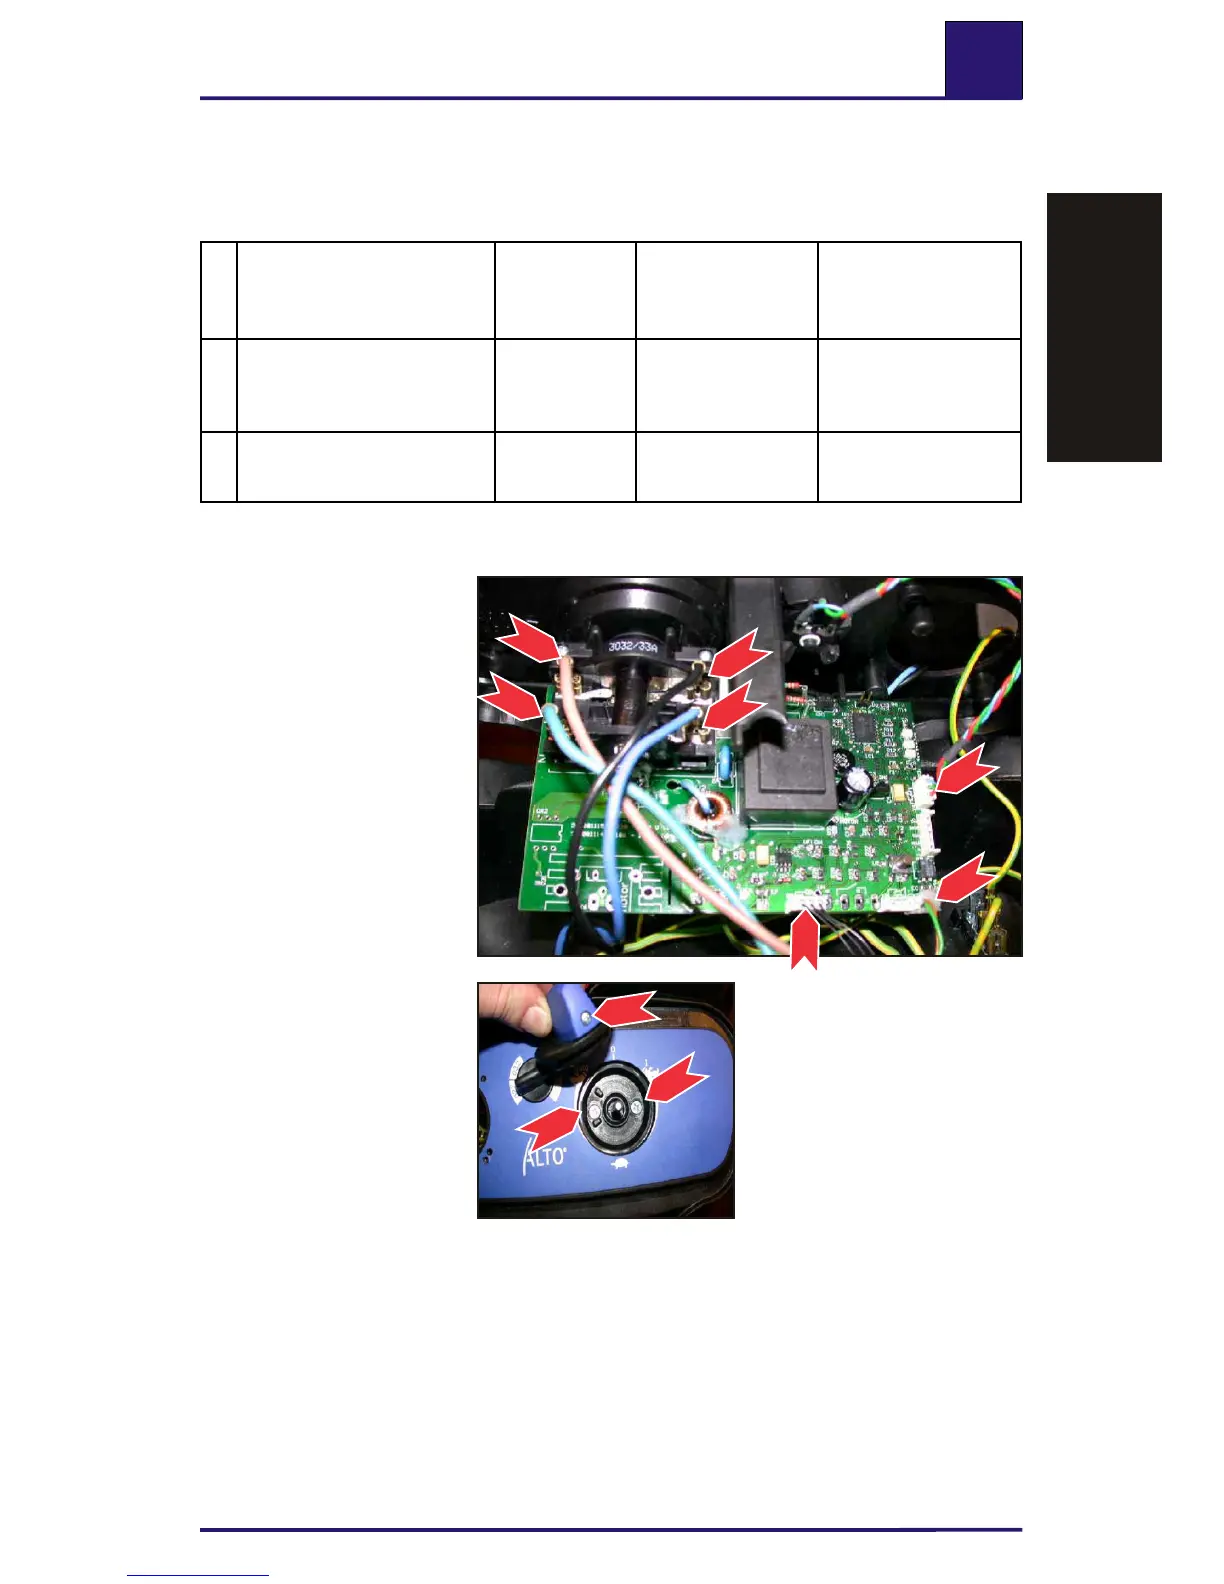
7.10 Removing/fitting electronic flow metering EC (Attix 791-2M/B1)
1. Remove the hood (see
4.7).
2. Disconnect the power
cord, cables to EC electro-
nics, flow sensor, buzzer,
and potentiometer from
the electronics. Discon-
nect L1 and N on the
socket (2).
Withdraw the plug for the
speed control from the EC
electronics.
3. Undo the retaining
screw (3) on the rotary
knob with a Phillips
screwdriver, and remove
the rotary knob.
4. Undo the two retaining
screws (4) behind the rota-
ry knob with a Phillips
screwdriver, and remove
the electronics.
5. Fit in the reverse order.
Attix
751-2M/-0H
761-2MXC
763-2MED1
791-2M/B1
Identical to Attix
See section
"Troubleshooting"
in repair manual
7.8
Checking flow sensor
detection (performance) of
electronic flow metering
X
550-2M/-0H
Attix 550/560
page 54
7.9
Checking and calibration
(adjustment) of flow
sensor
X
550-2M/-0H
Attix 550/560
page 55-56
2
2
2
2
2
2
2
Attix7 3630
Attix7 3633
3
4
4
Troubleshooting
T
r
ou
l
e
s
h
oot
in
b g
39/59

Table of Contents

Questions and Answers:

Question and Answer IconNeed help?

Do you have a question about the Nilfisk-ALTO ATTIX 751-01/-11/-21 and is the answer not in the manual?

Nilfisk-ALTO ATTIX 751-01/-11/-21 Specifications

General IconGeneral
BrandNilfisk-ALTO
ModelATTIX 751-01/-11/-21
CategoryYard Vacuum
LanguageEnglish

Related product manuals