E
Nilfisk
ALTO
Attix7_ver.1.0_140105
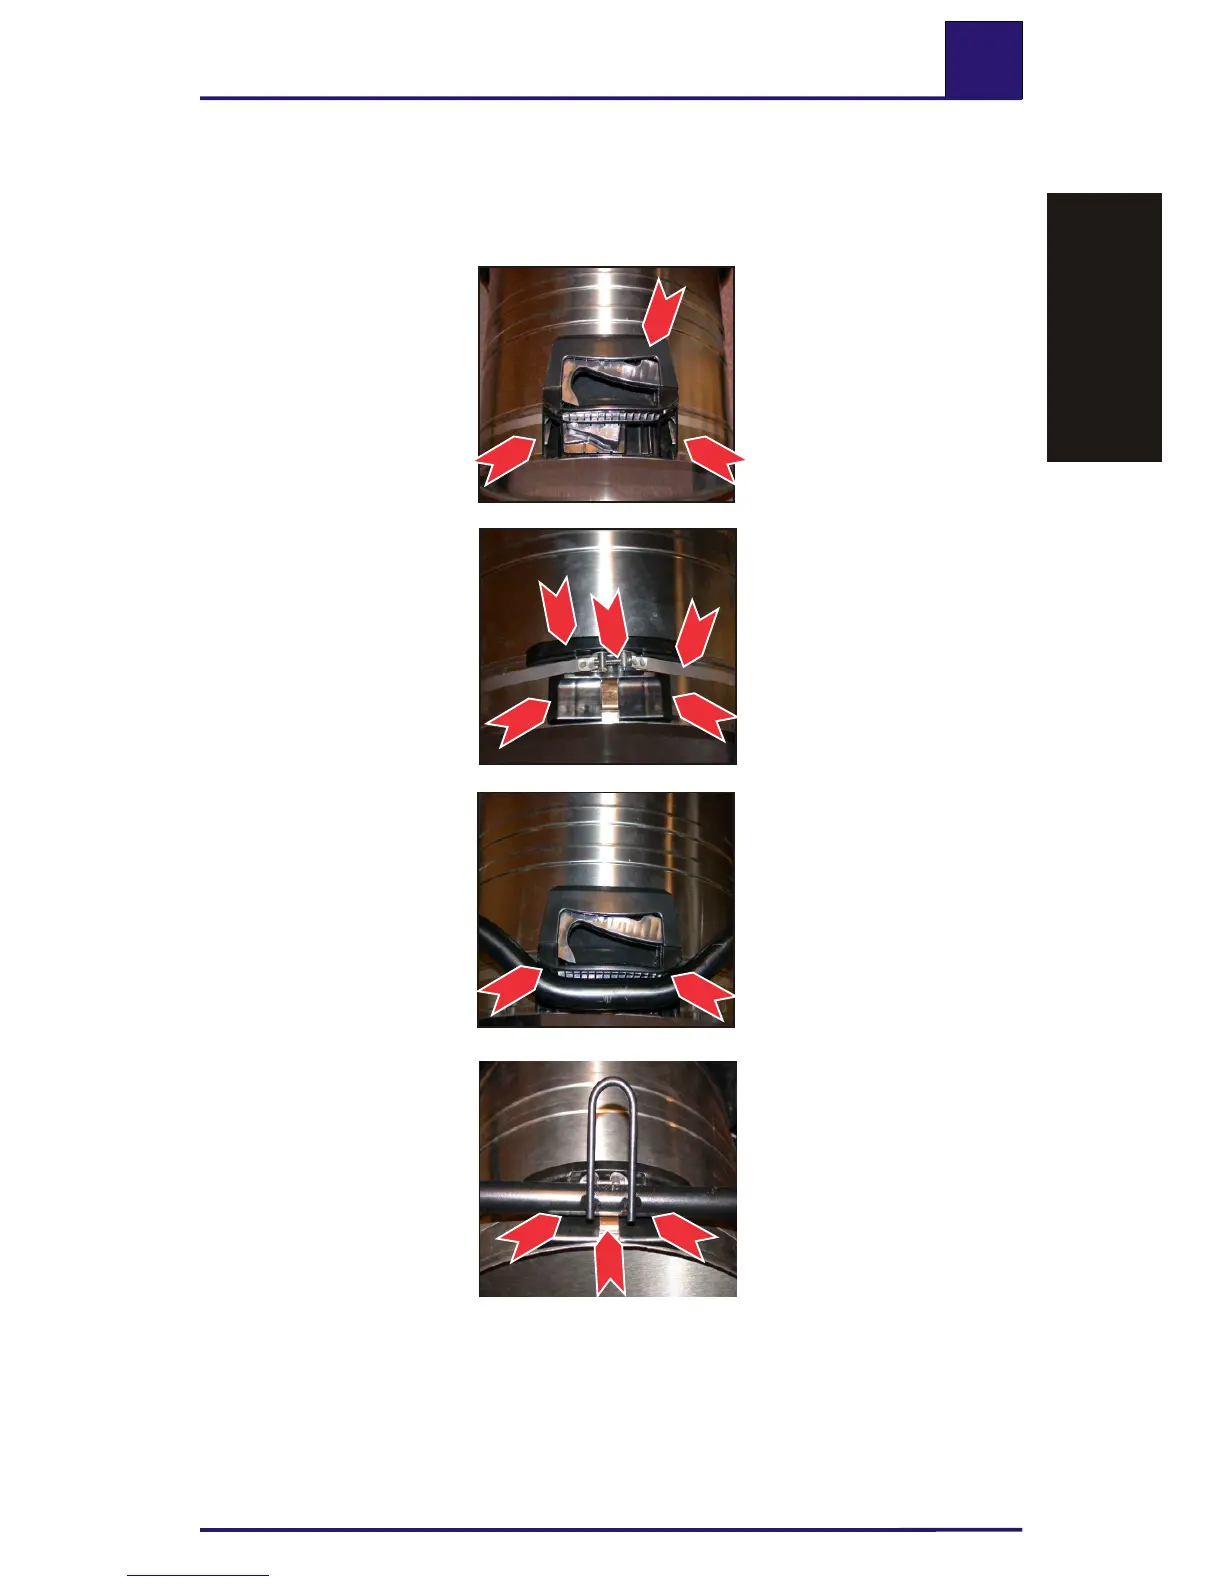
3.7 Removing/fitting grip with tensioning band (all models)
1. Take the cleaner head
with the adapter ring off
the container, and lift the
container out of the base
frame.
2. Mark (1) the position of
the grip (4) and the facing
stop (5) on the container.
3. Undo the screw (2) on
the tensioning band (3)
with a screwdriver, and re-
move the grip (4) and ten-
sioning band (3).
4. Fit in the reverse order,
placing the grip (4) and
stop (5) between the mar-
kings and lightly tightening
the screw (2) on the ten-
sioning band (3).
5. Set the container in the
base frame, and lock it in
place.
6. Align the grip (4) and
stop (5) on the container in
the base frame (7), and
firmly tighten the screw (2)
on the tensioning band
(3).
Note:
The contact faces of the
contact spring (6) must be
clean and free of corrosi-
on.
Attix7 3657
1
1
4
7
6
7
Attix7 3661
Attix7 3660
7
7
Attix7 3659
1
1
2
3
5
Troubleshooting
r h
T o
ubl
e
s
ootin
g
☞
 Loading...