E
Nilfisk
ALTO
Attix7_ver.1.0_140105
1. Take the cleaner head
with the adapter ring off
the container, and lift the
container out of the base
frame..
2. Take out the C-coupling
(see 3.8/3, page 27).
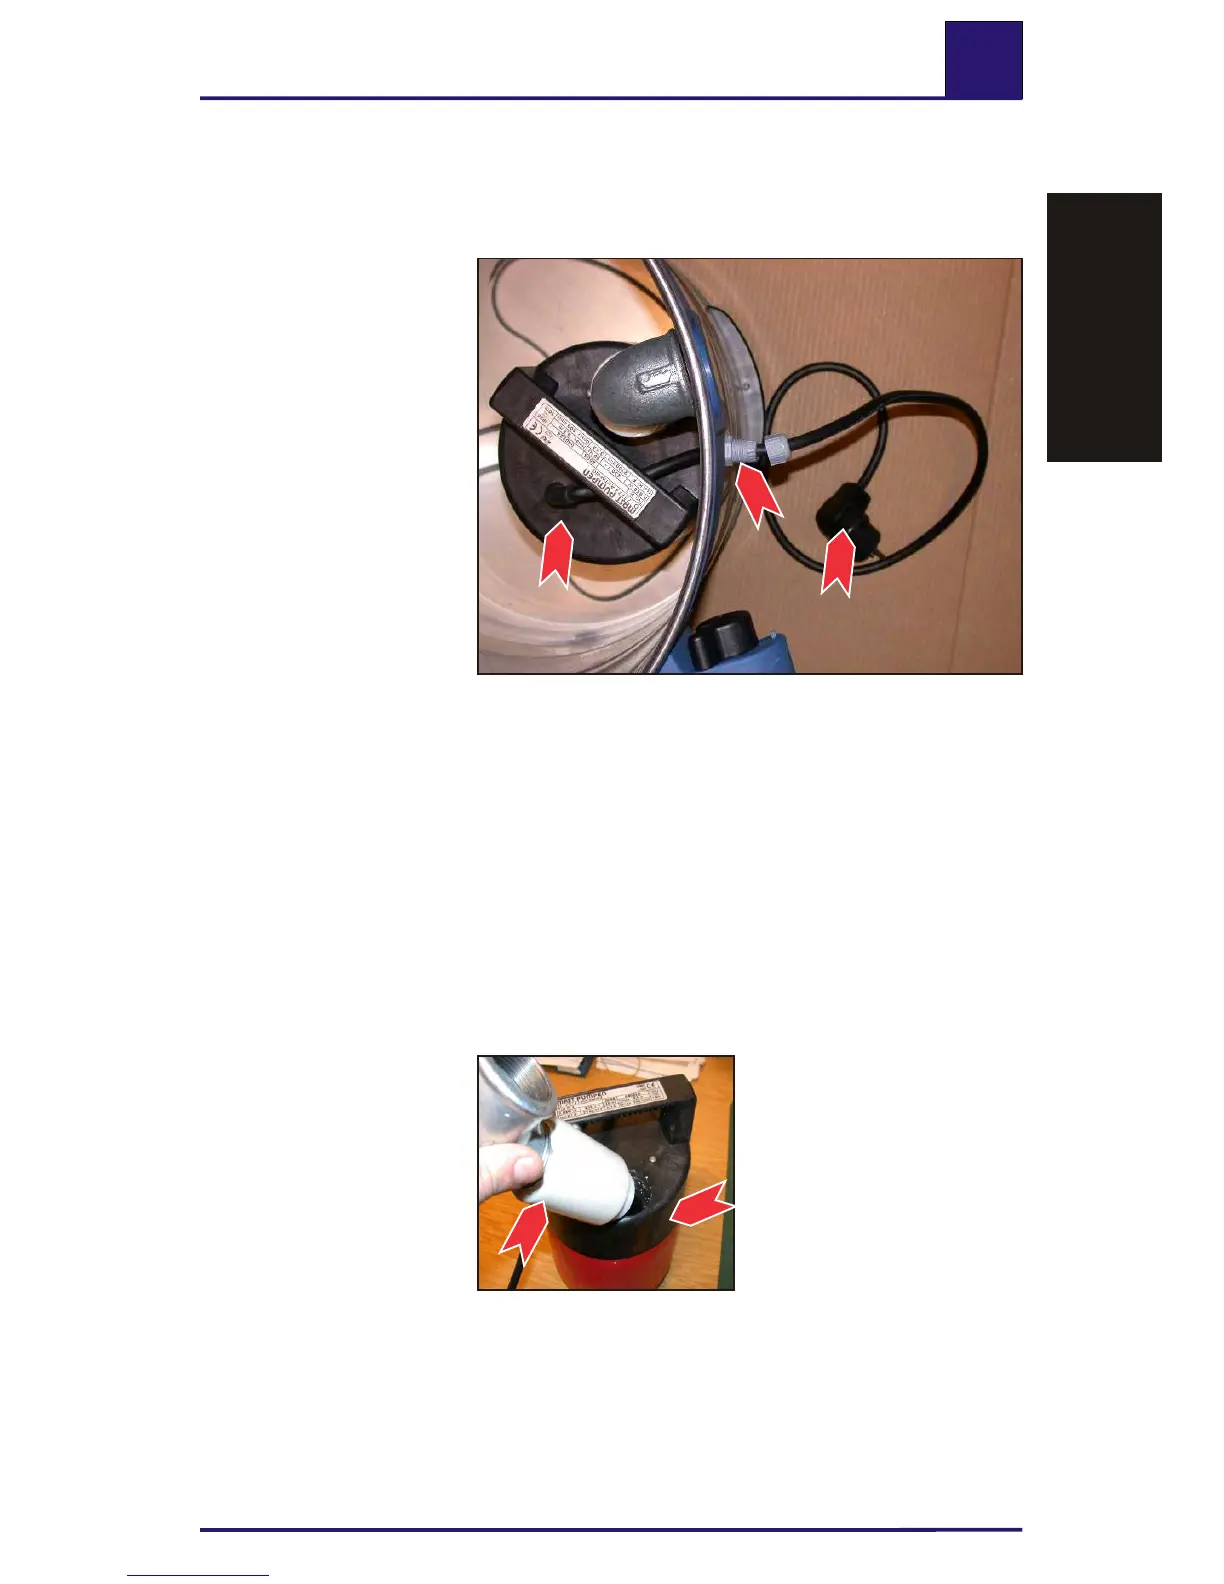
3. Disassemble the plug
(1) of the pump (3), undo
the cable fixture (4) on the
container, pull the cable
through, and take out the
pump.
Fit in the reverse order.
3.9 Removing/fitting pump (Attix 751-61/-71, Attix 19 Gallon AE)
3.10 Removing/fitting non-return pipe (Attix 751-61/-71, Attix 19 Gallon AE)
1. Remove the pump (1)
(see 3.9, page 28).
2. Unscrew the non-return
pipe (2) from the threaded
fitting of the pump (1), and
remove it.
3. Fit in the reverse order.
Note:
The threaded fitting can
be sealed with normal
silicone.
Attix7 3664
1
3
4
Attix7 3668
2
1
☞
Troubleshooting
r h
T o
ubl
e
s
ootin
g
 Loading...