20
1-877-646-5288
ASSEMBLY
Assembly and Use for the Mini Prep Bowl
USE
WARNING: Never leave the appliance unattended while in use.
USING THE 3 CUP MINI PREP BOWL
NOTE: The mini prep bowl must be used with the
flat food processor lid.
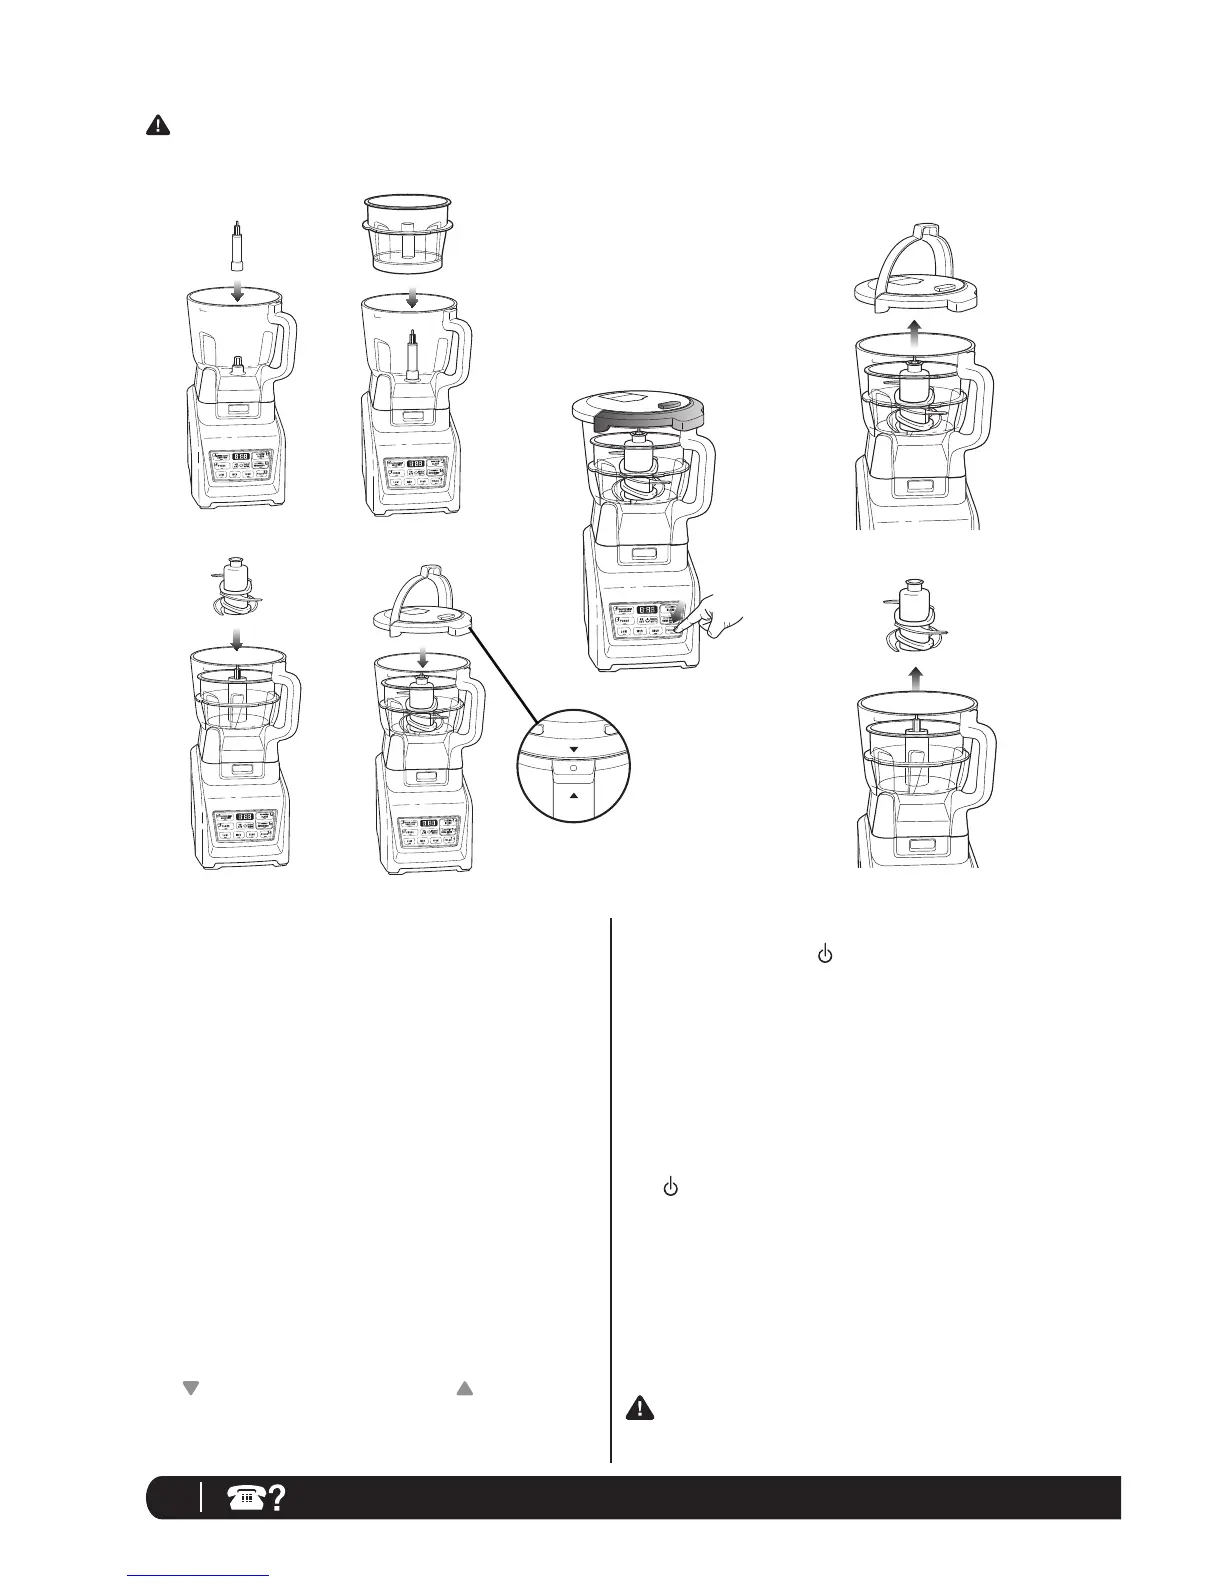
1 Place the 64 oz. bowl onto the motor base.
2 Holding the spindle by the shaft, place it onto the
gear shaft inside the 64 oz. bowl. Ensure that the
attachment fits around the gear shaft and that it is
standing straight. (Fig. 1)
3 Place the mini prep bowl aligning the spindle inside the
center post. (Fig. 2)
4 Hold the prep bowl blade by the shaft and carefully place
it over the center post of the mini prep bowl. (Fig. 3)
5 Add ingredients into the mini prep bowl.
6 Holding the lid by the handle in the upright position,
place it on top of the 64 oz. bowl aligning the arrow
(
) located on the lid with the arrow ( ) located on the
bowl’s handle. (Fig. 4) Press the handle down until you
hear a click.
Fig. 1
Fig. 4
Fig. 2
Fig. 3
Fig. 5
REMOVAL
Fig. 6
Fig. 7
7 Plug the power cord into the electrical outlet and press
on the power button (
).
8 Select the speed that best suits your needs. For best
results, hold the Auto-iQ
™
Pulse button down until you
have reached your desired consistency. (Fig. 5)
NOTE: Please refer to “Speed Settings & Uses” chart
for suggested uses and speeds.
9 When you have reached your desired consistencey, stop
the appliance by pressing the power button
(
) and wait for the blade to stop turning.
10 To remove the lid, pull the lid handle up to a 90° angle
and lift the lid off. (Fig. 6)
11 Carefully hold the mini prep bowl blade by the shaft and
lift it out of the mini prep bowl. (Fig. 7)
12 Turn the bowl counter clockwise and then lift off the
base.
CAUTION: If pouring from the bowl, ALWAYS remove
the blade assembly first before pouring.