Installation and Owner’s Manual 17
These clearances plus the lower and upper vents cause the natural air draft that is necessary for good refrigeration. Cooler air comes
in through the lower vent, goes up around the refrigerator coils where it removes the excess heat from the refrigerator components, and
goes out through the upper vent. If this air ow is blocked or decreased, the refrigerator will not cool correctly.
Each NORCOLD model is certied by CSA International for correct ventilation. Install only the certied vents that are listed in this
manual.
Key Refrigerator Dimensions
Height* Width Depth* Total Volume Freezer Volume Net Weight
(in.) (in.) (in.) (cu. ft.) (cu. ft.) (lb.)
N3104Axx 32 5/16 20 11/16 23 3/8 3.7 0.39 61
N3150Axx 49 1/16 20 11/16 22 7/8 5.3 0.88 85
* Height dimension includes feet. Depth dimension includes the door.
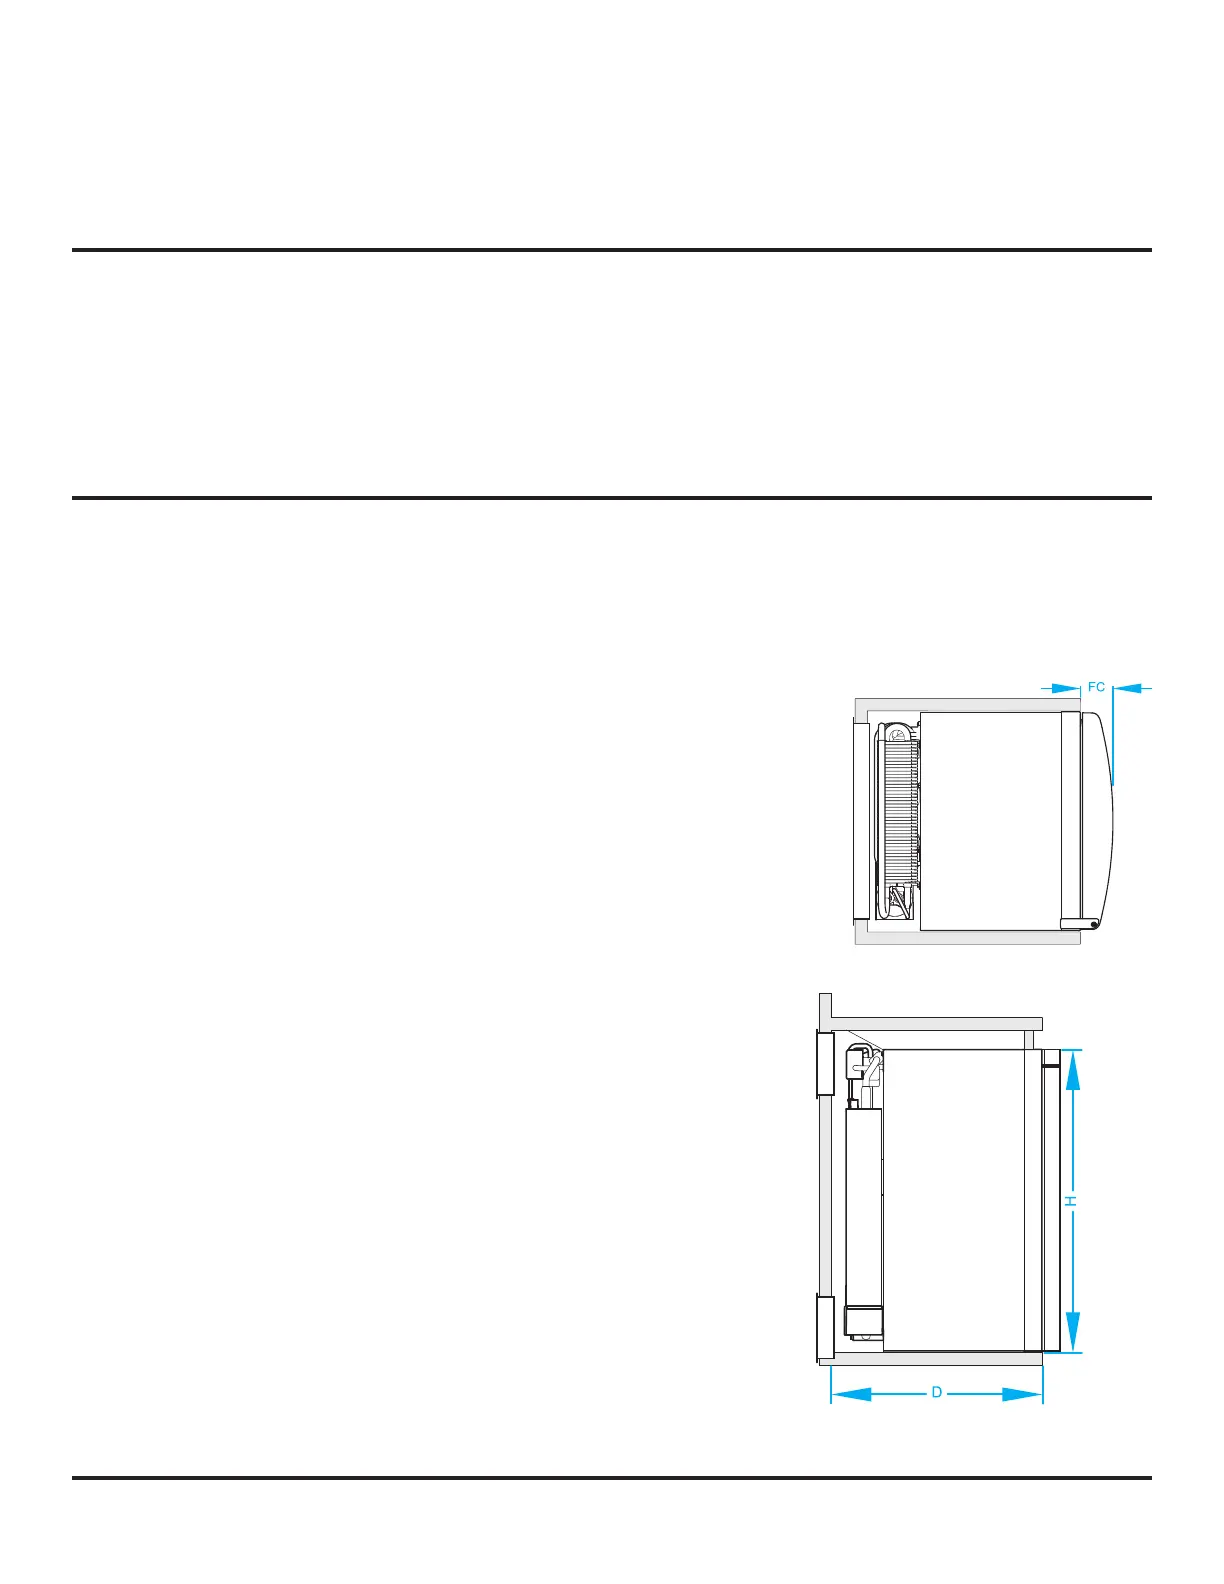
Assemble the Enclosure for the Refrigerator
1. Use the table below, and associated gures, to determine the enclosure size.
Model Height Width Depth Door Depth
(in.) (in.) (in.) “FC” (in.)
N3104Axx 32 1/2 20 13/16 min. to 20 15/16 max. 20 3/8 min. 3 1/16
N3150Axx 49 3/16 20 13/16 min. to 20 15/16 max. 19 7/8 min. 3 1/16
2. Make sure the oor is solid and level.
- The oor must be metal or a wood panel and extend the full width and depth of the
enclosure.
- The oor must be able to support the weight of the refrigerator and its contents.
3. Make sure there are no adjacent heat sources such as a furnace vent, a hot
water heater vent, etc.
4. If there is more than 1/2 inch between either side of the refrigerator and the
inside of the enclosure:
- Fill the space with berglass insulation or add a bafe to eliminate the excess clearance.
- Make sure that the batt-type insulation extends from the enclosure face, to the
combustion seal at the rear of the refrigerator cabinet.
- Securely attach the batt-type insulation to the enclosure so that it remains in this
position during refrigerator installation, if it becomes wet, and in windy conditions.
Art02344