NordicCab Instructions and user manual for the NordicCab Explorer Page 12 of 25
ASSEMBLING THE FRAME AND THE CANOPY
Align the casing and the
canopy in the same direction.
F
asten the roll bar of the
canopy to the casing by
pressing each end piece into
each of the four holes, one in
each corner of the casing.
Loc
k the roll bar in place with
“C” lock pins as shown in the
insert.
Lift the front part of the canopy
slightly. Grip the handle on top
of the rear part of the canopy
frame, and pull it fully back. Be
careful not to injure your
fingers.
T
he rear part of the canopy
frame should now
automatically attach to the
front part on the top.
Push the handle you pulled
down to secure the release
buttons. When the canopy
frame is locked, both front and
rear parts should be
completely immobile.
Close the zip as shown in the
picture.
Press the rear part of the
canopy down and under the
edge of the plastic casing, so
that the canopy is securely
fastened under the casing.
P
ress the front part of the
canopy down and under the
edge of the plastic casing, so
that the canopy is securely
fastened under the casing.
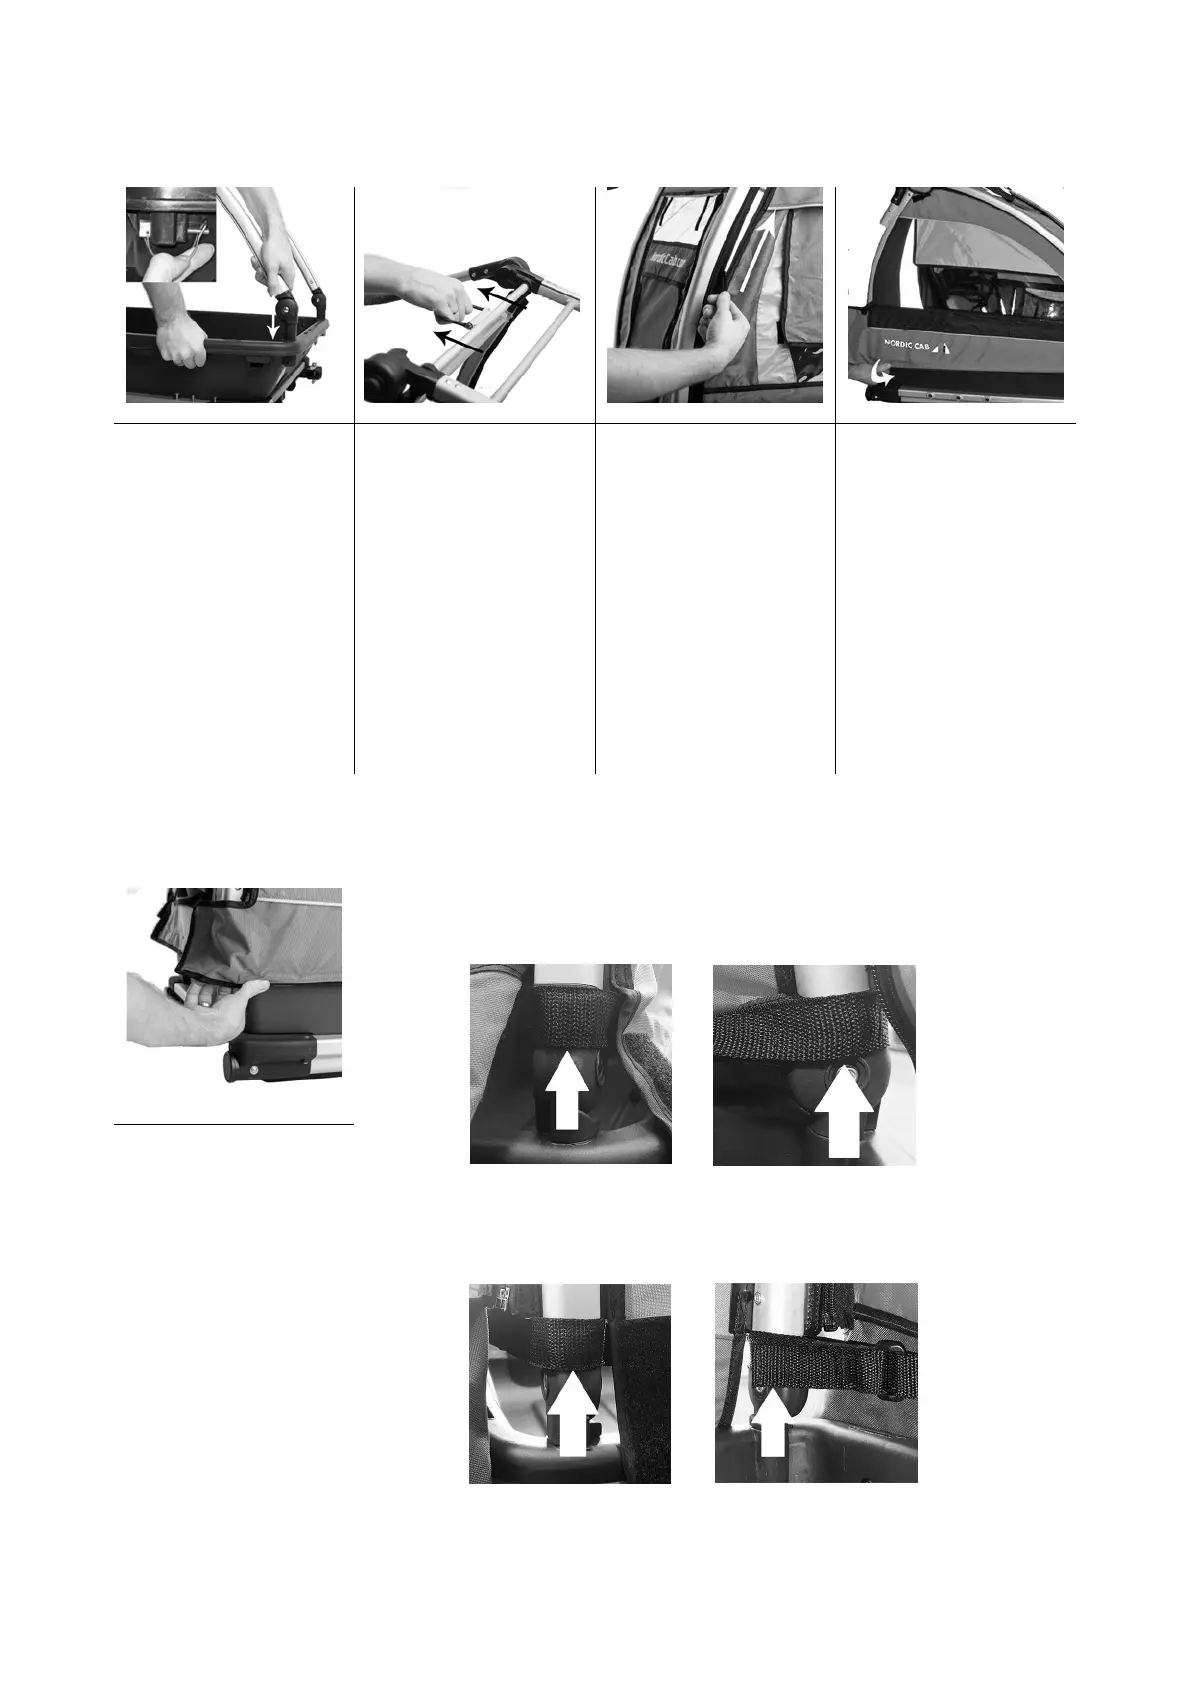
Using both hands, pull the
middle part of the canopy
down and under the edge of
the casing. Canopy should
now be well secured under the
Attach the front and rear
corners of the side panels with
Velcro fasteners. These are
attached to the bottom of the
front and rear panels.
N
OTE
The side panels can be very
taut when used for the first
time but will stretch over time.
Tighten side panel
Front
Back