NordicCab Instructions and user manual for the NordicCab Explorer Page 22 of 25
JOGGER (SOLD SEPARATELY)
1
2
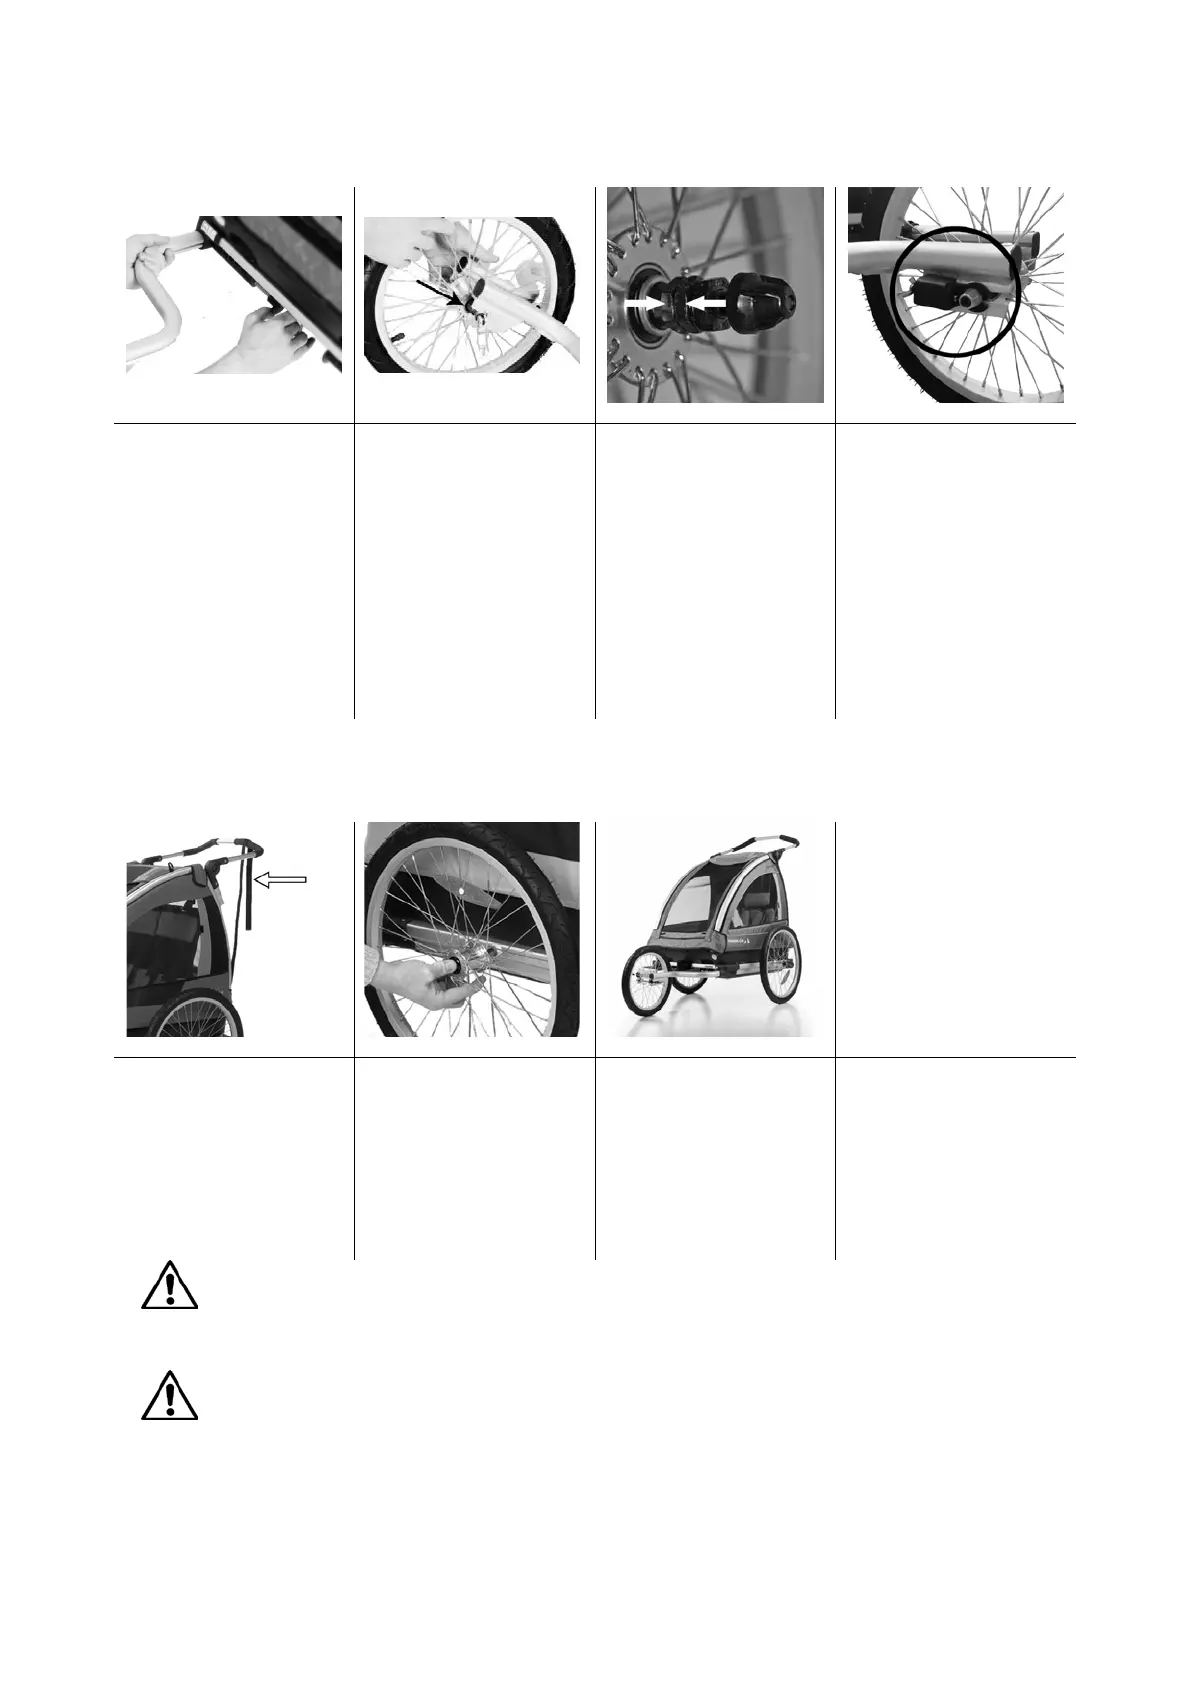
Pull one of the “snap-lock” lock
pins out so that the end piece
of the jogger fork can be
inserted in the aluminium
frame of the cart. NOTE:
Grooves for attaching the
wheel should point
downwards.
Repeat on the other side.
The wheel is attached to the
jogger fork after it is attached
to the cart. Loosen the screw
on the axle bolt of the wheel
so that the wheel can easily be
inserted in the grooves on the
jogger fork.
If the rolling resistance of the
wheel needs to be adjusted,
this can normally be
accomplished by loosening the
nuts on each side of the
wheel’s axle bolt. See the
picture. There are three nuts
on each side of the wheel. The
two inner nuts are loosened
slightly, enough for the wheel
to spin easily. Then “lock” the
inner nut by tightening the
outer of the two nuts against
the inner nut.
If the direction of the jogger
wheel needs adjusting, it can
be accomplished using a wing
nut on the jogger fork.
Loosen the jogger wheel by
opening the quick release and
adjust as needed with the wing
nut. Attach the quick release
securely.
Remember to use the safety
strap when pushing the cart.
Press the black button on the
end of the axle bolt with your
thumb. Insert the bolt in the
frame.
Release the button as you
push the wheel in until you
hear the axle bolt clicking in
place.
WARNING
Ensure that the tips on the “snap-lock” locking pins (red tip) are visible on the outside of the aluminium frame on the cart. This
ensures that the jogger fork is securely attached to the cart.
WARNING
Always use the safety strap when the cart is used as a jogger.