8, 8
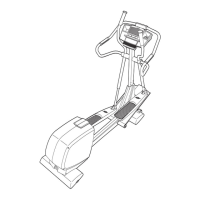
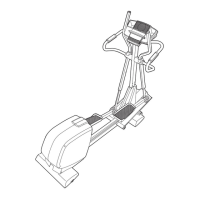
Apply the entire contents of the included Teflon <_lubrio
cant packet to the Pivot Shafts (15), Apply a small
amount of grease to the axle on each Pivot Arm (7)
and to the two M8 x 28ram Washers (99), Slide a Pivot
Arm over the right Pivot Shaft (15), insert the axle on
the Pivot Arm into the Right Upright (3), Note: The
PedaJ (not shown} will need to be resting at the
bottom of the lncJine Ramp (not shown} and you
wilt need to sJightJy push the Peda_ toward the cen-
ter of the lncJine Ramp during this step.
Next, slide an M8 x 28mm Washer (99) and a Wave
Washer (100) onto an M8 x 25mm Button Screw (81),
Tighten the Button Screw into the axle on the Pivot
Arm (7), Then, attach an Outer Upright Cover (74) to
the end of the axle with two M4 x 25mm Screws (105),
Attach the other Pivot Arm (7) to the left Pivot Shaft
(15) and the Left Upright (4) in the same way,
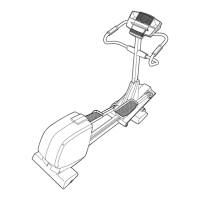
Loosen the M4 x 25mm Screws (105) in the Pivot
Arms (7), identify the Right Handlebar (9), Hold two
Handlebar Covers (80) over the lower end of the Right
Handlebar as indicated, insert the Right Handlebar
with the two Handlebar Covers down into the right
Pivot Arm and attach them with the two M4 x 25ram
Screws, an M4 x 12ram Round Head Screw (104), and
three M4 Star Washers (16),
Attach the Left Handlebar (10) in the same way,
10, Hug the Power Cord (8) into the Power Receptical
(68) at the rear of the elliptical exerciser,
Lube
10
Grease
74
1O0
/
/
/
16
1
lO4 > \
7 Ji , \,
\
105
11, Make sure that all parts of the elliptical exerciser are properly tightened. Cover the floor beneath the
elliptical exerciser to protect the floor from damage, Note: Some extra hardware may be left over,
8

 Loading...