54
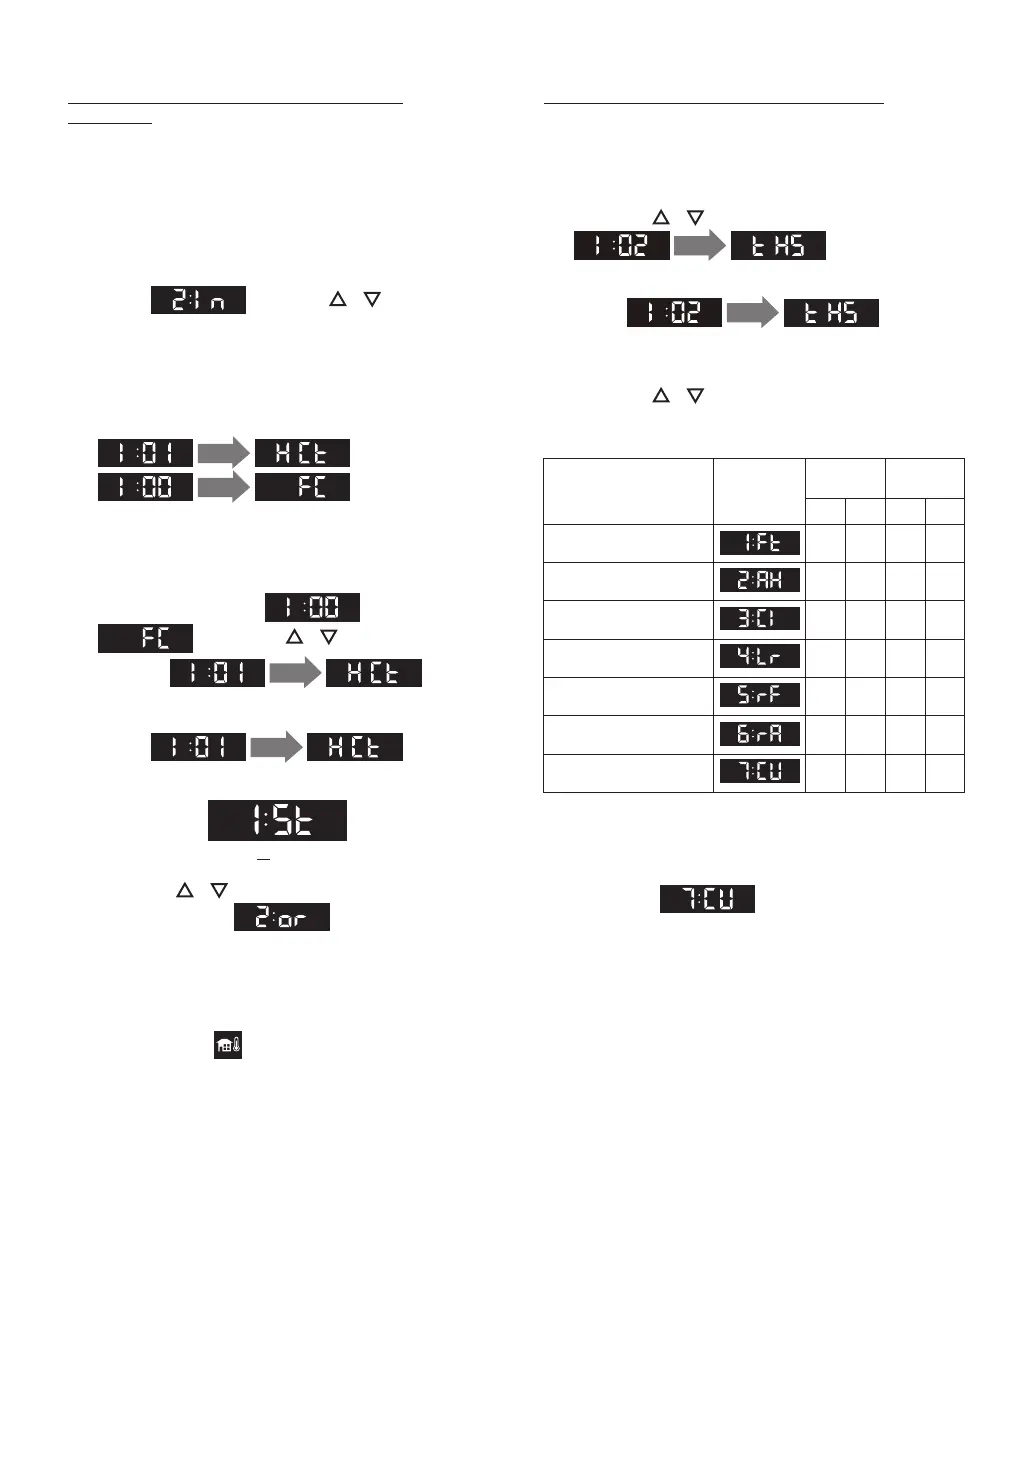
Setting the Outdoor Reset Control Mode
[I:01_HCt]
Adjusting Outdoor Reset Control Options
1. Connect Outdoor Temperature Sensor to
terminal. (Refer to pages 55, 56 for details.)
2. The ON/OFF button is OFF.
The Operation Display must be off.
1. The ON/OFF button is OFF.
The Operation Display must be off.
3. Press the SETTING button.
Select using the / buttons,
and then press the ENTER button.
2. Press the / buttons to navigate
1 sec.
in the
“Installer Mode”.
• The ”Installer Mode” screen appears.
4. When entering the “Installer Mode”, display
will change to
1 sec.
, or
1 sec.
.
5. When display shows after 1sec.
, press the / buttons to
navigate
1 sec.
in the
“Installer Mode”.
6. Select
1 sec.
, then
press the ENTER button to enter the function.
(St: Standard)
7. Press the / buttons to change the
parameter value , and then press
the ENTER button to save the settings and to
exit the function.
And additional menu items will become
available to adjust.
• The icon will flash if the outdoor sensor is
not detected.
• This function will appear within the first 10
minutes of connecting electrical power and
before pressing the ON/OFF button.
4. Press the / buttons to navigate into
desired system.
3. Select
1 sec.
, and
then press the ENTER button to enter the
function.
5. When you are done, press the ENTER button
to save the settings and to exit the function. If
you select , refer to page 55, 59-
61.
6. To exit the “Installer Mode” or another
function, press the BACK button.
Types of Heating System
* Factory Default.
Type of Heating System
Screen
Display
Temperature
(°F)
Temperature
(°C)
LOW HIGH LOW HIGH
[1:Ft] (Default)
Fin Tube Baseboard
120 180 49 82
[2:AH]
Air Handler
140 180 60 82
[3:CI]
Cast Iron Baseboard
100 170 38 76
[4:Lr]
Low Mass Radiant Floor
80 140 27 60
[5:rF]
Mass Radiant Floor
80 120 27 49
[6:rA]
Radiator
120 170 49 76
[7:CU]
Custom
100* 180* 38* 82*
Connecting Electricity