26 DAA2 & DAX — P/N 53265:A1 8/24/2011
DAA2 Digital Audio Amplifiers DAA2 Installation
• Label the branch circuit “Fire Alarm”.
• Connect the branch circuit to the line side of the main power feed of the protected premises.
• Do not power other equipment from the fire alarm branch circuit.
• Run the AC branch circuit wire continuously, without any disconnect devices, from the
power source to the power supply.
• Overcurrent protection for the AC branch circuit must comply with Article 760 of the
National Electrical Codes, as well as local codes.
• Use 12-14 AWG (1.6mm O.D.) wire with 600 VAC insulation for the AC branch circuit.
Connect primary power as follows:
1.Turn off the circuit breaker at the main power
distribution panel.
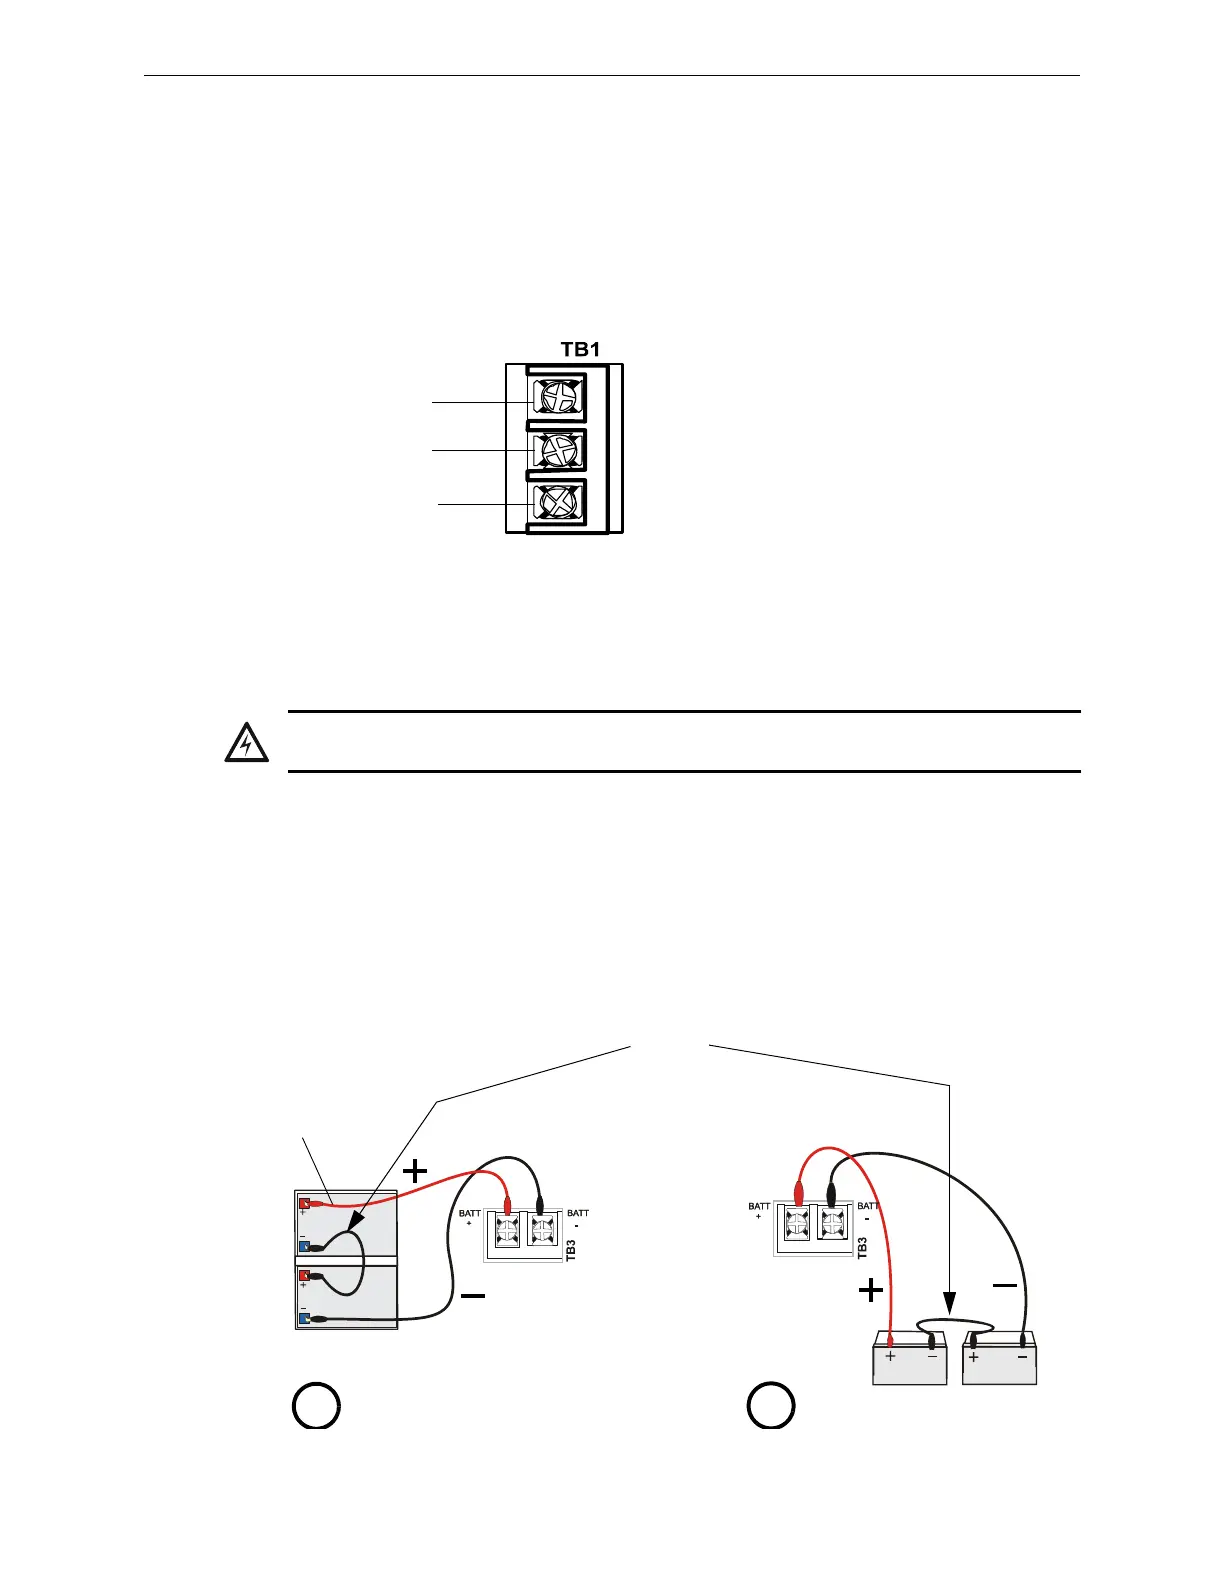
2.Connect the earth ground terminal (TB1
EARTH) to a solid earth ground (a metallic, cold
water pipe may be suitable in some installations).
This connection is vital to maintaining the power
supply’s immunity to unwanted transients
generated by lightning and electrostatic discharge.
3. Connect the primary power neutral line to the terminal marked NEUTRAL and the primary
power AC line to the terminal marked HOT.
Batteries
The DAA2 works with two 12 volt batteries. See Appendix B.1, “DAA2 Battery Calculations”, on
page 84 for current draw calculations to determine the battery size required for this installation.
Battery cables (90”, 2.28 m) are included with the DAA2 for battery installation in any CAB-4
series cabinet that includes a DAA2 in one of the rows. Shorter battery cables (18”, 0.5 m) are
included with the CHS-BH1. For battery sharing, use 12 AWG wire either in the same cabinet, or in
conduit for no more than 20 ft. (6.09 m.).
Batteries Within the Same Enclosure as the DAA2
Refer to Figure 2.9 for battery connections.
Figure 2.9 Connecting Batteries to TB3 on the CPS-24
Figure 2.8 AC Power Connection
EARTH
NEUTRAL
HOT
DAACPStb1.wmf
WARNING: Do not connect the battery interconnect cable (See Figure 2.9) at this time. Leave the
battery interconnect cable disconnected until after initial system power-up.
DAAPStobatts.wmf
Battery
Interconnect
Cable, P/N
71070
Leave disconnected
until after initial
system power-up.
Batteries in CHS-BH1, same
cabinet row as DAA2
Batteries in different cabinet
row than DAA2.
DAAPStobattsa.wmf
A
B
P/N 75560 (pos)
P/N 75561 (neg)
P/N 75621 (neg)
P/N 71071 (pos)