—14—
Operation of the Aero
®
Press
d.
c. With top beam properly centered above
bottom beam, rotate all four press connector
bolts up and hand tighten them, ensuring all
bolts are seated properly in their spherical
recess on top beam.
DANGER: Do not operate any press size
with a missing or broken bolt, as this
can cause serious physical harm and/or
damage to press. If a bolt is missing or
broken, replace it with authorized factory
parts only. e Aero 2135 press is capable
of producing a force up to 12,275 pounds
(54,600 N).
WARNING: To ensure proper bolt thread
engagement, the prepared splice (including
various pads) may not exceed 15 mm (0.6")
thick. Do not use a tool to tighten or loosen
hand bolts. Over tightening bolts may
lead to damage to the press. Finger tight is
sucient for proper operation.
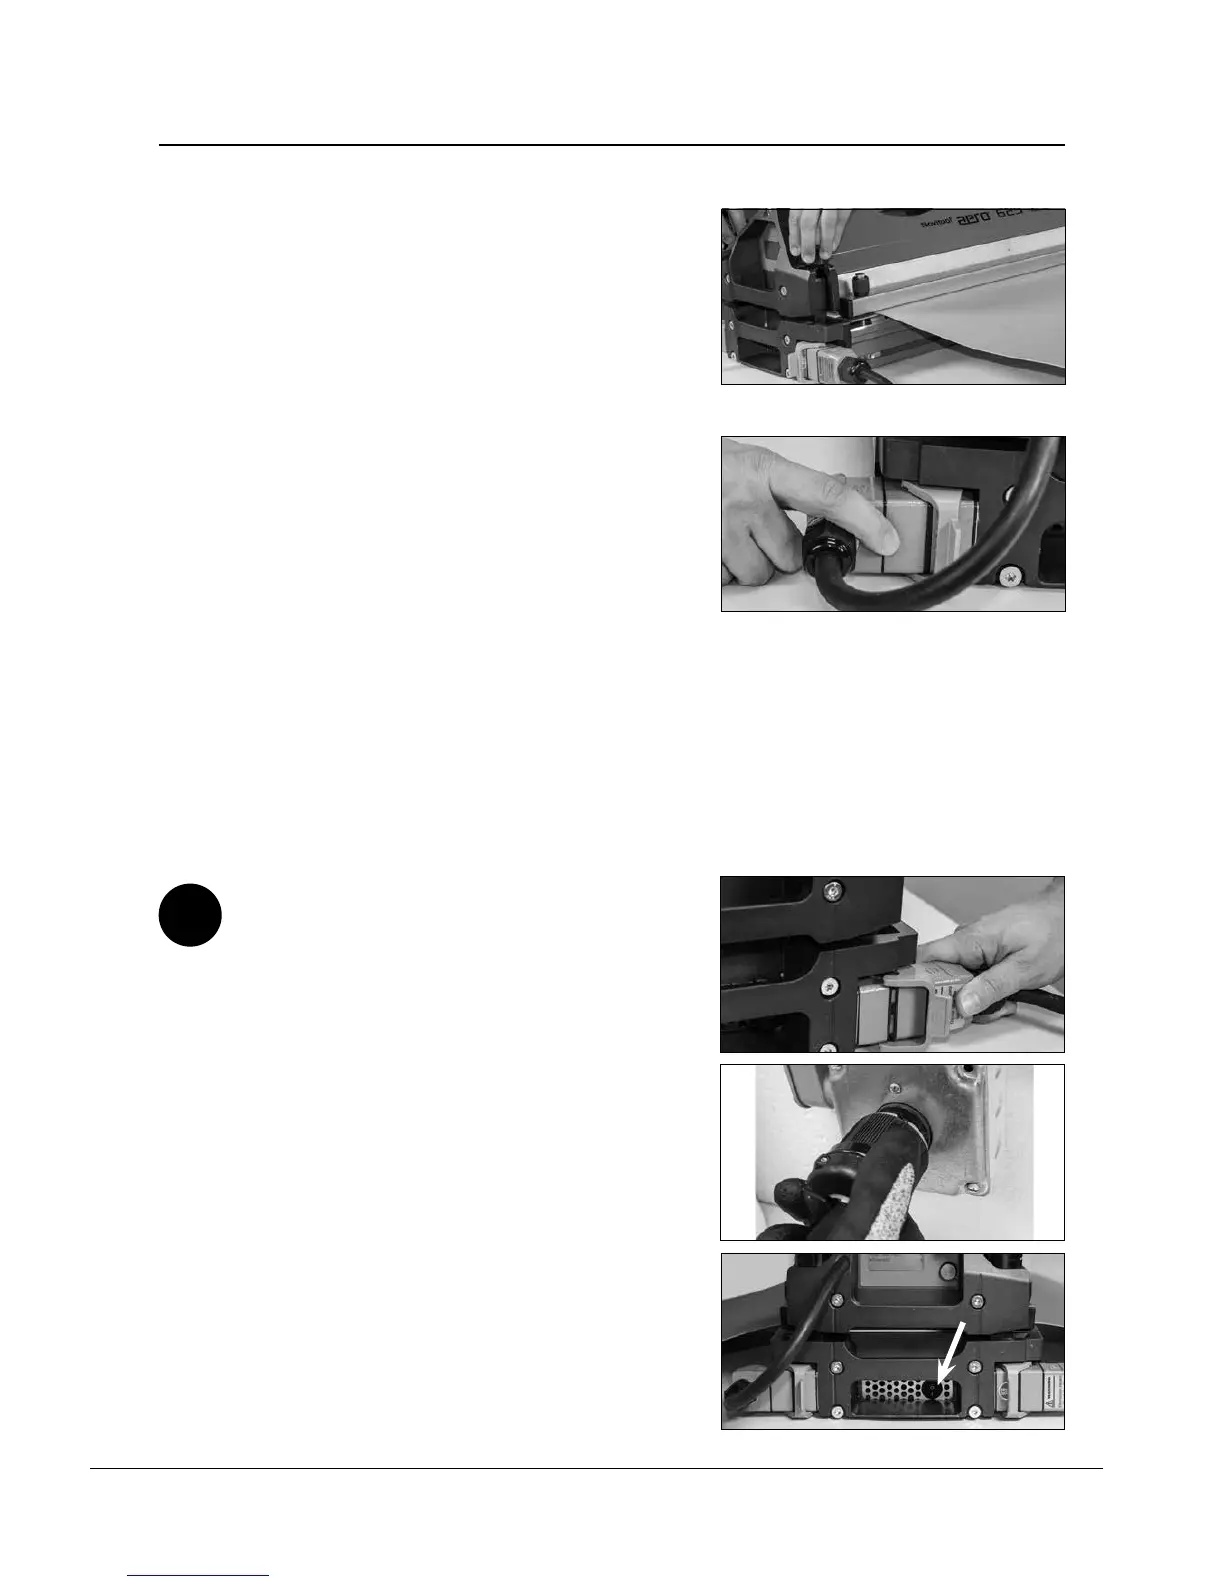
d. Insert umbilical cable connector into
machine base connector and engage latch.
WARNING: Failure to engage latch to
lock plug can result in intermittent power
supply to press.
Connect Aero® press to power supply
a. First connect main power cable to main
power cable connector. Engage latch.
b. Double check to ensure power cable is
appropriate for power source you are using.
Power cable is labeled with voltage and
amperage it is made for.
WARNING: Connecting press to incorrect
power can cause serious damage to press.
c. Insert power cable plug into appropriate wall
receptacle.
WARNING: It is important that the power
cord is attached to the press rst and then
to the wall receptacle.
d. Turn on/o switch to on.
WARNING: Turning the on/o switch to
‘o’ does not disconnect power from the
press.
a.
c.
c.
A6
d.
On/Off switch