19
EN DE FR ES IT PT
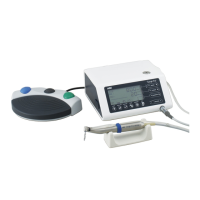
FX23 / FX23m / FX25 / FX25m
4) Locate the correct wrench tool for the head cap then turn
the wrench counter clockwise to loosen the cap. Remove
the cap (Fig.12).
5) Use the bur to gently push the entire cartridge out from
the head (Fig. 13).
6) Clean the head interior with NSK PANA SPRAY Plus /
PANA SPRAY.
7) Wipe the NSK PANA SPRAY Plus / PANA SPRAY oil over
the head interior.
8) Insert the new cartridge into the head by align
ing the pin on
the cartridge with the slot on the head (Fig. 14).
9) Tighten the head cap with the correct wrench.
10) Insert the drive shaft firmly into the handpiece head until it
clicks. If the click is not heard, insert it again.
11) Reattach the shank.
*Refer to "15. Spare Parts List" to identify the correct cartridge.
FX22
4) Locate the correct Cap Wrench tool for the cap then turn
the cap wrench counter clockwise to loosen the cap.
Remove the cap (Fig. 15).
5) Use the bur to gently push the entire cartridge out from
the head (Fig. 16).
6) Clean the head interior with NSK PANA SPRAY Plus /
PANA SPRAY.
7) Wipe the NSK PANA SPRAY Plus / PANA SPRAY oil over
the head interior.
8) Insert the new cartridge into the head by a
ligning the pin
on the cartridge with the slot on the head (Fig. 17).
9) Tighten the cap with the correct cap wrench.
10) Insert the drive shaft firmly into the handpiece head until it
clicks. If the click is not heard, insert it again.
11) Reattach the shank.
*Refer to "15. Spare Parts List" to identify the correct cartridge.