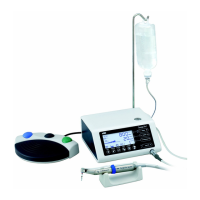
English
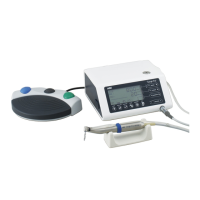
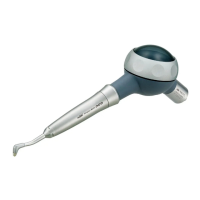
3-3 Foot Control
&RRODQW6ROXWLRQ)ORZ9ROXPH%XWWRQ
8VHWRVHOHFWOHYHOVRIFRRODQWVROXWLRQIORZIURPWRHDFKOHYHOPD\EHLQFUHDVHGE\RQHVWHSSUHVVLQJWKLV
EXWWRQ,I\RXSUHVVWKLVEXWWRQLQOHYHOLWUHWXUQVWROHYHO
35*3URJUDP%XWWRQ
8VHWRVHOHFWWKHGHVLUHGSURJUDPQXPEHU3URJUDPQXPEHUVZLOODOZD\VDVFHQGHDFKWLPHWKLVEXWWRQLVSUHVVHGDQG
released. To descend, press and hold for 1 second then release.
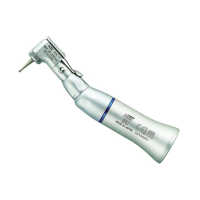
Speed Control Pedal
Use to start and stop the Micromotor and to control the speed during operation. The Micromotor operational speed is
GLUHFWO\SURSRUWLRQDOWRWKHSRVLWLRQRIWKHIRRWFRQWUROXSWRWKHSUHVHWPD[LPXP
)RUZDUG5HYHUVH%XWWRQ
Use to change the rotational direction of the Micromotor. Push once to change the rotational direction.
D
E
F
G
(b) PRG (Program) Button
(c) Speed Control Pedal
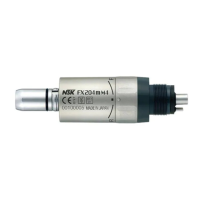
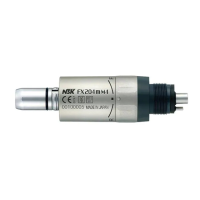
Foot Control Cord and Plug
4. Installation
Align the [
ە
@PDUNRQWKH0RWRU&RUGZLWK>
ە
] mark on the
Control Unit.
Push the Base of Motor Cord Plug into the socket until the
ORFNLQJMRLQWŐFOLFNVőLQWRSODFH
7RGLVFRQQHFWWKHSOXJSXOOEDFNWKH/RFN-RLQWSXOOIXUWKHU
to disconnect the cord.
4-1 Connecting the Motor Cord
(a) Coolant Solution Flow
Volume Button
(d) Forward/Reverse Button
7
[
ە
] mark
Lock Joint
Fig.1
CAUTION
Ř,QVWDOOWKHFRUGSOXJRQO\SRZHULV2))